In this series of tutorials, we’ve seen how to establish a Docker Swarm cluster, schedule services to the cluster’s nodes, and make those services consumable from within and outside the cluster. Deploying services, however, is not necessarily a one-time activity. Things change, and there needs to be a mechanism for updating services, after they’ve initially been deployed. This tutorial explores how services can be updated in-flight, and how these updates can be configured to adhere to a predefined policy.

Prerequisites
In order to follow the tutorial, the following items are required:
- a four-node Swarm Mode cluster, as detailed in the first tutorial of this series,
- a single manager node (
node-01), with three worker nodes (node-02,node-03,node-04), and - a direct, command-line access to each node, or, access to a local Docker client configured to communicate with the Docker Engine on each node.
The most straightforward configuration can be achieved by following the first tutorial. All commands are executed against the manager node, node-01, unless explicitly stated otherwise.
Service Updates
Updating a service deployed on a Swarm Mode cluster can be relatively straightforward. In fact, we did just this in the last tutorial in this series, when we removed a scheduling constraint.
The Docker CLI command for updating services is the docker service update command. It provides a bewildering array of config options, which allows a user to update just about every configurable aspect of a service. In addition to the configurable aspects of a service, the manner in which the services are updated is also highly configurable. We’ll talk some more about these topics in a moment, but first, let’s remind ourselves of how to execute a simple update. Let’s start a simple service by executing the following on the manager node, node-01 — remember to execute eval $(docker-machine env node-01) to point your local Docker client at the Docker daemon running on node-01, first:
$ docker service create --detach=false --name nginxhello --publish published=8080,target=80 nbrown/nginxhello
nc2js7zs6cfi8affh9rwfpwmhy
overall progress: 1 out of 1 tasks
overall progress: 1 out of 1 tasks
1/1: running   [==================================================>]
verify: Service converged
The service consists of a single replica or task. We’ll find which node the task has been scheduled on, and then inspect the container to see which environment variables it has defined. Remember, in order to point the local Docker client at a different Docker host controlled by Docker Machine, we need to execute eval $(docker-machine env node-0x), where x is the node number.
$ docker service ps --format '{{.Node}}' nginxhello
node-04
$ eval $(docker-machine env node-04)
$ docker container inspect --format '{{json .Config.Env}}' $(docker container ls -lq) | jq '.'
[
  "PATH=/usr/local/sbin:/usr/local/bin:/usr/sbin:/usr/bin:/sbin:/bin"
]
It has a single environment variable defined; PATH. Now, let’s update the service by adding a new environment variable — the ID of the node that the task is scheduled on. This needs to be executed on the manager node, node-01:
$ eval $(docker-machine env node-01)
$ docker service update --detach=false --env-add NODE_ID="{{.Node.ID}}" nginxhello
nginxhello
overall progress: 1 out of 1 tasks
1/1: running   [==================================================>]
verify: Service converged
As a consequence of the update, the task will have been rescheduled, and we can go through the same process to check the environment variables of the new container:
$ docker service ps  --format 'table {{.Name}}\t{{.Node}}\t{{.CurrentState}}' nginxhello
NAME                NODE                CURRENT STATE
nginxhello.1        node-04             Running 2 minutes ago
 \_ nginxhello.1    node-04             Shutdown 2 minutes ago
$ eval $(docker-machine env node-04)
$ docker container inspect --format '{{json .Config.Env}}' $(docker container ls -lq) | jq '.'
[
  "NODE_ID=okdkt8nmuc5norebof7vdbmh6",
  "PATH=/usr/local/sbin:/usr/local/bin:/usr/sbin:/usr/bin:/sbin:/bin"
]
The simple service update provides the container that represents the task, with the additional environment variable; NODE_ID, which is set to the cluster unique ID for the node that the task is scheduled on. It’s the same ID that is listed when the cluster nodes are listed using docker node ls:
$ docker node ls --format 'table {{.ID}} {{if .Self}}*{{else}} {{end}}\t{{.Hostname}}'
ID                            HOSTNAME
rf5sn4qo2vb9squt5zqnzf2c2 *   node-01
g9caj662cfi4f8p1l3wk9mok8     node-02
y8vzyn25l96d22s9d8p72olxu     node-03
okdkt8nmuc5norebof7vdbmh6     node-04
Let’s clean up:
$ eval $(docker-machine env node-01)
$ docker service rm nginxhello
nginxhello
Service Attributes
That’s a fairly trivial service update, which begs the question, “So, what attributes of a service can be updated?” The answer to this is just about anything, from the addition or removal of environment variables, to the addition or removal of secrets, and a whole host of other things besides. Services are highly configurable objects, and it’s not just the Docker image that dictates their behaviour, although a service’s image is also another attribute that can be updated. The easiest way to see what can be updated is to run docker service update --help, to get a list of the available config options.
Image Updates
One of the more obvious service updates that might be required is to update the image that the service is based on. Perhaps some code changes have traversed through a Continuous Integration/Delivery workflow, conducted on a platform such as the Semaphore CI platform. The CI platform may also have pushed a new Docker image to a registry, ready for subsequent deployment.
Let’s demonstrate this by deploying a global service, with a specific image version, that we’ll subsequently update. Using our manager node, node-01:
$ docker service create --detach=false --name nginxhello --publish published=8080,target=80 \
--mode global nbrown/nginxhello:1.12.1
96hvvcebmwa4f0to0wrxcoioa
overall progress: 4 out of 4 tasks
g9caj662cfi4: running   [==================================================>]
okdkt8nmuc5n: running   [==================================================>]
rf5sn4qo2vb9: running   [==================================================>]
y8vzyn25l96d: running   [==================================================>]
verify: Service converged
The service is exposed on port 8080 on each of the cluster’s nodes, so we can pick one at random, and find its IP address:
$ echo -n "node-02: " && docker-machine ip node-02
node-02: 34.240.166.194
If you’re following this tutorial using AWS, then make sure that an ingress rule has been created for port 8080 for the ‘Docker Machine’ security group. The first article in this series details the AWS CLI command required to achieve this, or you can configure it using the AWS Console.
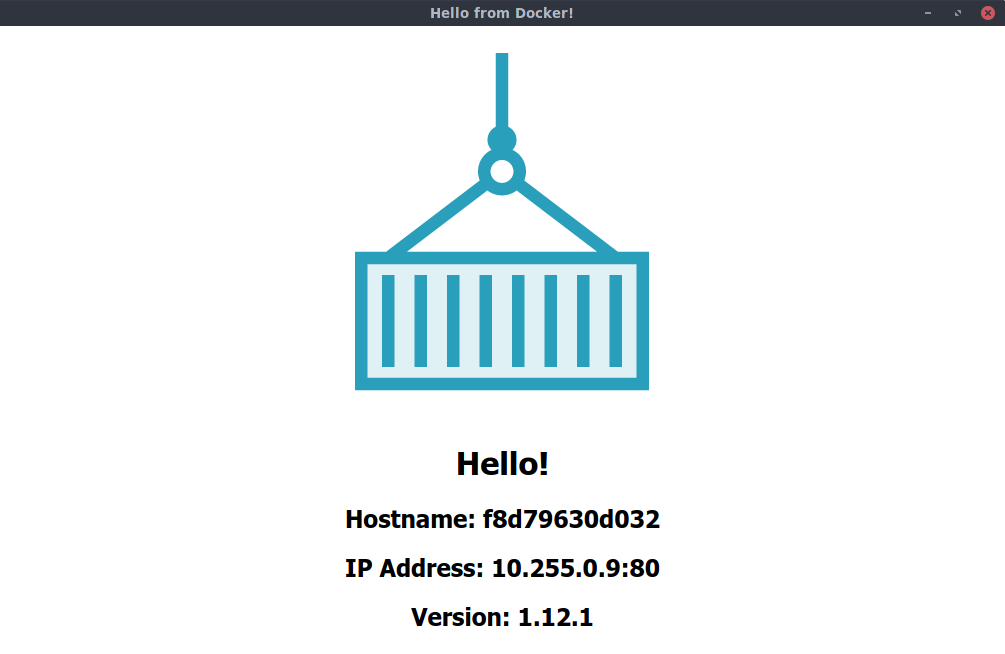
Navigating to 34.240.166.194:8080 in a web browser will provide us with the following served content, which includes the version of Nginx encapsulated in the serving container. Continuously refreshing the browser will provide a different hostname and IP address, as the requests are load balanced to the individual tasks:
Now, let’s update the service’s image, using the image nbrown/nginxhello:1.13.5. If you’re following this tutorial using a ‘nix client, you can track the progress of the update, using the watch utility. First, we can issue the docker service update command, specifying the new image. We’ll suppress all output, and place it in the background. Whilst it’s working away, we’ll continuously execute the docker service ps command (with 1 second intervals), to observe the tasks being replaced with new ones, based on the new image. In order to make our commands more understandable, let’s use some environment variables:
$ IMAGE="nbrown/nginxhello:1.13.5"
$ FORMAT="table {{.ID}}\t{{.Image}}\t{{.Node}}"
$ (docker service update --quiet --detach=true --image $IMAGE nginxhello &) > /dev/null 2>&1 && \
watch -n 1 "docker service ps --filter "desired-state=running" --format '$FORMAT' nginxhello"
The output will show each of the tasks running as a container derived from the image with tag 1.12.1, being replaced with a task derived from the image with tag 1.13.5. After the update has completed, if we navigate, in a browser, to the IP address and port number we previously accessed (i.e. 34.240.166.194:8080), we should see similar output, but with the version as 1.13.5.
As you watched the update take place, you will have noticed that the tasks were not updated synchronously. In fact, the default behaviour, is for a task to be stopped, and then started by the scheduler with its updated configuration. The scheduler then waits for the task to achieve a ‘running’ state, before it moves on to update the next task.
Let’s clean up again:
$ docker service rm nginxhello
nginxhello
Controlling Service Updates
Having digested the service update behaviour described above, you may well be thinking that this may not be appropriate for the kind of scenarios you encounter in day-to-day life. You may be expecting more control over the way the update is performed. Thankfully, Swarm Mode updates are very configurable, and it’s a breeze to fine-tune update behaviour.
We might, for example, want to update all of the tasks simultaneously (--update-parallelism=0), or two at a time (--update-parallelism=2), rather than the default behaviour of one at a time (--update-parallelism=1). Perhaps we want to enforce a rollback when an update fails (--update-failure-action=rollback), instead of pause the update, which is the default behaviour.
In order to demonstrate two of the other configurable attributes of service updates, we’ll re-instate our nginxhello service, and watch the updates take place, as before. Using our manager node, node-01:
$ docker service create --detach=false --name nginxhello --publish published=8080,target=80 \
--mode global nbrown/nginxhello:1.12.1
wevubnfd8emwilm1s1b9ihz17
overall progress: 4 out of 4 tasks
y8vzyn25l96d: running   [==================================================>]
okdkt8nmuc5n: running   [==================================================>]
g9caj662cfi4: running   [==================================================>]
rf5sn4qo2vb9: running   [==================================================>]
verify: Service converged
Now, rather than allowing the scheduler to stop a task before starting a newly-configured replacement task, let’s configure the service so that the replacement task is started before the old task is stopped (--update-order="start-first). This means that, fleetingly, a node will host two tasks, one running the old configuration (in this case, image with tag 1.12.1), and one running the new configuration (on image with tag 1.13.5). Additionally, we’ll introduce a delay of 15 seconds between each component of the upgrade (--upgrade-delay=15s).
We should still have the IMAGE and FORMAT variables set from earlier, so let’s go ahead and apply the update, and monitor its progress every 0.1 seconds, so we can catch two tasks running simultaneously:
$ (docker service update --quiet --detach=true --image $IMAGE \
--update-delay 15s --update-order "start-first" nginxhello &) > /dev/null 2>&1 && \
watch -n 0.1 "docker service ps --filter "desired-state=running" --format '$FORMAT' nginxhello"
The output we observe is very similar to that we observed earlier, except for the fact that we have introduced a visible delay between each task being updated. We can fleetingly see two tasks running, due to our update to the update-order policy.
Service updates in Swarm are reasonably configurable, but what happens when things don’t go according to plan?
Rolling Back Service Updates
If we hit a problem with an update, we’ve already mentioned that we can automatically rollback the update, based on the ‘update failure action’ policy (--update-failure-action). This, immediately poses some questions:
- What constitutes a failure?
- What was the previous state?
- How is a rollback carried out?
Service Health
Generally speaking, an individual task in a service is considered healthy if the process that is invoked when the container is bootstrapped continues to run indefinitely. In practice, however, a running process is not a panacea for determining a healthy service. For that reason, it’s possible to define a healthcheck inside a Docker image, or as a config option to the docker container run command, or the docker service create command in the context of a Swarm. The healthcheck defines a command to run inside the container, and the interval at which it runs. If the command completes with an exit code of 0, the container is healthy, otherwise it is unhealthy.
For the purposes of this tutorial, we’ll simulate an update failure, by simply stopping one of the containers that make up the service’s tasks. Before we do that, let’s find out how Swarm maintains current and previous service states.
Service Spec
Docker holds a ‘spec’ of a service within the object that represents the service. Additionally, if an update has been applied to the service, the old ‘spec’ is also held within the service object. This is what enables the service to be rolled back. The ‘specs’ can be viewed using the docker service inspect command.
We recently updated our service, so let’s look at one of the attributes of the current and previous specs. Using node-01:
$ docker service inspect --format '{{.Spec.TaskTemplate.ContainerSpec.Image}}' nginxhello
nbrown/nginxhello:1.13.5@sha256:a84714e889b940851d4cac7005bc2e658fbbb62bee2c361ea3265953aea61c74
$ docker service inspect --format '{{.PreviousSpec.TaskTemplate.ContainerSpec.Image}}' nginxhello
nbrown/nginxhello:1.12.1@sha256:3a15453cff424fa6d6cede0585d1c9d6a3bf5f760346385fc45f58a3acf0fa75
This shows us the image versions used by the service for its tasks, before and after the update. The spec also contains information pertaining to how updates and rollbacks are to be performed.
Performing Rollbacks
Ordinarily, we would want rollbacks to be automated based on the policy we define. We can, however, also manually enforce a rollback, using the --rollback config option with the docker service update command. A manual update respects the rollback policy paramaters defined in the service’s spec. Let’s rollback the nginxhello service:
$ docker service update --detach=false --rollback nginxhello
nginxhello
rollback: manually requested rollback
overall progress: rolling back update: 4 out of 4 tasks
g9caj662cfi4: running   [>                                                  ]
okdkt8nmuc5n: running   [>                                                  ]
rf5sn4qo2vb9: running   [>                                                  ]
y8vzyn25l96d: running   [>                                                  ]
verify: Service converged
Our nginxhello service is back running tasks derived from the image with tag 1.12.1.
We’ll use a similar process to the previous one we used to update our nginxhello service, but we will simulate an update failure by stopping the container for the task running on node-01. We’ll watch the service update as it happens, and then its rollback after the failure occurs. We need another compound set of commands to set the update rolling, introduce the failure, and watch the service evolve in real-time.
The service update component is similar to that we used last time, except for the fact that we have applied two new config options, --update-failure-action and --update-monitor. The first is set to rollback, and the second, which is the duration that Docker monitors the updated tasks for failures, is 3m or 3 minutes. In combination, these config parameters require Docker to monitor each of the new task containers for 3 minutes after their update, and if any of them fail, invoke a rollback to the previous spec. There are other rollback options that could be used, which mirror those associated with updates (e.g. --rollback-parallelism).
Almost simultaneously, we’ll start another sub-shell in the background, where we sleep for 75 seconds, in order to allow the update to take place, before we stop the newly created container on node-01. This is our simulated failure.
The final part of the compound set of commands is the same as before, where we watch the service using docker service ps. Let’s see what happens, by executing the following on node-01:
$ (docker service update --quiet --detach=true --image $IMAGE --update-delay 15s \
--update-failure-action rollback --update-monitor 3m nginxhello &) > /dev/null 2>&1 && \
((sleep 75; docker container stop $(docker container ls -lq)) &) > /dev/null 2>&1 && \
watch -n 1 "docker service ps --filter "desired-state=running" --format '$FORMAT' nginxhello"
You will have seen each task updated to use the image with tag 1.13.5, before the introduction of the failure, caused the scheduler to rollback the tasks to use the image with tag 1.12.1.
Let’s tidy up, with the following on node-01:
$ docker service rm nginxhello
nginxhello
Conclusion
In summary, Swarm provides a comprehensive capability for updating the many different attributes of a service, as well as providing the means of defining an appropriate policy for performing those updates. Failure, as they say, is inevitable, and thankfully, Docker Swarm Mode provides a robust mechanism for dealing with failure, particularly through the use of rollbacks.
In the next, and final, tutorial in this series, we’ll investigate how to deploy a multi-service application onto a Swarm Mode cluster.
P.S. Want to continuously deliver your applications made with Docker? Check out Semaphore’s Docker platform with full layer caching for tagged Docker images.
Read next:
