


Introduction
This tutorial will show you how to create an automation tool for deploying your software in a simple way, similar to deploying to Heroku. We’ll be using Docker to version control each deploy, which makes upgrades and rollbacks fairly easy. Also, we’ll use Semaphore to continuously deploy our application.
Our containers can be hosted on any Docker Registry, and only a host with Docker installed is needed to run the application.
At the end of this tutorial you’ll have a simple Ruby cli script, capable of deploying a sample application to a remote host, similar to Heroku’s. It will also have other commands for rolling back to previous versions, attaching longs and tracking which application version is running.
This tutorial is focused on the deploying routine, so you can use any application you want, by adjusting the environment according to your needs. We’ll be using a simple Hello World built with Ruby on Rails, in a folder called blog. If you need help building such an application, please follow the guide Getting Started with Rails steps 1 to 4.
Prerequisites
- Docker installed and running on the host and on every machine that will deploy the application,
- Any Docker Registry account (examples with Docker Hub),
- Any cloud provider with SSH access and Docker installed (examples with AWS EC2), and
- Ruby 2.3 installed on every machine that will deploy the application.
Steps in the Deployment Process
This deployment process consists of the following 5 steps:
- Build: Each application has its own container with specific build steps that can be changed anytime,
- Upload: After building our application container, we need to send it to the Docker Registry. The first time we do this it’s going to take some time, because we’ll need to upload the whole container, but the next time will be faster, due to the Docker layer system, which helps us save space and bandwidth.
- Connect: After sending our container to the Docker Registry, we need to connect to the host to run the next steps,
- Download: After connecting to the host, it’s time to download our container, and
- Restart: The last step consists of stopping the running application and starting the new container with the same configuration as the stopped one (ports, logs, environment variables, etc).
Now that we know what’s ahead, let’s get started.
Building the Container
In our example, we’ll be using one container to run our application, since Ruby isn’t a compiled language and we don’t need a build step. This is the respective Dockerfile:
FROM ruby:2.3.1-slim

COPY Gemfile* /tmp/
WORKDIR /tmp

RUN gem install bundler && \
    apt-get update && \
    apt-get install -y build-essential libsqlite3-dev rsync nodejs && \
    bundle install --path vendor/bundle

RUN mkdir -p /app/vendor/bundle
WORKDIR /app
RUN cp -R /tmp/vendor/bundle vendor
COPY application.tar.gz /tmp

CMD cd /tmp && \
    tar -xzf application.tar.gz && \
    rsync -a blog/ /app/ && \
    cd /app && \
    RAILS_ENV=production bundle exec rake db:migrate && \
    RAILS_ENV=production bundle exec rails s -b 0.0.0.0 -p 3000
To keep our scripts organized, let’s save our Dockerfile in a folder above our application. We’ll have the following folder structure:
.
├── Dockerfile
├── blog
│   ├── app
│   ├── bin
... (application files and folders)
Here’s what is happening in each line:
FROM ruby:2.3.1-slim
This is the base image used to build our container. As we need Ruby installed, it is easier to use a pre-installed container than to install everything on our own.
COPY Gemfile* /tmp/
WORKDIR /tmp
Here, we are copying the Gemfile and Gemfile.lock to our container /tmp dir, and moving into it, so the next commands will be executed from there.
RUN gem install bundler && \
    apt-get update && \
    apt-get install -y build-essential libsqlite3-dev rsync nodejs && \
    bundle install --path vendor/bundle
This Ruby image has an outdated bundler, so we update it to to avoid receiving a warning. Also, we need some packages ,mostly compilers, so that the bundler can install all the required gems. You may need to change this when working on an application different from the one we’re working on in this tutorial. The last step installs all the gems in the Gemfile.
Docker caches every command , i.e. layer, to avid executing it again if there is no change in the command. This will save us some time. The --path flag tells the bundler to install all the gems locally, in the defined path vendor/bundle
RUN mkdir -p /app/vendor/bundle
WORKDIR /app
RUN cp -R /tmp/vendor/bundle vendor
COPY application.tar.gz /tmp
This creates the final path for bundle installation, copies all installed gems from the last build cache, and copies the compressed application into the container.
CMD cd /tmp && \
    tar -xzf build.tar.gz && \
    rsync -a blog/ /app/ && \
    cd /app && \
    RAILS_ENV=production bundle exec rake db:migrate && \
    RAILS_ENV=production bundle exec rails s -b 0.0.0.0 -p 3000
This command will be executed in the docker run command. It extracts the compressed application inside the container, runs setup steps (migrate) and starts the application.
To test if everything is working as expected with your Dockerfile, move into the root directory, where the Dockerfile is, and execute the following commands:
Note: the mydockeruser below is your registered username in the Docker Registry. We’ll use that later for versioning the container.
Note 2: when running in production environment, Rails needs some environment variables, like SECRET_KEY_BASE, in config/secrets.yml. Since we are using just a sample application, you can safely overwrite them with static values, similar to the ones for development and test environments.
$ cp blog/Gemfile* .
$ tar -zcf application.tar.gz blog
$ docker build -t mydockeruser/application-container .
This should start building each step in the Dockerfile:
Sending build context to Docker daemon 4.386 MB
Step 1/9 : FROM ruby:2.3.1-slim
 ---> e523958caea8
Step 2/9 : COPY Gemfile* /tmp/
 ---> f103f7b71338
Removing intermediate container 78bc80c13a5d
Step 3/9 : WORKDIR /tmp
 ---> f268a864efbc
Removing intermediate container d0845585c84d
Step 4/9 : RUN gem install bundler &&     apt-get update &&     apt-get install -y build-essential libsqlite3-dev rsync nodejs &&     bundle install --path vendor/bundle
 ---> Running in dd634ea01c4c
Successfully installed bundler-1.14.6
1 gem installed
Get:1 http://security.debian.org jessie/updates InRelease [63.1 kB]
Get:2 http://security.debian.org jessie/updates/main amd64 Packages [453 kB]
...
If everything went well, you’ll get a success message:
Successfully built 6c11944c0ee4
Notice that the hash may be different, since Docker generates it randomly each time a container is built.
To see the cache working, run the command again. It’ll finish almost instantly.
$ docker build -t mydockeruser/application-container .
Sending build context to Docker daemon 4.386 MB
Step 1/9 : FROM ruby:2.3.1-slim
 ---> e523958caea8
Step 2/9 : COPY Gemfile* /tmp/
 ---> Using cache
 ---> f103f7b71338
Step 3/9 : WORKDIR /tmp
 ---> Using cache
 ---> f268a864efbc
Step 4/9 : RUN gem install bundler &&     apt-get update &&     apt-get install -y build-essential libsqlite3-dev rsync nodejs &&     bundle install --path vendor/bundle
 ---> Using cache
 ---> 7e9c77e52f81
Step 5/9 : RUN mkdir -p /app/vendor/bundle
 ---> Using cache
 ---> 1387419ca6ba
Step 6/9 : WORKDIR /app
 ---> Using cache
 ---> 9741744560e2
Step 7/9 : RUN cp -R /tmp/vendor/bundle vendor
 ---> Using cache
 ---> 5467eeb53bd2
Step 8/9 : COPY application.tar.gz /tmp
 ---> Using cache
 ---> 08d525aa0168
Step 9/9 : CMD cd /tmp &&     tar -xzf application.tar.gz &&     rsync -a blog/ /app/ &&     cd /app &&     RAILS_ENV=production bundle exec rake db:migrate &&     RAILS_ENV=production bundle exec rails s -b 0.0.0.0 -p 3000
 ---> Using cache
 ---> ce28bd7f53b6
Successfully built ce28bd7f53b6
If you receive an error message, check your Dockerfile syntax and console errors, and try again.
Now, we want to test if our container can run our application, to see if everything is working. To do that, run the command:
docker run -p 3000:3000 -ti mydockeruser/application-container
This runs the container, mapping the host port 3000 to container port 3000. If everything workes well, you’ll get the Rails startup message:
=> Booting Puma
=> Rails 5.0.2 application starting in production on http://0.0.0.0:3000
=> Run rails server -h for more startup options
Puma starting in single mode...
* Version 3.8.2 (ruby 2.3.1-p112), codename: Sassy Salamander
* Min threads: 5, max threads: 5
* Environment: production
* Listening on tcp://0.0.0.0:3000
Use Ctrl-C to stop
You can now access your browser localhost:3000 and see the welcome message.
Uploading the Container to the Docker Registry
The following steps will need you to log into your Docker Registry:
> docker login
Login with your Docker ID to push and pull images from Docker Hub. If you don\'t have a Docker ID, head over to https://hub.docker.com to create one.
Username: mydockeruser
Password: ########
Login Succeeded
We have a fully working container, and now we need to upload it to the Docker Registry:
$ docker push mydockeruser/application-container
The push refers to a repository [docker.io/mydockeruser/application-container]
9f5e7eecca3a: Pushing [==================================================>] 352.8 kB
08ee50f4f8a7: Preparing
33e5788c35de: Pushing  2.56 kB
c3d75a5c9ca1: Pushing [>                                                  ] 1.632 MB/285.2 MB
0f94183c9ed2: Pushing [==================================================>] 9.216 kB
b58339e538fb: Waiting
317a9fa46c5b: Waiting
a9bb4f79499d: Waiting
9c81988c760c: Preparing
c5ad82f84119: Waiting
fe4c16cbf7a4: Waiting
You’ll notice that the container is uploaded in a series of layers, and some of them are huge (100mb+). This is normal, and the big layers will be uploaded just this first time. We’ll be using Docker’s layer system to upload only the changes we’ve made in our application, saving disk space and bandwidth. If you want do know more about the docker push and layers, you can read the Official Documentation.
After pushing, you’ll receive a success message:
...
9f5e7eecca3a: Pushed
08ee50f4f8a7: Pushed
33e5788c35de: Pushed
c3d75a5c9ca1: Pushed
0f94183c9ed2: Pushed
b58339e538fb: Pushed
317a9fa46c5b: Pushed
a9bb4f79499d: Pushed
9c81988c760c: Pushed
c5ad82f84119: Pushed
fe4c16cbf7a4: Pushed
latest: digest: sha256:43214016a4921bdebf12ae9de7466174bee1afd44873d6a60b846d157986d7f7 size: 2627
You can check your new image in your Docker Registry console:
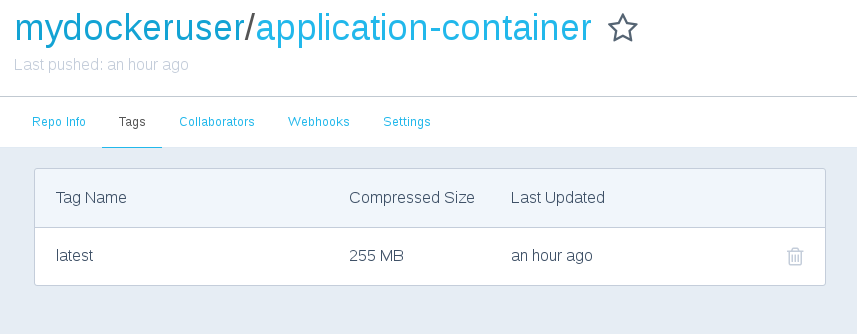
If you try to push the image again, you’ll notice that all layers already exist. Docker matches each layer hash to see if it already exists, in order to avoid reuploading it.
$ docker push mydockeruser/application-container
The push refers to a repository [docker.io/mydockeruser/application-container]
9f5e7eecca3a: Layer already exists
08ee50f4f8a7: Layer already exists
33e5788c35de: Layer already exists
c3d75a5c9ca1: Layer already exists
0f94183c9ed2: Layer already exists
b58339e538fb: Layer already exists
317a9fa46c5b: Layer already exists
a9bb4f79499d: Layer already exists
9c81988c760c: Layer already exists
c5ad82f84119: Layer already exists
fe4c16cbf7a4: Layer already exists
latest: digest: sha256:43214016a4921bdebf12ae9de7466174bee1afd44873d6a60b846d157986d7f7 size: 2627
Opening a Remote Connection
Now that we have uploaded our container, let’s see how to download and run it on the remote server. First, we need to prepare the remote environment for running the container. You must install Docker and log into the Docker Registry, just like you did on the host machine. To open a remote connection via SSH, you can use the following command:
ssh remoteuser@35.190.185.215
# or if you need authentication
ssh -i path/to/your/key.pem remoteuser@35.190.185.215
Download
After configuring everything on the remote machine, we won’t need to access its terminal again. Each command will be executed on its own. Let’s download our container. Remember to include the key flag, if needed:
$ ssh remoteuser@35.190.185.215 docker pull mydockeruser/application-container
Using default tag: latest
latest: Pulling from mydockeruser/application-container
386a066cd84a: Pulling fs layer
ec2a19adcb60: Pulling fs layer
b37dcb8e3fe1: Pulling fs layer
e635357d42cf: Pulling fs layer
382aff325dec: Pulling fs layer
f1fe764fd274: Pulling fs layer
a03a7c7d0abc: Pulling fs layer
fbbadaebd745: Pulling fs layer
63ef7f8f1d60: Pulling fs layer
3b9d4dda739b: Pulling fs layer
17e2d6aad6ec: Pulling fs layer
...
3b9d4dda739b: Pull complete
17e2d6aad6ec: Pull complete
Digest: sha256:c030e4f2b05191a4827bb7a811600e351aa7318abd3d7b1f169f2e4339a44b20
Status: Downloaded newer image for mydockeruser/application-container:latest
Restart
Since we are running the container for the first time, we won’t need to stop other containers. You can run the container using the same command as the local host:
$ ssh remoteuser@35.190.185.215 docker run -p 3000:3000 -d mydockeruser/application-container
f86afaa7c9cc4730e9ff55b1472c5b30b0e02055914f1673fbd4a8ceb3419e23
The only output you’ll get is the container hash. This is because the flag -d (instead of -ti). This means that we’re running the container in detached mode, instead of gluing its output to the terminal.
You can access the remote host address in your browser (35.190.185.21:3000) to check the running application.
Wrapping Up
Now we have everything we need to build our automated deploy. The following code is the finished script, you can save it in the root folder with the name deployer.rb. Let’s take a look at each line in order to understand what is happening.
# deployer.rb
class Deployer
  APPLICATION_HOST = '54.173.63.18'.freeze
  HOST_USER = 'remoteuser'.freeze
  APPLICATION_CONTAINER = 'mydockeruser/application-container'.freeze
  APPLICATION_FILE = 'application.tar.gz'.freeze
  ALLOWED_ACTIONS = %w(deploy).freeze
  APPLICATION_PATH = 'blog'.freeze

  def initialize(action)
    @action = action
    abort('Invalid action.') unless ALLOWED_ACTIONS.include? @action
  end

  def execute!
    public_send(@action)
  end

  def deploy
    check_changed_files
    copy_gemfile
    compress_application
    build_application_container
    push_container
    remote_deploy
  end

  private

  def check_changed_files
    return unless git -C #{APPLICATION_PATH} status --short | wc -l
                  .to_i.positive?
    abort('Files changed, please commit before deploying.')
  end

  def copy_gemfile
    system("cp #{APPLICATION_PATH}/Gemfile* .")
  end

  def compress_application
    system("tar -zcf #{APPLICATION_FILE} #{APPLICATION_PATH}")
  end

  def build_application_container
    system("docker build -t #{APPLICATION_CONTAINER}:#{current_git_rev} .")
  end

  def push_container
    system("docker push #{APPLICATION_CONTAINER}:#{current_git_rev}")
  end

  def remote_deploy
    system("#{ssh_command} docker pull "\
           "#{APPLICATION_CONTAINER}:#{current_git_rev}")
    system("#{ssh_command} 'docker stop \$(docker ps -q)'")
    system("#{ssh_command} docker run "\
             "--name #{deploy_user} "\
             "#{APPLICATION_CONTAINER}:#{current_git_rev}")
  end

  def current_git_rev
    git -C #{APPLICATION_PATH} rev-parse --short HEAD.strip
  end

  def ssh_command
    "ssh #{HOST_USER}@#{APPLICATION_HOST}"
  end

  def git_user
    git config user.email.split('@').first
  end

  def deploy_user
    user = git_user
    timestamp = Time.now.utc.strftime('%d.%m.%y_%H.%M.%S')
    "#{user}-#{timestamp}"
  end
end

if ARGV.empty?
  abort("Please inform action: \n\s- deploy")
end
application = Deployer.new(ARGV[0])

begin
  application.execute!
rescue Interrupt
  puts "\nDeploy aborted."
end
Now, let’s examine it step by step:
  APPLICATION_HOST = '54.173.63.18'.freeze
  HOST_USER = 'remoteuser'.freeze
  APPLICATION_CONTAINER = 'mydockeruser/application-container'.freeze
  APPLICATION_FILE = 'application.tar.gz'.freeze
  ALLOWED_ACTIONS = %w(deploy).freeze
  APPLICATION_PATH = 'blog'.freeze
Here we are defining some constants to avoid code duplication. APPLICATION_HOST stands for the remote IP of the running server, HOST_USER is the remove server user, APPLICATION_CONTAINER is the name of the container used to wrap the application. You can use any name you want. APPLICATION_FILE is the compressed application filename, ALLOWED_ACTIONS is an array of allowed actions, so you can easily define which actions are available to run. Lastly, APPLICATION_PATH is the path of your application. In our example, it’s blog.
  def initialize(action)
    @action = action
    abort('Invalid action.') unless ALLOWED_ACTIONS.include? @action
  end

  def execute!
    public_send(@action)
  end
This is a wrapper for validating and calling each available method (in ALLOWED_ACTIONS). With this, you can easily add new callable methods, without the need of a code refactor.
  def deploy
    check_changed_files
    copy_gemfile
    compress_application
    build_application_container
    push_container
    remote_deploy
  end
These are our deploy steps. These methods do almost the same as our examples above, with just a few changes. Let’s take a look at each step:
  def check_changed_files
    return unless git -C #{APPLICATION_PATH} status --short | wc -l
                  .to_i.positive?
    abort('Files changed, please commit before deploying.')
  end
Since we are using our local code to deploy the application, it is a good practice to check if there are any file changes present, and aborting the deploy if true. This step uses git status --short to check if there are any new or changed files, and the -C flag defines where git should check (blog, in our example). You can remove this step if you want, but it’s not recommended.
  def copy_gemfile
    system("cp #{APPLICATION_PATH}/Gemfile* .")
  end
This copies the Gemfile and Gemfile from the blog to the root location each time a deploy is made. This ensures that all gems are installed before the deploy is finished.
  def compress_application
    system("tar -zcf #{APPLICATION_FILE} #{APPLICATION_PATH}")
  end
As the name says, this steps compresses the whole application in a single file, that will be included in the container later.
  def build_application_container
    system("docker build -t #{APPLICATION_CONTAINER}:#{current_git_rev} .")
  end
This method runs the container build step, which installs all dependencies and gems. Every time the Gemfile is changed, Docker detects it and installs, so you don’t need to worry about updating dependencies. This will take some time every time dependencies change. If there is no change, Docker will use its cache, and the step will run almost instantly.
  def push_container
    system("docker push #{APPLICATION_CONTAINER}:#{current_git_rev}")
  end
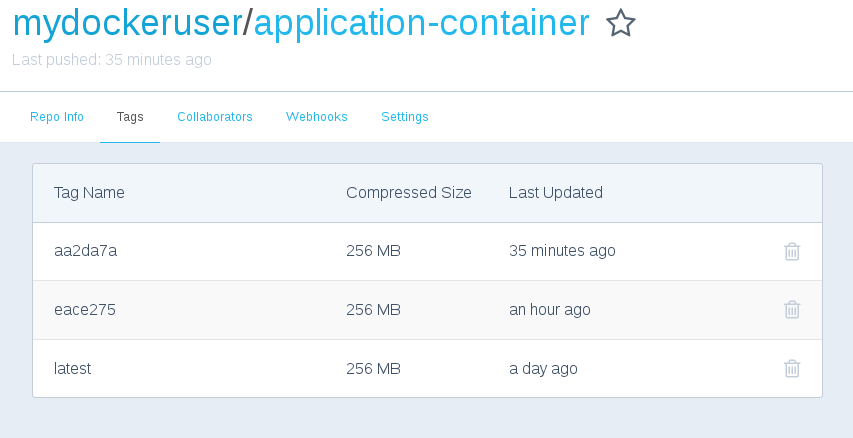
This uploads the new container to the Docker Registry. Notice the current_git_rev, this method uses git to retrieve the last commit hash, and we use it here to identify each deploy. You can also check all uploaded containers in DockerHub console:
  def remote_deploy
    system("#{ssh_command} docker pull "\
           "#{APPLICATION_CONTAINER}:#{current_git_rev}")
    system("#{ssh_command} 'docker stop \$(docker ps -q)'")
    system("#{ssh_command} docker run "\
             "--name #{deploy_user} "\
             "#{APPLICATION_CONTAINER}:#{current_git_rev}")
  end
Three things happen here:
docker pull— pulls the container we just uploaded to the remote server. Notice thessh_commandmethod call, this is just a wrapper to avoid duplicating code each time we need to send a remote command.docker stop $(docker ps -q)— this stops all running containers, so that we won’t get any port conflicts when we run the new container.docker run— starts the new container with the correct tag, and names it according to the current git user and timestamp. This is helpful us when we need to know who deployed the current running application. You can check this by entering the commanddocker pson the remote server:
CONTAINER ID        IMAGE                                        COMMAND                  CREATED             STATUS              PORTS                    NAMES
01d777ef8d9a        mydockeruser/application-container:aa2da7a   "/bin/sh -c 'cd /t..."   10 minutes ago      Up 10 minutes       0.0.0.0:3000->3000/tcp   mygituser-29.03.17_01.09.43
if ARGV.empty?
  abort("Please inform action: \n\s- deploy")
end
application = Deployer.new(ARGV[0])

begin
  application.execute!
rescue Interrupt
  puts "\nDeploy aborted."
end
This receives arguments from CLI, and runs the deploy application. If you cancel the deploy with CTRL-C the rescue block returns a better message.
Deploying the Application
You should now have the following folder structure:
.
├── blog
│   ├── app
│   ├── bin
... (application files and folders)
├── deployer.rb
├── Dockerfile
Next, let’s run and deploy your application:
$ ruby deployer.rb deploy
You’ll see the output of every command that is executed. ALl outputs will be very similar to the ones we run manually, in the first example:
Sending build context to Docker daemon 4.846 MB
Step 1/9 : FROM ruby:2.3.1-slim
 ---> e523958caea8
Step 2/9 : COPY Gemfile* /tmp/
 ---> Using cache
 ---> f103f7b71338
Step 3/9 : WORKDIR /tmp
 ---> Using cache
 ---> f268a864efbc
Step 4/9 : RUN gem install bundler &&     apt-get update &&     apt-get install -y build-essential libsqlite3-dev rsync nodejs &&     bundle install --path vendor/bundle
 ---> Using cache
 ---> 7e9c77e52f81
Step 5/9 : RUN mkdir -p /app/vendor/bundle
 ---> Using cache
 ---> 1387419ca6ba
Step 6/9 : WORKDIR /app
 ---> Using cache
 ---> 9741744560e2
Step 7/9 : RUN cp -R /tmp/vendor/bundle vendor
 ---> Using cache
 ---> 5467eeb53bd2
Step 8/9 : COPY application.tar.gz /tmp
 ---> b2d26619a73c
Removing intermediate container 9835c63b601b
Step 9/9 : CMD cd /tmp &&     tar -xzf application.tar.gz &&     rsync -a blog/ /app/ &&     cd /app &&     RAILS_ENV=production bundle exec rake db:migrate &&     RAILS_ENV=production bundle exec rails s -b 0.0.0.0 -p 3000
 ---> Running in 8fafe2f238f1
 ---> c0617746e751
Removing intermediate container 8fafe2f238f1
Successfully built c0617746e751
The push refers to a repository [docker.io/mydockeruser/application-container]
e529b1dc4234: Pushed
08ee50f4f8a7: Layer already exists
33e5788c35de: Layer already exists
c3d75a5c9ca1: Layer already exists
0f94183c9ed2: Layer already exists
b58339e538fb: Layer already exists
317a9fa46c5b: Layer already exists
a9bb4f79499d: Layer already exists
9c81988c760c: Layer already exists
c5ad82f84119: Layer already exists
fe4c16cbf7a4: Layer already exists
aa2da7a: digest: sha256:a9a8f9ebefcaa6d0e0c2aae257500eae5d681d7ea1496a556a32fc1a819f5623 size: 2627
aa2da7a: Pulling from mydockeruser/application-container
1fad42e8a0d9: Already exists
5eb735ae5425: Already exists
b37dcb8e3fe1: Already exists
50b76574ab33: Already exists
c87fdbefd3da: Already exists
f1fe764fd274: Already exists
6c419839fcb6: Already exists
4abc761a27e6: Already exists
267a4512fe4a: Already exists
18d5fb7b0056: Already exists
219eee0abfef: Pulling fs layer
219eee0abfef: Verifying Checksum
219eee0abfef: Download complete
219eee0abfef: Pull complete
Digest: sha256:a9a8f9ebefcaa6d0e0c2aae257500eae5d681d7ea1496a556a32fc1a819f5623
Status: Downloaded newer image for mydockeruser/application-container:aa2da7a
01d777ef8d9a
c3ecfc9a06701551f31641e4ece78156d4d90fcdaeb6141bf6367b3428a2c46f
Your output may change due to different hashes and Docker cache. In the end, you’ll get two hashes, as seen above:
01d777ef8d9a
c3ecfc9a06701551f31641e4ece78156d4d90fcdaeb6141bf6367b3428a2c46f
The first, small one, is the hash of the stopped container, and the last (big) one, is the new running container.
Yu can now access your remote server IP address and see your new application running.
Continuous Delivery with Semaphore
It is possible to use our script to automatically deploy our application with Semaphore. Let’s see how.
First of all, in your Project Settings, set your platform to one with Docker support: 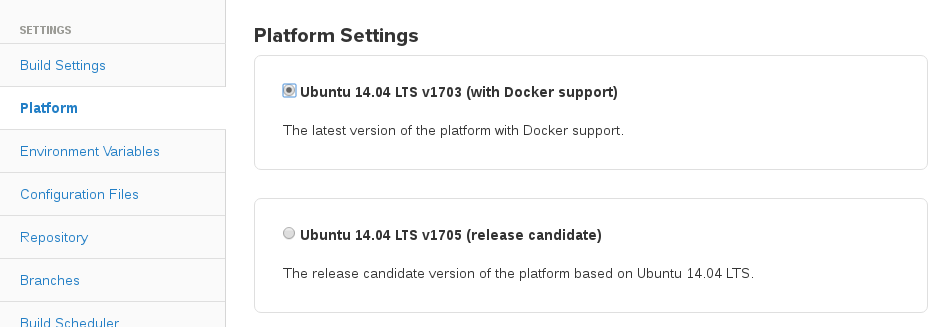
On your Semaphore project page, click on “Set Up Deployment”. 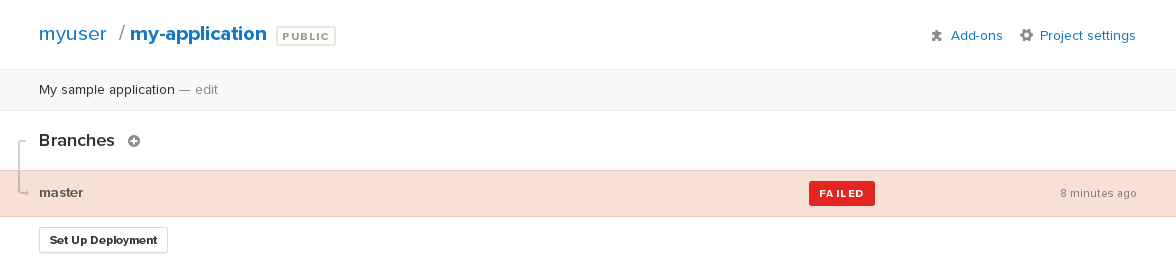
Select “Generic Deployment”: 
Select “Automatic”: 
Select the branch (usually master): 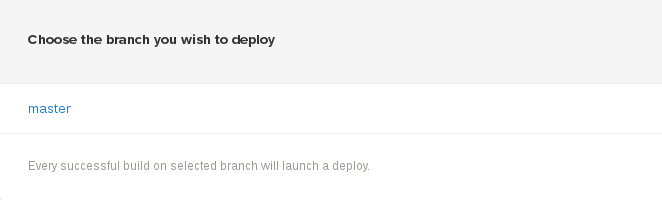
Since we just want to deploy our application, we can run the deploy script the same way we would run it on a local machine:
rbenv global 2.3.1
docker-cache restore
ruby deployer.rb deploy
docker-cache snapshot
Notice both docker-cache commands. They are responsible for retrieving your built images, so you don’t need to build them from zero. Same as running locally, the first time will take a little more time, but the next ones will be faster. For more info, check the official documentation.
Also, take a note of the rbenv global 2.3.1 command. This sets the current ruby version, required to run our script. If you use another language, you must configure the required environment.
The next steps consist of uploading the SSH key for accessing your remote server (if needed), and naming your new server. After this, every time you push code to master branch, this script will be executed, deploying your application to your defined remote server.
Other Commands That Can Be Automated
In the following section, we’ll take a look at several other helpful commands that we can automate.
Current version
We can track which application version is running by using container Tags as a description.
To retrieve the current running version, we need the following code:
def current
  remote_revision = #{ssh_command} docker ps | grep -v CONTAINER | awk '{print $2}' | rev | cut -d: -f1 | rev.strip

  abort('No running application.') if remote_revision == ''

  current_rev = `git show --ignore-missing --pretty=format:'%C(yellow)%h \
%C(blue)<<%an>> %C(green)%ad%C(yellow)%d%Creset %s %Creset' \
  #{running_revision} | head -1`.strip
  if current_rev.empty?
    puts 'Local revision not found, please update your master branch.'
  else
    puts current_rev
  end
  deploy_by = #{ssh_command} docker ps --format={{.Names}}
  puts "Deploy by: #{deploy_by}"
end
Here’s what’s happening in each line:
remote_revision = #{ssh_command} docker ps | grep -v CONTAINER | awk '{print $2}' | rev | cut -d: -f1 | rev.strip
This command takes care of the following:
- Gets the output of the remote container status with
docker ps, - Removes the headers of the output with
grep -v CONTAINER, - Retrieves the second column (image name:tag) with
awk '{print $2}', - Using the remaining command, cuts the image name in the
:(colon), returning the last part, the commit hash, and - The
.stripremoves the linebreak at the end of the returned string.
abort('No running application.') if remote_revision == ''
If no container is running or no commit has been found, this aborts the command.
current_rev = `git show --ignore-missing --pretty=format:'%C(yellow)%h \
%C(blue)<<%an>> %C(green)%ad%C(yellow)%d%Creset %s %Creset' \
  #{running_revision} | head -1`.strip
This command finds the matching git log to the container hash, and prettifies the formatting.
if current_rev.empty?
   puts 'Local revision not found, please update your master branch.'
else
  puts current_rev
end
If the current git history does not have this commit, this asks the user to update the repository. This may happen due to new commits that have not yet been rebased from the local copy. If the commit is found, this prints the log info.
deploy_by = #{ssh_command} docker ps --format={{.Names}}
This command returns the running container name, which contains the user and the timestamp.
puts "Deploy by: #{deploy_by}"
The command above prints the deploy author and timestamp.
Logs
Most applications have logs, and sometimes we must take a look at them. We can use Docker’s built-in log system with a simple ssh connection to access our application logs more easily.
To output logs from the application, we can input the following:
def logs
  puts 'Connecting to remote host'
  system("#{ssh_command} 'docker logs -f --tail 100 \$(docker ps -q)'")
end
The docker logs command outputs all logs generated by the application. We use the follow flag -f to stay connected, reading all logs as a stream. The --tail flag limits the amount of old logs to print. The last part $(docker ps -q) returns the ID of every container running in the remote host. Since we’re running just our application, there is no problem with retrieving all containers.
Note* that our example application does not return any logs to Docker, because it writes every log to a file. You can change this behavior by setting the environment variable RAILS_LOG_TO_STDOUT=true when starting the application.
Docker Installation and Login
For new hosts, it’s a good idea to have a “setup” command to install and configure all requirements.
We can accomplish this in two steps: installation and login.
def docker_setup
  puts 'Installing Docker on remote host'
  system("#{ssh_command} -t 'wget -qO- https://get.docker.com/ | sh'")

  puts 'Adding the remote user to Docker group'
  system("#{ssh_command} 'sudo usermod -aG docker #{HOST_USER}'")

  puts 'Adding the remote user to Docker group'
  system("#{ssh_command} -t 'docker login}'")
end
Let’s explain each command:
system("#{ssh_command} -t 'wget -qO- https://get.docker.com/ | sh'")
This command runs a Docker installation script. It will ask for the remote user password, so we need the flag -t so we can enter it when asked.
system("#{ssh_command} 'sudo usermod -aG docker #{HOST_USER}'")
This command adds the remote user to the Docker group. This is needed so we can run docker commands without sudo.
system("#{ssh_command} -t 'docker login'")
This is needed since we have to be logged in so we can download our updated application. The -t flag allows typing.
Rolling back
If anything went wrong with the new running application, it is important to be able to roll back to a previous version. Using this container approach, every deployed version stays saved on the host, and can be started instantly.
Take a look at the following code snippet:
def rollback
  puts 'Fetching last revision from remote server.'
  previous_revision = #{ssh_command} docker images | grep -v 'none\|latest\|REPOSITORY' | awk '{print $2}' | sed -n 2p.strip
  abort('No previous revision found.') if previous_revision == ''
  puts "Previous revision found: #{previous_revision}"
  puts "Restarting application!"
  system("#{ssh_command} 'docker stop \$(docker ps -q)'")
  system("#{ssh_command} docker run --name #{deploy_user} #{APPLICATION_CONTAINER}:#{previous_revision}")
end
Let’s see what is happening in each step:
  puts 'Fetching last revision from remote server.'
  previous_revision = #{ssh_command} docker images | grep -v 'none\|latest\|REPOSITORY' | awk '{print $2}' | sed -n 2p.strip
  abort('No previous revision found.') if previous_revision == ''
This command greps the previous container tag from all Docker images present on the remote host. This tag is the git commit short hash, that will be used as reference for rolling back our application. If no previous image is found, the rollback is aborted.
system("#{ssh_command} 'docker stop \$(docker ps -q)'")
This shuts down all running containers, so we can start the previous one.
system("#{ssh_command} docker run --name #{deploy_user} #{APPLICATION_CONTAINER}:#{previous_revision}")
This command starts the application with the tag we found in the previous step. We can use the same naming convention that is used in the deploy method (deploy_user).
Conclusion
If you went through every step of the tutorial, you should now have a fully functioning automation tool for deploying your software. This can be helpful when dealing with applications that must be easily deployed, but can’t be on hosts like Heroku or other automated environments.
if you found this tool to be helpful, feel free to share this tutorial with your friends. Also, you’re more than welcome to leave any comments or questions you might have.
Happy shipping.
P.S. Want to continuously deliver your applications made with Docker? Check out Semaphore’s Docker platform with full layer caching for tagged Docker images.
