Introduction
Routes provide benefits to the users of our applications. While routes are not necessary in all applications, they make applications shine a little brighter. Having routes in your application gives users the ability to return to a specific point in your application just by typing in a URL.
Testing routes comes with some interesting challenges. Keep reading to find out how to tackle them.
Prerequisites
Before starting this article, it is assumed that you have:
- An understanding of Angular 2,
- Knowledge of TypeScript and how it relates to JavaScript,
- An understanding of ES6/ES2015 concepts such as arrow functions, modules, classes, and block-scoped variables,
- Comprehension of using a command line or terminal such as Git Bash, iTerm, or your operating system’s built-in terminal,
- Node >= v4 and NPM >= v3 installed while knowing how to run NPM scripts, and
- A setup capable of unit testing Angular 2 applications. If you could use some help with this, see our tutorials on Setting Up Angular 2 with Webpack, Testing Components in Angular 2 with Jasmine, and Testing Services in Angular 2.
The Sample Project
In previous tutorials, we began developing an application which dynamically generates and displays forms. The application can handle forms passed from a server, display them as a list, and let users display a selected form.
The list of forms and the selected form are both displayed on a single page, making for a cluttered user experience. In this tutorial, we’ll use routes to remove that clutter.
Cloning the Repository
If you’d like to view the final code for this article, it’s available in this GitHub repository. It can be downloaded by going to your terminal/shell and entering:
git clone https://github.com/gonzofish/semaphore-ng2-webpackOnce cloned, switch to this article’s final code by typing:
git checkout routesTo see the code from the previous article on services, enter:
git checkout servicesTo see the code from our previous article on components, enter:
git checkout componentsOnce you have the code checked out, make sure to run:
npm iThis will install all of the dependencies.
Continuing from Existing Code
If you have existing code, it’s a good idea to update your dependencies before diving in. Between the previous tutorial and this one, the following dependency upgrades were made:
- angular-in-memory-web-api:
^0.1.9 -> ^0.2.3 - rxjs:
5.0.0-beta.12 -> ^5.0.1 - zone.js:
^0.6.23 -> ^0.7.2 - typescript:
^1.8.10 -> ^0.7.2
Make those changes in package.json and, from the root of your code, run:
npm upDepending on your version of Node and NPM you may receive warnings, but all the dependencies should be working.
Traveling Along a Route
As mentioned in the introduction, routes can give an application an added level of quality by giving users URL-access to specific points in an application. The routes in our application will be relatively simple, but the Angular router can handle very complex routes.
Our application will have two routes:
- Viewing the list of available forms (
/forms) and - Viewing a single form (
/form/:id).
Colon-Prefixes in Routes
You’ll notice the second URL (/form/:id) has the :id notation on it. When a route contains a colon-prefixed substring, the values following that colon are considered a parameter of the route.
This means that this route will activate for any URL that starts /form/ and ends with any value. This means /form/123 and /form/foo will be recognized. The values 123 and foo would be made available through use of the ActivatedRoute class, which we will look at later.
How to Test Routing
Routing is an interesting topic because the bulk of the work is handled by the routing library. Angular’s routing library provides a lot functionality out of the box, taking a lot of the work off of application developers.
For instance, having a default route requires no extra coding. Since this is handled by Angular, it goes outside the responsibility of testing for the application developer.
So, what’s left to test?
What We Will Be Testing
Since our application will need to leverage two features of the Angular routing library, we’ll need to test that we’re accessing those features at the correct time. The first feature we’ll be using is the router’s navigateByUrl method, which should be called when the user tries to open a form from the list.
We’ll utilize the router’s params to get the ID of the form that we want to view. This means that we’ll need to test if the form-displaying component understands and utilizes the router’s params object properly.
First Things First
To use the router in our application we’ll need to install it via NPM. To do so, from the root of the project, run the following command:
npm i -S @angular/routerNew Components
The Angular routing library is a component router, meaning that when a specific route hits, one or more specified components are displayed. In the router-enabled version of our application, we’ll have two new components:
FormListComponent: displays the list of forms andFormViewerComponent: displays a single form, specified by ID.
For now, we will create two bare-bones components, which we will expand on later. For each component we need .component.ts, .component.spec.ts, and .component.html files, as we’ve done for other components in the previous articles. Additionally, you can checkout the routing-components tag from the GitHub project to see the components’ starting setup.
The Routing Setup
Next, we’ll need to set up our router. Thanks to the power of Angular’s NgModule decorator, we can add routes to our project easily. Add a file to the src directory named app-routing.module.ts, this module will hold all of our routes.
We name the file app-routing because, in more complex applications, we can have specific routing for child modules. Giving it the app- prefix is a good practice for understanding to which level the routing applies.
In app-routing.module.ts, we’ll need to pull in our Angular dependencies:
import { NgModule } from '@angular/core';
import {
    RouterModule,
    Routes
} from '@angular/router';
Here, we’re simply pulling in NgModule and the necessary routing dependencies. The first is the RouterModule, which is used to establish the routes we’ll be using. The second is the Routes interface which defines the data shape of a route.
We’ll also need to import the components that we’ll be routing to when a certain route is hit. These are the components we have just created.
// Angular dependencies

import { FormListComponent } from './components/form-list/form-list.component';
import { FormViewerComponent } from './components/form-viewer/form-viewer.component';
Then, we will define our routes:
// imports

const appRoutes: Routes = [
    {
        path: 'forms',
        component: FormListComponent
    },
    {
        path: 'form/:id',
        component: FormViewerComponent
    },
    {
        path: '',
        pathMatch: 'full',
        redirectTo: '/forms'
    }
];
There’s quite a bit of new information here, so let’s break it down. We’re creating an Array of route objects. The order of these paths matters and will be read from the first route to the last. If a path is matched, it will be used as the route to display.
Each object has a path, which is a string. We’re describing two types of routes — a component route and a redirect route. The component routes are routes that display an actual component, while the redirect route will redirect to another route — in our case, if the user navigates to http://mysite/ it will redirect to http://mysite/#/forms.
One thing of note is the pathMatch attribute on the redirect route. This attribute is a way of telling Angular how to evaluate the paths to find a match. On redirect routes, this attribute is required, but it can be used on other routes as well. We’ve set it to full, which tells the router to match the entire route. The other possible value is prefix, which matches any route that begins with a certain value.
Finally, we’ll define our routing module:
// imports

// routes

@NgModule({
    imports: [
        RouterModule.forRoot(appRoutes, { useHash: true })
    ],
    exports: [
        RouterModule
    ]
})
export class AppRoutingModule {}
This is pretty simple. We use the Angular RouterModule to establish our routes using forRoot. We use the static RouterModule.forRoot method at the application-level only. If we were to set up routing at lower-levels, we would use the static RouterModule.forChild method, but we will not delve into that in this application.
Note the useHash option we pass in to the forRoot method. This tells the router that the URLs will use a # prefix, which would look similar to http://mysite.com/#/forms instead of http://mysite.com/forms. We do this because the default, non-hash strategy (known as the PathLocationStrategy) requires the server to understand the routes we’re using in our application and that is outside the scope of this article.
As the last part of our setup, we incorporate our AppRoutingModule into the main AppModule of app.module.ts.
// Angular imports

import { AppRoutingModule } from './app-routing.module.ts';

// Services & Components

@NgModule({
    bootstrap: [AppComponent],
    declarations: [
        /* declarations */
    ],
    imports: [
        AppRoutingModule,               // NEW LINE
        BrowserModule,
        HttpModule,
        InMemoryWebApiModule.forRoot(FauxFormsService),
        ReactiveFormsModule
    ]
})
export class AppModule {}
Getting Started with Tests
We’re now ready to develop our new components for routing with a test-first approach. We can start with the simpler FormListComponent. What we’ll be testing with the FormListComponent is that when the user clicks a Display button from the list, it calls the Router method navigateByUrl with the expect URL.
The navigateByUrl method does exactly what it says: it attempts to navigate to the specified URL string using the router. To do this, we’ll need to mock out a version of the router that spies on the navigateByUrl method. We’ve done this before in the article on testing services, so it may seem familiar. In components/form-list/form-list.component.spec.ts, we’ll first need to provide a mock Router:
import {
    async,              // ADDED LINE
    inject,             // ADDED LINE
    TestBed
} from '@angular/core/testing';
import { Router } from '@angular/router';   // ADDED LINE

import { FormListComponent } from './form-list.component';

// ADDED CLASS
class MockRouter {
    navigateByUrl(url: string) { return url; }
}

describe('Component: FormListComponent', () => {
    let component: FormListComponent;

    // updated beforeEach
    beforeEach(async(() => {
        TestBed.configureTestingModule({
            declarations: [FormListComponent],
            providers: [
                { provide: Router, useClass: MockRouter }
            ]
        })
        // the below was added
        .compileComponents().then(() => {
            const fixture = TestBed.createComponent(FormListComponent);

            component = fixture.componentInstance;
        });
    }));
});
We’ve leveraged Angular’s testing framework to substitute the regular Router class with our MockRouter. The regular Router has many more methods and features, but our mock router just needs stubs for the methods we care about — in this case that just means navigateByUrl. This allows us to avoid loading the real Router and all its setup for our tests.
Note that we’re utilizing the async test method here. This allows us to create our components for testing, which is an asynchronous operation, in a way that executes our tests only after the asynchronous operations have completed.
With our component we also need a method, displayForm, that handles a user clicking a display button within the list. When a button is clicked, we just need to navigate to form display URL with the ID of the form.
First, we’ll add a test for that behavior:
// imports

describe('Component: FormListComponent', () => {
    // setup & previous tests

    describe('#displayForm', () => {
        it('should call Router.navigateByUrl("forms/:id") with the ID of the form', inject([Router], (router: Router) => {
            const spy = spyOn(router, 'navigateByUrl');

            component.displayForm(23);

            const url = spy.calls.first().args[0];

            expect(url).toBe('/form/23');
        }));
    });
});
In this test, we spy on the navigateByUrl method of the MockRouter instance so that when it is called, we can see what it was called with. Next, we call the new displayForm method with an arbitrary ID. Finally we grab the URL from the spy we created and verify that is the expected URL we wanted.
This test makes use of the inject testing method because it allows us to gain access to the instance of Router being used by the FormListComponent.
As per usual, at this point, if we run our tests, we’ll see failures because there is no displayForm method in the FormListComponent. Let’s create one and satisfy the test.
In form-list.component.ts:
import { Component } from '@angular/core'; // UPDATED LINE
import { Router } from '@angular/router';   // ADDED LINE

import { FormData } from '../../models'; // ADDED LINE

@Component({
    selector: 'form-list',
    template: require('./form-list.component.html'),
    styles: []
})
export class FormListComponent {

    // ADDED CONSTRUCTOR
    constructor(private router: Router) {}

    // ADDED METHOD
    displayForm(id: number) {
        this.router.navigateByUrl(/form/${id});
    }
}
The application code here is very simple. First we import the Router, then create a constructor that adds a private class attribute, router, that we then use in our displayForm method to call navigateByUrl.
Updating Our Templates
For now, we want to use this new component to display our list of forms. So, take the <table> from app.component.html and move it into the template form-list.component.html, which should look like this:
<table border="1" cellpadding="2" cellspacing="0" style="width: 40%">
    <thead>
        <tr>
            <th>Title</th>
            <th>Questions</th>
            <th> </th>
        </tr>
    </thead>

    <tbody>
        <tr *ngFor="let form of forms">
            <td>{{ form.title }}</td>
            <td>{{ form.questions.length }}</td>
            <td>
                <!-- NAME OF CLICK HANDLER CHANGED TO displayForm -->
                <button (click)="displayForm(form.id)">Display</button>
            </td>
        </tr>
    </tbody>
</table>
And, in app.component.html, replace the table with:
<router-outlet></router-outlet>

<span *ngIf="!!selectedForm">
    <hr>

    <h1>{{ selectedForm.title }}</h1>

    <dynamic-form [questions]="selectedForm.questions"></dynamic-form>
</span>
Here, we’ve added the router-outlet component. This component is provided by the router module. It is the location at which the component associated with the current route will be displayed; in actuality, it places our component right after router-outlet. So, when we navigate to /forms the FormListComponent will be added to the DOM between the router-outlet and the span tag.
Updating the Application Module
We’ll also need to pull our new component into the AppModule so that it can be used in our application. In app.module.ts:
// imports

import {
    AppComponent,
    DynamicFormComponent,
    DynamicQuestionComponent,
    FormListComponent,          // ADDED LINE
    FormViewerComponent         // ADDED LINE
} from './components';

@NgModule({
    bootstrap: [ AppComponent ],
    declarations: [
        AppComponent,
        DynamicFormComponent,
        DynamicQuestionComponent,
        FormListComponent,      // ADDED LINE
        FormViewerComponent     // ADDED LINE
    ],
    // rest of NgModule
});
Where’s the Data?
Load up the application with:
npm startAnd see what the application gives you. You should see the following:

There are no forms, which is not what we want. This is because we didn’t provide FormListComponent with access to the forms from FormService.
We have been pulling the forms in at the AppComponent level, which is the right way since we want the whole application to have access to the list. However, because getting the lists is an asynchronous operation. If we call the getAllForms method of the FormService from FormListComponent during ngOnInit, we’ll get no data because the data loading hasn’t completed yet.
So, what can we do? This where the power of RxJS comes into play. RxJS is the JavaScript implementation of the Reactive Extensions library which is used heavily in Angular. Even the HTTP library uses RxJS’s Observables to perform server calls.
If Observables aren’t familiar, the quick explanation is that we subscribe to Observables with a function. Whenever the data associated with that Observable updates, our function is called with the updated data.
So, what we’ll do is this: create an Observable attribute in the FormService which can be subscribed to for access to the list of forms FormService is keeping track of. Then, we’ll subscribe to that Observable in FormListComponent.
Update services/form.service.ts:
import { Injectable } from '@angular/core';
import { FormData } from '../models';

import { BehaviorSubject } from 'rxjs/Rx';      // ADDED LINE

@Injectable()
export class FormService {
    forms = new BehaviorSubject<Array<FormData>>([]);   // CHANGED TO SUBJECT

    setForms(newForms: Array<FormData>) {
        this.forms.next(newForms);                      // CHANGED TO SUBJECT
    }

    getForm(formId: number): FormData {
        // CHANGED TO SUBJECT
        let form = this.forms.value.find((form) => form.id === formId);

        if (!form) {
            form = null;
        }

        return form;
    }
}
What’s changed? We imported RxJS’s BehaviorSubject. This allows us to store the forms and publish them to subscribers at the same time. We then change the forms variable to public and create it as a BehaviorSubject with an empty Array by default.
The setForms method updates forms using its next method, which will store the value and notify any subscribers. Finally, we update getForm so that it uses the value attribute of forms when searching for a form.
This, of course, means we also need to update our unit tests. In the name of brevity, consult the code repository for the updated FormService tests.
Changing the behavior of FormService causes a chain reaction where we must also update FormListComponent which requires us to update the unit test for that as well.
// imports + MockRouter

// ADDED
class MockFormService {
    forms = {
        subscribe: () => {}
    }
}

describe('Component: FormListComponent', () => {
    let component: FormListComponent;

    beforeEach(async(() => {
        TestBed.configureTestingModule({
            declarations: [FormListComponent],
            providers: [
                { provide: Router, useClass: MockRouter },
                // ADDED LINE
                { provide: FormService, useClass: MockFormService }
            ]
        })
        // compileComponents
    }));

    // tests
});
The MockFormService will just allow us to create a fake version of the FormService, similar to how MockRouter works. We stub out the forms attribute so that when FormListComponent is constructed, calling forms.subscribe() doesn’t cause an error, but we also keep our unit test from crossing testing boundaries and into FormService.
Now, we’ll need to subscribe to the forms attribute of the FormService in FormListComponent:
// imports

@Component({
    // component config
})
export class FormListComponent {
    forms: Array<FormData> = [];

    constructor(private formService: FormService, private router: Router) {
        this.formService.forms
            .subscribe((forms) => this.forms = forms);
    }

    // displayForm method
}
When the FormListComponent is constructed, we just subscribe to forms from the formService and when the subscription is updated, we set the component’s forms variable to the subscription update.
Now, if we re-run our application, we should see our forms listed.

However, if you click a display button, you’ll notice that although the URL updates, you’re met with a blank page. This is because we haven’t set up our FormViewerComponent.
Viewing a Form
Setting up the FormViewerComponent will be relatively simple. In the AppComponent we already have the markup for displaying a form. However, the tests for routing will introduce new concepts.
As stated before, the FormViewerComponent is going to need to be able to read the params attribute from the route. What’s important to know is that the params attribute is actually an Observable. The way we will grab the ID off of the route is:
this.route.params.map(param => param['id'])
    .forEach((id) => this.selectForm(id));
You may notice that we’re calling on this.route, not this.router. This is because the params is a member of the ActivatedRoute class. This class, as its name says, describes the currently active route.
The selectForm method currently resides in the AppComponent, so we’ll move it to the FormViewerComponent. However, first we’re going to need to set up the component to work with ActivatedRoute.
In form-viewer.component.spec.ts:
import {
    async,
    inject,         // ADDED LINE
    TestBed
} from '@angular/core/testing';
// ADDED IMPORTS
import { ReactiveFormsModule } from '@angular/forms';
import { ActivatedRoute } from '@angular/router';

import { MockActivatedRoute } from '../../mocks/activated-route';
import { FormViewerComponent } from './form-viewer.component';
// ADDED IMPORTS
import { DynamicFormComponent } from '../dynamic-form/dynamic-form.component';
import { DynamicQuestionComponent } from '../dynamic-question/dynamic-question.component';

describe('Component: FormViewerComponent', () => {
    let activeRoute: MockActivatedRoute;    // ADDED LINE
    let component: FormViewerComponent;

    // ADDED BEFORE EACH
    beforeEach(() => {
        activeRoute = new MockActivatedRoute();
    });

    beforeEach(async(() => {
        TestBed.configureTestingModule({
            declarations: [
                FormViewerComponent,
                // ADDED COMPONENTS
                DynamicFormComponent,
                DynamicQuestionComponent
            ],
            imports: [
                // ADDED MODULE
                ReactiveFormsModule
            ]],
            // ADDED PROVIDERS
            providers: [
                { provider: ActivatedRoute, useValue: activeRoute },
            ]
        });

        // component creation
    }));

    // previous test
});
First, note that we’ve pulled in the sub-components we’ll be using, DynamicFormComponent and DynamicQuestionComponent. Since they rely on the ReactiveFormsModule, we also needed to pull that into our tests.
With this setup, we control see how ActivatedRoute‘s behavior. We are going to pull in ActivatedRoute and a mock version of it. An instance of the mock version will be created, which will replace the real ActivatedRoute for our tests. Let’s create the mock version of ActivatedRoute.
Create a folder under src called mocks and add a file named activated-route.ts and add the following code:
import { BehaviorSubject } from 'rxjs/Rx';

export class MockActivatedRoute {
    private paramsSubject = new BehaviorSubject(this.testParams);
    private _testParams: {};

    params  = this.paramsSubject.asObservable();

    get testParams() {
        return this._testParams;
    }
    set testParams(newParams: any) {
        this._testParams = newParams;
        this.paramsSubject.next(newParams);
    }
}
We’ve created a bare-bones version of the ActivatedRoute class. We’re creating a BehaviorSubject, which allows us to update observers by calling its next method. A BehaviorSubject is a special type of RxJS Subject that keeps track of the last value next was called with. It requires an initialization value, so we pass in the public testParams value.
testParams is set up as a getter/setter combo. The getter just returns the private _testParams while the setter sets _testParams and calls paramsSubject.next.
We also expose a public variable, params, which is just paramsSubject converted to an Observable. This Observable is needed to match the behavior of ActivatedRoute.
Again, this is a pretty minimal mocking out of ActivatedRoute, you can add methods and behavior to this class to suit the needs of a project’s testing.
Back in form-viewer.component.spec.ts, we can now create tests to see if our component works with the params of ActivatedRoute.
// imports

describe('Component: FormViewerComponent', () => {
    // MOVED COMPONENT CREATION TO FUNCTION
    const createComponent = () => {
        const fixture = TestBed.createComponent(FormViewerComponent);

        component = fixture.componentInstance;
        fixture.detectChanges();
    };
    // previous setup

    beforeEach(async(() => {
        // test module configuring
        TestBed.configureTestingModule({
            declarations: [FormViewerComponent],
            imports: [],
            providers: [
                { provider: ActivatedRoute, useValue: activeRoute },
                // ADDED FormService
                FormService
            ]
        });
    }));

    it('should have a defined component', () => {
        createComponent();
        expect(component).toBeDefined();
    });

    // ADDED TEST
    it('should call FormService.getForm when the route ID changes', inject([FormService], (formService: FormService) => {
        spyOn(formService, 'getForm');
        activeRoute.testParams = { id: 1234 };
        createComponent();
        formService.forms.next([]);

        expect(formService.getForm).toHaveBeenCalledWith(1234);
    }));
});
We’ve now moved the component creation out of a beforeEach and into a function. We do this because we want to be able to do specific test steps before the component is created, such as setting the id parameter attribute of our activeRoute, as is being done in our test. Notice that we’re calling fixture.detectChanges(). Doing this after we create our component is like calling ngOnInit, which we’ll need to do to get our ID parameter.
We also inject the FormService into our new test so we can get a hold of the instance. We then spy on its getForm method. Using the logic from before, when the route changes, it will call a private selectForm method on the FormViewerComponent which will, in turn call FormService.getForm.
Before the component is created, however, we call formService.forms.next. This may seem odd, but we do this so that, when a user navigates to a route directly (i.e., they type in the URL), the application waits for the forms of the FormService to be loaded before trying to call getForm.
Let’s satisfy this test. In form-viewer.component.ts, add replace it with the following:
import {
    Component,
    OnInit
} from '@angular/core';
import { ActivatedRoute } from '@angular/router';

import { FormService } from '../../services/form.service';
import { FormData } from '../../models';

@Component({
    selector: 'form-viewer',
    template: require('./form-viewer.component.html'),
    styles: []
})
export class FormViewerComponent implements OnInit {
    private get _blankForm(): FormData {
        return {
            id: null,
            questions: [],
            title: ''
        };
    }

    form: FormData = this._blankForm;

    constructor(private formService: FormService, private route: ActivatedRoute) {}

    ngOnInit() {
        this.formService.forms.subscribe(() => {
            this.route.params.map((param) => parseInt(param['id']))
                .forEach((id: number) => this.selectForm(id));
        });
    }

    private selectForm(id: number) {
        const selectedForm = this.formService.getForm(id);

        if (selectedForm) {
            this.form = selectedForm;
        } else {
            this.form = this._blankForm;
        }
    }
}
We’re now importing OnInit from Angular, as well as the ActivatedRoute. We also pull in our FormService. In the constructor of our component we pull in the instances of FormService and ActivatedRoute.
Our FormViewerComponent now implements OnInit. Remember that OnInit means that we need a public ngOnInit method on our class, which will be called on the first change detection cycle. This is why we called on fixture.detectChanges() in our spec file.
In ngOnInit we first subscribe to the forms from FormService. Once we know the forms are loaded in FormService, we start checking for changes to params of the ActivatedRoute instance. If params does change (i.e. the ID value changes), we’ll map the id value out of params and ensure it’s an integer. That value is then sent to forEach where we call the private selectForm method with the id.
In turn, selectForm calls FormService.getForm with the id, satisfying our test. We also added a check to ensure that the component’s form value only gets set when getForm returns a valid form. If not, our template would try to access attributes on a null form. When there is no returned form, we set form to a blank FormData object.
We’ve successfully tested a routed component with parameters.
Finally, to get it visibly working:
Copy the remaining non-router-outlet code from app.component.html and paste it into the file form-viewer.component.html:
<h1>{{ form.title }}</h1>

<dynamic-form [questions]="form.questions"></dynamic-form>

<br>
<a routerLink="/">« Home</a>
Note that selectedForm has been changed to just form.
We’ve removed the span wrapper which AppComponent needed and added a link after the form to get us back to the list of forms. Notice that we do not use an href on our link. We use the Angular directive for binding to a route, routerLink. Using routerLink could be a post of its own, so for more information, see the Angular documentation on routing.
Run the Application
We are now ready to see the fruits of our labor. Open a shell/terminal and run:
npm startNavigate to http://localhost:9000 and your screen should look something like:

If you click a “Display” button, you should see something like:
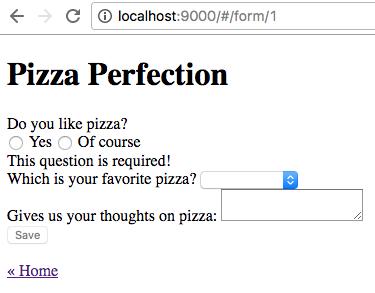
This looks pretty much like our last application, but if you look at the URLs, you can see the router at work. In our previous application, the URL was always set to http://localhost:9000. However, now the default URL is http://localhost:9000/forms and, when a form is displayed, the URL is something like http://localhost:9000/form/1!
Continuous Testing with Semaphore
As always, we’re not really done testing until we’ve incorporated it into our continuous integration service. We’ll use Semaphore for continuous integration.
If you haven’t done so already, push your code to a repository on either GitHub or Bitbucket.
Once our code is committed to a repository, we can add a CI step to our Angular 2 development without much effort.
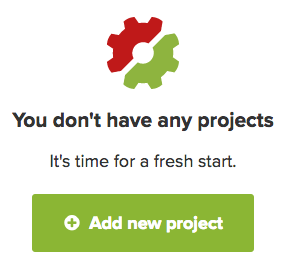
- You’ll be prompted to select an organization. Just select your account:

- Next, if you haven’t already, select either Github or Bitbucket, depending on where your repository lives:
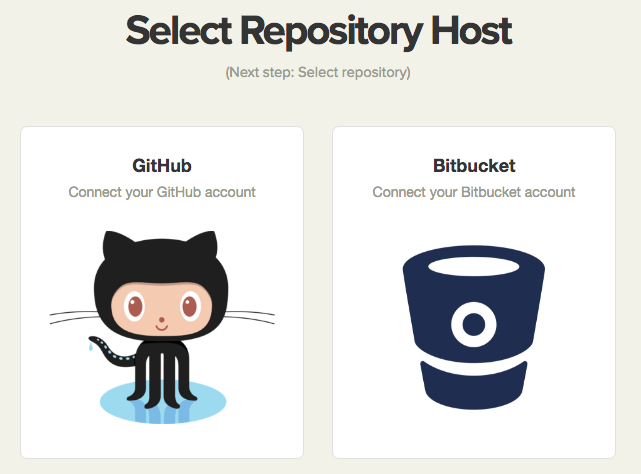
- Then, from the provided list, select the project repository:
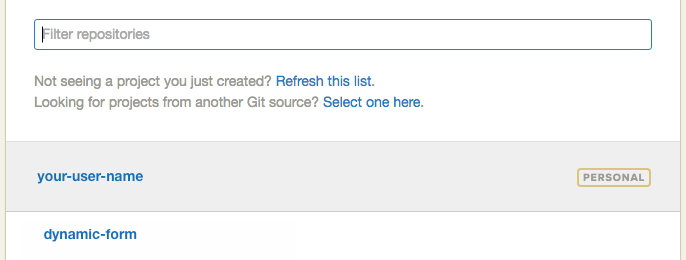
- Next, select the branch (most likely “master”),
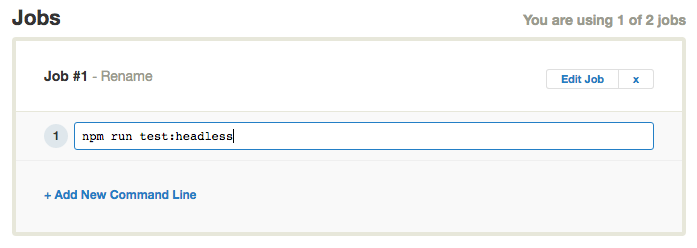
- Once Semaphore completes analysis of your project, update the job to
npm run test:headless,
- Click “Build with These Settings” and it’s building.

From now on, any time you push code to your repository, Semaphore will start building it, making testing and deploying your code continuously fast and simple.
Conclusion
In this article, we took our existing application and separated it into two separate views. We utilized the Angular router to allow a user to navigate between those views, including navigating to a dynamic route in order to view a form. This application is now rendering components, employing services to manage data, using data-fetch with HTTP, and taking advantage of the Angular router to perform navigation.
The router is a very feature-rich library under the Angular umbrella. We have just scratched the surface. If you’d like to learn more, you can take a look at the Angular documentation on Routing & Navigation.
If you have questions or comments, please leave them in the comments section below. Thank you for reading!
