This tutorial was initially published on DailyDrip. Read the original post here.
Continuous Deployment to Heroku
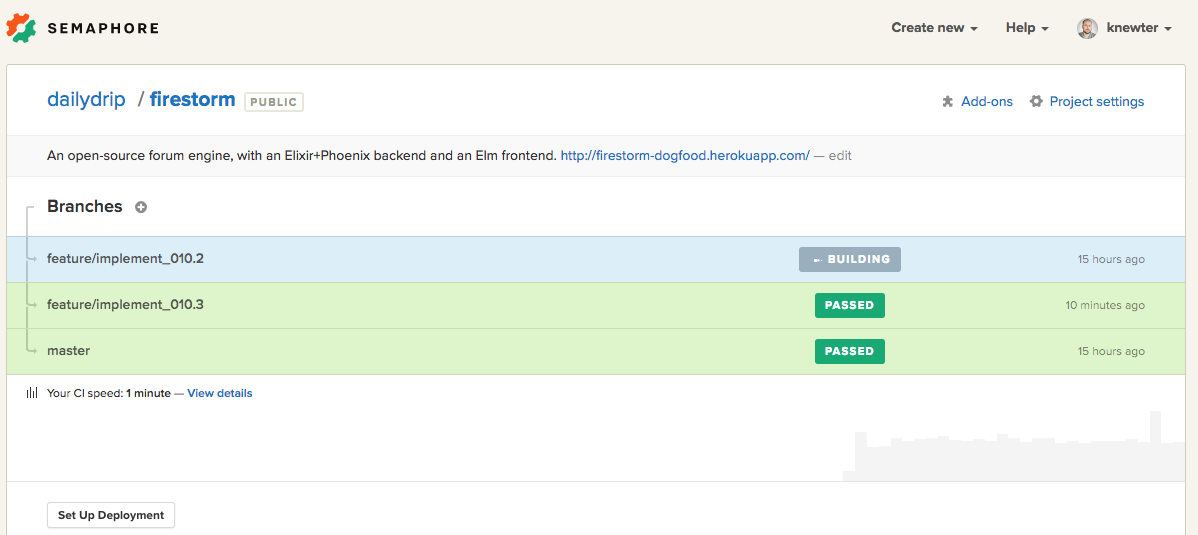
In the previous tutorial, we set up continuous integration for Firestorm via Semaphore. In this tutorial, we’ll deploy our application to Heroku, and then set up Semaphore to deploy each time the tests pass on the master branch. Let’s get started.
Project
We’re starting with the dailydrip/firestorm repo tagged before this episode.
We’ve already signed up for Heroku and Semaphore and installed the Heroku Toolbelt, which is Heroku’s CLI.
Heroku created the concept of buildpacks, which are a way to tell Heroku how to set up and run your application. We’ll be using the Heroku Elixir Buildpack.
We’ll create an app named firestorm-forum, specifying the buildpack:
heroku create firestorm-forum --buildpack "https://github.com/HashNuke/heroku-buildpack-elixir.git"
We need to add another buildpack, to handle the static compilation for our frontend assets.
heroku buildpacks:add https://github.com/gjaldon/heroku-buildpack-phoenix-static.git
We need to tweak our configuration a little to fetch some environment variables from Heroku:
vim config/prod.exs
# We'll enable SSL and force its use, and fetch the SECRET_KEY_BASE environment
# variable.
config :firestorm_web, FirestormWeb.Web.Endpoint,
  # ...
  url: [scheme: "https", host: "firestorm-forum.herokuapp.com", port: 443],
  force_ssl: [rewrite_on: [:x_forwarded_proto]],
  secret_key_base: System.get_env("SECRET_KEY_BASE")
# ...
# We'll use the POOL_SIZE var and let Heroku tell us how to talk to our database
config :firestorm_web, FirestormWeb.Repo,
  adapter: Ecto.Adapters.Postgres,
  url: System.get_env("DATABASE_URL"),
  pool_size: String.to_integer(System.get_env("POOL_SIZE") || "10"),
  ssl: true
# and we don't need a prod secrets file so we can remove that
We’re not using Phoenix Channels yet, but we will in the future. We need to reduce the timeout time for the websocket transport so that connections are closed before Heroku’s 55 second timeout:
vim lib/firestorm_web/web/channels/user_socket.ex
defmodule FirestormWeb.Web.UserSocket do
  # ...
  transport :websocket, Phoenix.Transports.WebSocket,
    timeout: 45_000
  # ...
end
Finally, we’ll create a Procfile. This is what Heroku uses to determine how to start your application:
vim Procfile
web: MIX_ENV=prod mix phx.server
Now, let’s create our database on Heroku:
heroku addons:create heroku-postgresql:hobby-dev
And we’ll configure its pool size:
heroku config:set POOL_SIZE=18
We get 20 connections to our database on the hobby tier, so we’ll configure it to be slightly below that number so we have a couple of spare connections to use for things like migrations and mix tasks.
When we do run a mix task, we can limit the number of connections it attempts to create to make sure we don’t exceed the headroom:
# example:
# heroku run "POOL_SIZE=2 mix ecto.migrate"
Let’s create the secret key and set our Heroku environment variable:
mix phoenix.gen.secret
# copy its output
heroku config:set SECRET_KEY_BASE="the_previous_output"
We have a few more environment variables that we need to make available to our application as well. We can configure this by creating an elixir_buildpack.config file:
vim elixir_buildpack.config
config_vars_to_export=(AWS_ACCESS_KEY_ID AWS_SECRET_ACCESS_KEY AWS_S3_BUCKET AWS_S3_REGION GITHUB_CLIENT_ID GITHUB_CLIENT_SECRET)
Some of these env vars are secret, so we’ll set them off-screen. Now, we’re ready to deploy. Let’s add the files we changed and push it up to our repo:
git checkout -b feature/episode_010.3
git add config/prod.exs lib/firestorm_web/web/channels/user_socket.ex elixir_buildpack.config
git commit -m"Add Heroku configuration"
git push origin feature/episode_010.3
Now we can deploy to Heroku. Normally you would just push master up to Heroku, but we’ll push this feature branch to Heroku’s master branch instead:
git push heroku feature/episode_010.3:master
On a Phoenix application that uses Brunch, this would be sufficient. We’re using webpack though, so there’s a little more work that has to go into it. To get Heroku to build our assets with webpack, we can create a compile script that the buildpack will use:
vim compile
#!/bin/bash

NODE_ENV=production ./node_modules/.bin/webpack -p
cd ..
mix phx.digest
chmod +x compile
git add .
git commit -m"Add custom compile script to handle webpack"
git push origin feature/episode_010.3
git push heroku feature/episode_010.3:master
If we push this, it’s still not quite enough – there’s an error when uglify tries to run. Let’s add a .babelrc for our assets:
vim assets/.babelrc
{
  "presets": [
    ["es2015", { "modules": false }]
  ]
}
git add .
git commit -m"Add babelrc for assets"
git push origin feature/episode_010.3
git push heroku feature/episode_010.3:master
With this, everything pushes up and builds successfully. If we try to visit the site, it won’t work though. We can check the logs to find out why:
heroku logs
We haven’t run our migrations. Let’s do that:
heroku run "POOL_SIZE=2 mix ecto.migrate"
heroku ps:restart
Now if we visit the app, it works. Mostly. We still haven’t setup the frontend to hit the deployed URL, and we’d really like to set up continuous deployment so it gets deployed each time we push.
First, we’ll configure the frontend to hit this API:
vim assets/config/production.js
module.exports = {
  apiBaseUrl: "https://firestorm-forum.herokuapp.com/api/v1/"
};
Before we push this, we’ll set up semaphore for continuous deployment.
First, we’ll click Set up deployment on semaphore for the project:
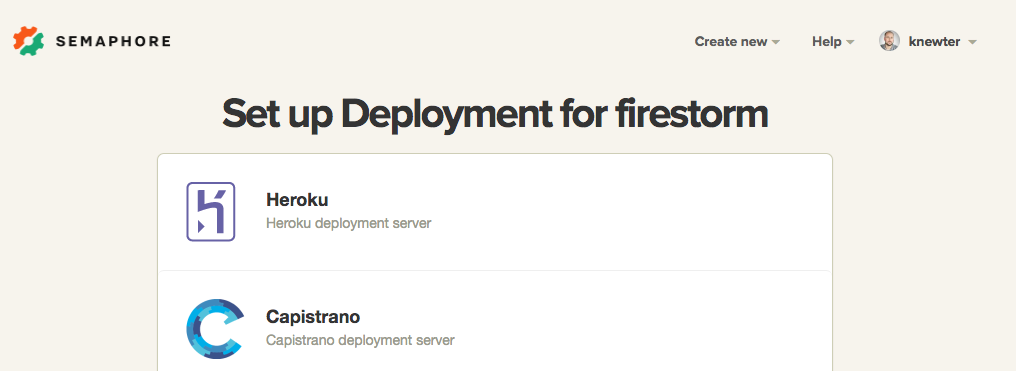
We’ll click ‘Heroku’:
We’ll pick automatic deployment:
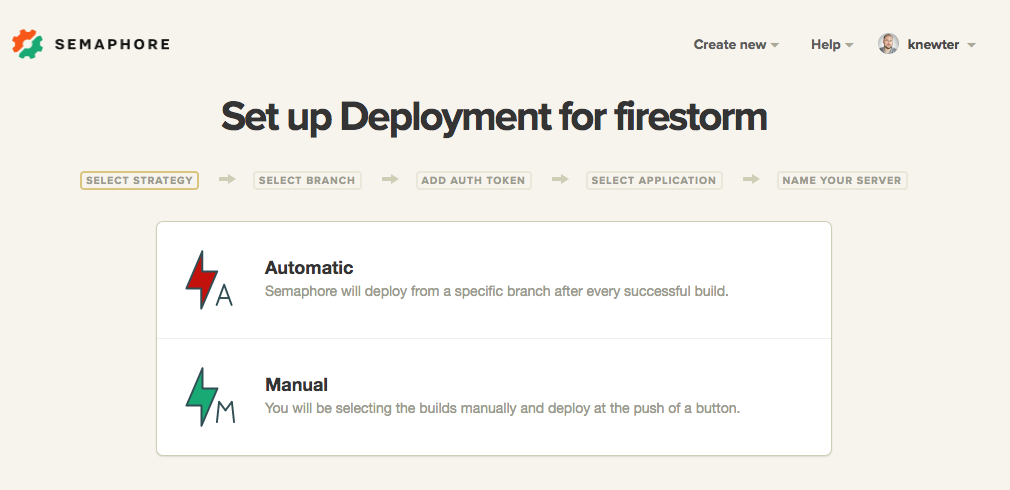
Then we’ll pick the branch we want to deploy from.
Next, we have to paste my Heroku API key. Then, we pick the application to deploy and complete setup.
We can also modify the deployment steps to add a migration step after each deploy:
heroku run --exit-code -- MIX_ENV=prod POOL_SIZE=2 mix ecto.migrate
Now we can push the js config change up, just to our github this time – we’ll let Semaphore handle the Heroku deployment.
git add .
git commit -m"Set up js production url"
git push origin feature/episode_010.3
Once the tests pass, it will deploy to Heroku for us. And that’s it!
Summary
Today we deployed Firestorm to Heroku and set up Continuous Deployment via Semaphore.
If you’d like to sign up for Semaphore, you can use the coupon code DAILYDRIP30 for a 30% discount for three months. The coupon expires on August 31, 2017.
Feel free to leave any comments or questions you may have in the comment section below.
