Introduction
This tutorial demonstrates how to build, test, deploy, and monitor a Java Spring web application, hosted on Apache Tomcat, load-balanced by NGINX, monitored by ELK, and all containerized with Docker.
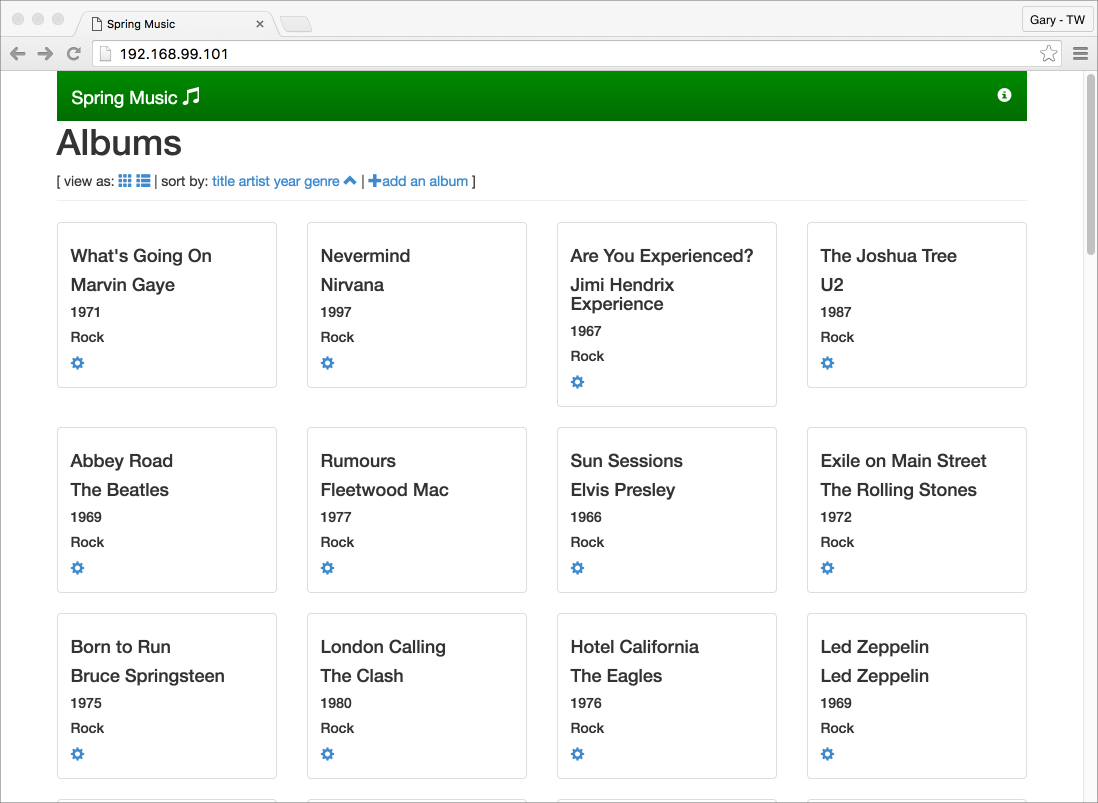
The project is based on a sample Java Spring application, Spring Music, available on GitHub from Cloud Foundry. The Spring Music application, a record album collection, was originally designed to demonstrate the use of database services on Cloud Foundry, using the Spring Framework. Instead of Cloud Foundry, this post’s Spring Music application is hosted within Docker containers on a VirtualBox VM, and optionally on AWS.
The project’s source code and all associated build files are stored on the springmusic_v2 branch of the garystafford/spring-music repository, also on GitHub. All files necessary to build the Docker portion of the project are stored on the docker_v2 branch of the garystafford/spring-music-docker repository on GitHub.

Application Architecture
The Java Spring Music application uses the following technologies: Java 8, Spring Framework, NGINX, Apache Tomcat, MongoDB, and the ELK Stack with Filebeat. This project’s testing frameworks include the Spring MVC Test Framework, Mockito, Hamcrest, and JUnit.
A few changes were made to the original Spring Music application, for this demonstration, including:
- Move from Java 1.7 to 1.8 (including newer Tomcat version),
- Add unit tests for Continuous Integration demonstration purposes,
- Modify MongoDB configuration class to work with non-local, containerized MongoDB instances,
- Add Gradle
warNoStatictask to build WAR without static assets, - Add Gradle
zipStatictask to ZIP up the application’s static assets for deployment to NGINX, - Add Gradle
zipGetVersiontask with a versioning scheme for build artifacts, - Add
context.xmlfile andMANIFEST.MFfile to the WAR file, - Add Log4j
RollingFileAppenderappender to send log entries to Filebeat, and - Update the versions of several dependencies, including Gradle, Spring, and Tomcat.
This project uses the following technologies to build, publish, deploy, and host the Java Spring Music application: Gradle, git, GitHub, Semaphore, Oracle VirtualBox, Docker, Docker Compose, Docker Machine, Docker Hub, and, optionally, Amazon Web Services (AWS).

NGINX
To increase the application’s performance, the application’s static content, including CSS, images, JavaScript, and HTML files, is hosted by NGINX. The application’s WAR file is hosted by Apache Tomcat. Requests for non-static content are proxied through NGINX on the front-end, to a set of three load-balanced Tomcat instances on the back-end. To further increase application performance, NGINX is configured for browser caching of the static content. In many enterprise environments, the use of a Java EE application server, such as Tomcat, WebLogic, or JBoss, is still commonplace, as opposed to the use of standalone Spring Boot applications.
Reverse proxying and caching are configured thought NGINX’s default.conf file, in the server configuration section:
server {
  listen        80;
  server_name   proxy;

  location ~* \/assets\/(css|images|js|template)\/* {
    root          /usr/share/nginx/;
    expires       max;
    add_header    Pragma public;
    add_header    Cache-Control "public, must-revalidate, proxy-revalidate";
    add_header    Vary Accept-Encoding;
    access_log    off;
  }
The three Tomcat instances are manually configured for load-balancing using NGINX’s default round-robin algorithm. Load-balancing is configured through the default.conf file, in the upstream configuration section:
upstream backend {
  server music_app_1:8080;
  server music_app_2:8080;
  server music_app_3:8080;
}
Client requests are received through port 80 on the NGINX server. NGINX redirects requests for non-static content, such as HTTP REST calls, to one of the three Tomcat instances on port 8080.
MongoDB
The Spring Music application was designed to work with many types of data stores. Options include MySQL, Postgres, Oracle, MongoDB, Redis, and H2, an in-memory Java SQL database. This project uses MongoDB, the popular NoSQL database, as a data store.
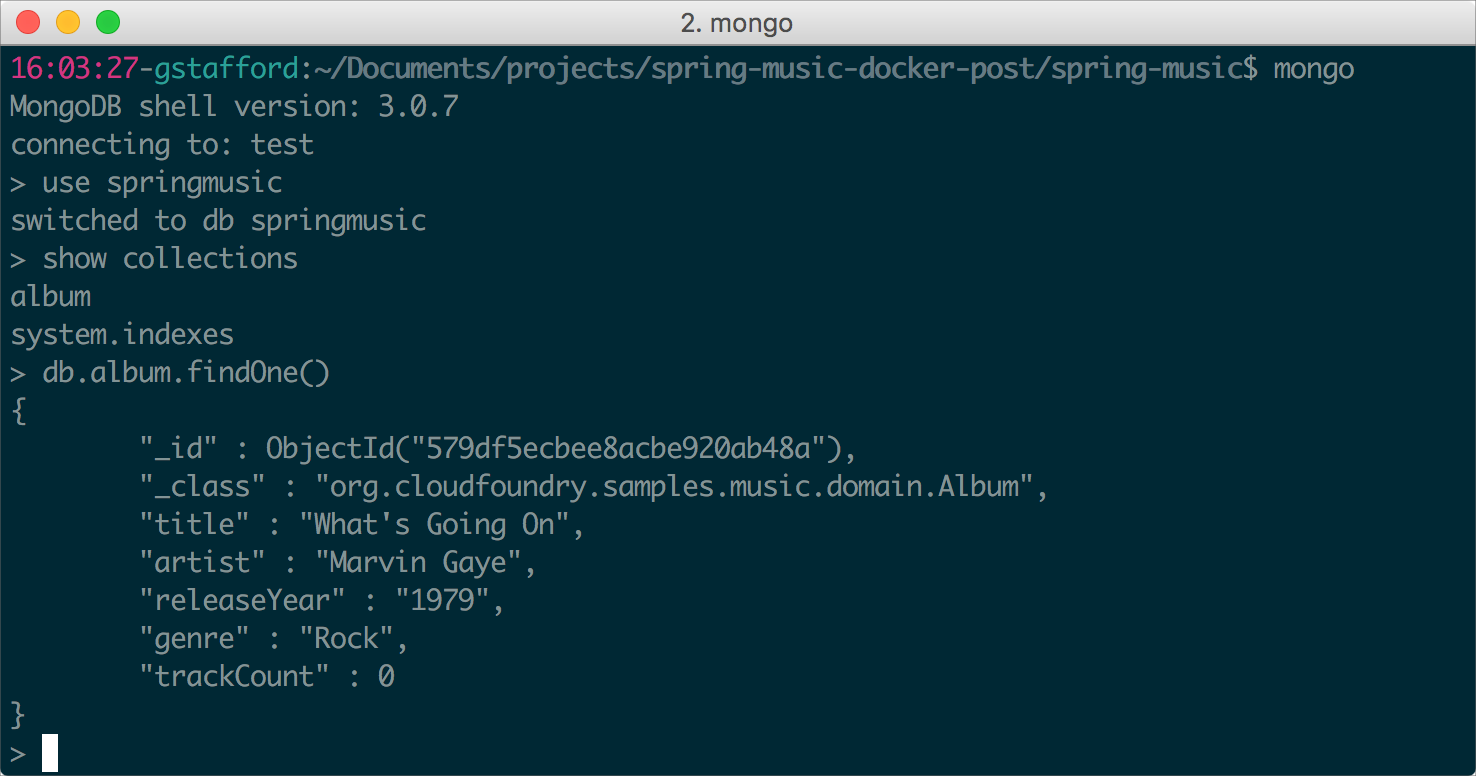
The Spring Music application performs basic CRUD operations against record album data (documents), stored in the MongoDB database. The MongoDB database is created and populated with album data, from a JSON file, when the Spring Music application first starts.

ELK
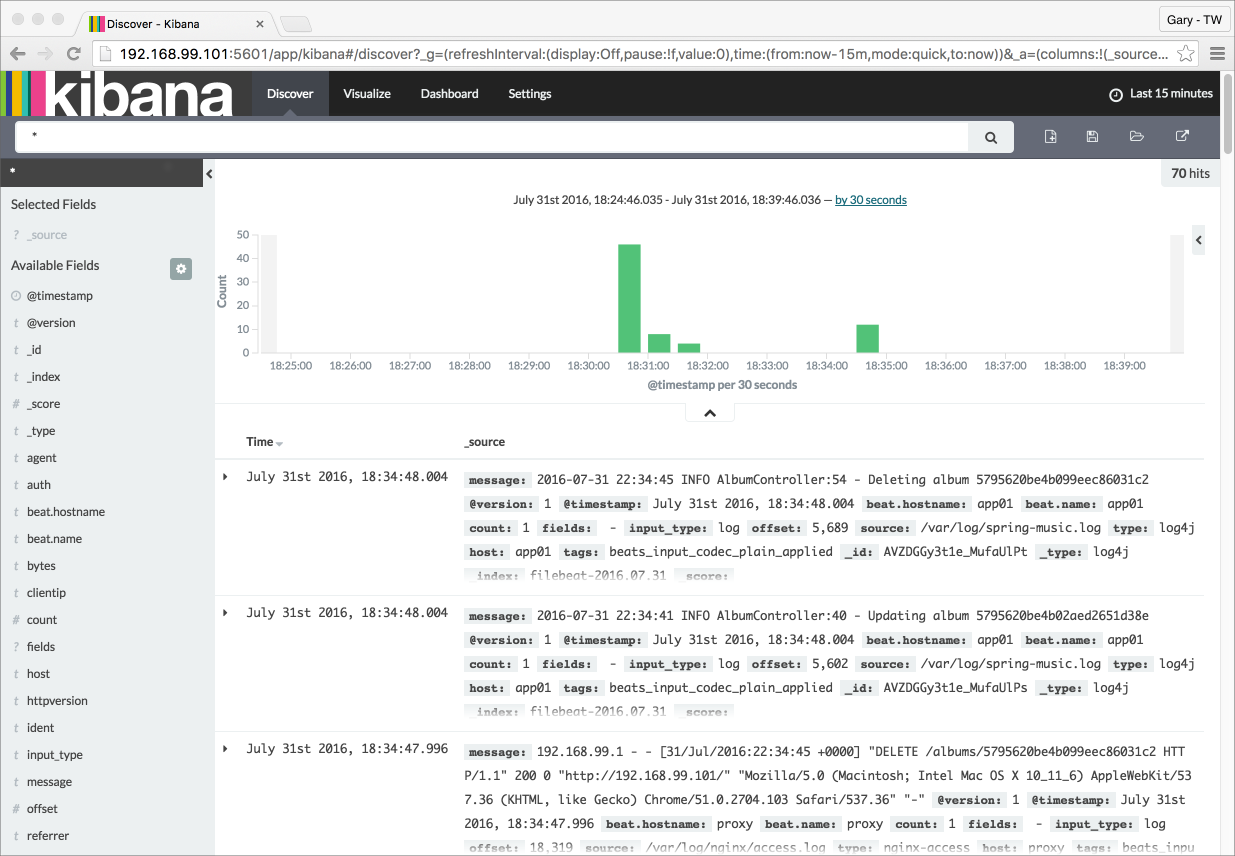
The ELK Stack with Beats (Filebeat) aggregates Tomcat, NGINX, and Java Log4j logging, providing debugging and analytics. The ELK Stack resides in a separate Docker container. Filebeat is installed in the NGINX container and in each Tomcat container. Filebeat pushes log entries to ELK.

Continuous Integration
The project produces two build artifacts, a WAR file for the Java application, and a ZIP file for the static web content. Both artifacts are built automatically by Semaphore, whenever source code is pushed to the springmusic_v2 branch of the garystafford/spring-music repository on GitHub.
Semaphore automatically pulls the source code from the project’s GitHub repository. Semaphore then executes a series of Gradle commands to build and test the source code and build the artifacts. Finally, Semaphore executes a shell script to deploy the artifacts back to GitHub.
The Gradle commands and shell script require environmentally-specific and project-specific information. Semaphore projects may be configured with environment variables. Since environment variables often contain sensitive information, such as passwords and GitHub access tokens, Semaphore provides the ability to encrypt the variables. This project contains three variables.
Following a successful build and unit testing, Semaphore pushes the two build artifacts, the WAR and the ZIP file, back to a separate build-artifacts branch of the same garystafford/spring-music repository on GitHub. The build-artifacts branch acts as a pseudo binary repository for the project, much like JFrog’s Artifactory. The build artifacts are later pulled, and used by Docker Compose to create immutable Docker images.
Build Notifications
Semaphore has several push notification options, including email, Slack, Campfire, and HipChat. Most options have mobile client applications. We’ve configured Semaphore to push notifications to a ‘semaphore-alerts’ Slack channel. Slack notifications eliminate the need to monitor Semaphore directly, for build status.
Automation Code
Semaphore divides the project’s Build Settings into three stages: ‘Setup’, ‘Jobs’, and ‘After job’. Jobs can be run in parallel.
The project’s Build Settings, execute a series of commands, which rely on the gradle.build file and the deploy_semaphore.sh script.
Custom gradle.build Tasks are as follows:
// versioning build artifacts
def major = '2'
def minor = System.env.SEMAPHORE_BUILD_NUMBER
minor = (minor != 'null') ? minor : '0'
def artifact_version = major + '.' + minor

// new Gradle build tasks
task warNoStatic(type: War) {
  // omit the version from the war file name
  version = ''
  exclude '**/assets/**'
  manifest {
    attributes
      'Manifest-Version': '1.0',
      'Created-By': currentJvm,
      'Gradle-Version': GradleVersion.current().getVersion(),
      'Implementation-Title': archivesBaseName + '.war',
      'Implementation-Version': artifact_version,
      'Implementation-Vendor': 'Gary A. Stafford'
  }
}

task warCopy(type: Copy) {
  from 'build/libs'
  into 'build/distributions'
  include '**/*.war'
}

task zipGetVersion (type: Task) {
  ext.versionfile =
    new File("${projectDir}/src/main/webapp/assets/buildinfo.properties")
  versionfile.text = 'build.version=' + artifact_version
}

task zipStatic(type: Zip) {
  from 'src/main/webapp/assets'
  appendix = 'static'
  version = ''
}
The deploy_sempahore.sh Script:
#!/bin/bash

set -e

cd build/distributions
git init

git config user.name "semaphore"
git config user.email "${COMMIT_AUTHOR_EMAIL}"

git add .
git commit -m "Deploying Semaphore Build #${SEMAPHORE_BUILD_NUMBER} artifacts to GitHub"

git push --force --quiet "https://${GH_TOKEN}@${GH_REF}" \
  master:build-artifacts > /dev/null 2>&1
Docker Setup
Make sure VirtualBox, Docker, Docker Compose, and Docker Machine are installed and running. At the time of this post, these are the latest versions of software we’ll use:
Mac OS X 10.11.6
VirtualBox 5.0.26
Docker 1.12.1-beta26
Docker Compose 1.8.0
Docker Machine 0.8.1
To clone the GitHub build project, construct the VirtualBox host VM, pull the Docker images, and create the containers, run the project’s build script, using the following command: sh ./build_project.sh. The build script is useful when working with CI/CD automation tools. However, we strongly recommend manually running the individual commands first, to gain a better understand the build process.
set -ex

# clone project
git clone -b docker_v2 --single-branch \
  https://github.com/garystafford/spring-music-docker.git music \
  && cd "$_"

# provision VirtualBox VM
docker-machine create --driver virtualbox springmusic

# set new environment
docker-machine env springmusic \
  && eval "$(docker-machine env springmusic)"

# mount a named volume on host to store mongo and elk data
# ** assumes your project folder is 'music' **
docker volume create --name music_data
docker volume create --name music_elk

# create bridge network for project
# ** assumes your project folder is 'music' **
docker network create -d bridge music_net

# build images and orchestrate start-up of containers (in this order)
docker-compose -p music up -d elk && sleep 15 \
  && docker-compose -p music up -d mongodb && sleep 15 \
  && docker-compose -p music up -d app \
  && docker-compose scale app=3 && sleep 15 \
  && docker-compose -p music up -d proxy && sleep 15

# run a simple connectivity test of application
for i in {1..9}; do curl -I $(docker-machine ip springmusic); done
Deploying to AWS
By changing the Docker Machine driver to AWS EC2 from VirtualBox, and providing AWS credentials, the springmusic environment can also be built on AWS.
Build Process
The build stage uses a Docker Machine to provision a single VirtualBox springmusic VM on which it hosts the project’s containers. VirtualBox provides an easy solution that can be run locally for initial development and testing of the application.
Next, two shared Docker volumes and a project-specific Docker bridge network are created.
Following that, using the project’s individual Dockerfiles, Docker Compose pulls base Docker images from Docker Hub for NGINX, Tomcat, ELK, and MongoDB. Project-specific immutable Docker images are then built for NGINX, Tomcat, and MongoDB. While constructing the project-specific Docker images for NGINX and Tomcat, the latest Spring Music build artifacts are pulled and installed into the corresponding images.
Finally, Docker Compose builds and deploys the containers on to the VirtualBox VM.
NGINX Dockerfile:
# NGINX image with build artifact

FROM nginx:latest

MAINTAINER Gary A. Stafford <garystafford@rochester.rr.com>
ENV REFRESHED_AT 2016-09-17

ENV GITHUB_REPO https://github.com/garystafford/spring-music/raw/build-artifacts
ENV STATIC_FILE spring-music-static.zip

RUN apt-get update -qq \
  && apt-get install -qqy curl wget unzip nano \
  && apt-get clean \
  \
  && wget -O /tmp/${STATIC_FILE} ${GITHUB_REPO}/${STATIC_FILE} \
  && unzip /tmp/${STATIC_FILE} -d /usr/share/nginx/assets/

COPY default.conf /etc/nginx/conf.d/default.conf

# tweak nginx image set-up, remove log symlinks
RUN rm /var/log/nginx/access.log /var/log/nginx/error.log

# install Filebeat
ENV FILEBEAT_VERSION=filebeat_1.2.3_amd64.deb
RUN curl -L -O https://download.elastic.co/beats/filebeat/${FILEBEAT_VERSION} \
 && dpkg -i ${FILEBEAT_VERSION} \
 && rm ${FILEBEAT_VERSION}

# configure Filebeat
ADD filebeat.yml /etc/filebeat/filebeat.yml

# CA cert
RUN mkdir -p /etc/pki/tls/certs
ADD logstash-beats.crt /etc/pki/tls/certs/logstash-beats.crt

# start Filebeat
ADD ./start.sh /usr/local/bin/start.sh
RUN chmod +x /usr/local/bin/start.sh
CMD [ "/usr/local/bin/start.sh" ]
Tomcat Dockerfile:
# Apache Tomcat image with build artifact

FROM tomcat:8.5.4-jre8

MAINTAINER Gary A. Stafford <garystafford@rochester.rr.com>
ENV REFRESHED_AT 2016-09-17

ENV GITHUB_REPO https://github.com/garystafford/spring-music/raw/build-artifacts
ENV APP_FILE spring-music.war
ENV TERM xterm
ENV JAVA_OPTS -Djava.security.egd=file:/dev/./urandom

RUN apt-get update -qq \
  && apt-get install -qqy curl wget \
  && apt-get clean \
  \
  && touch /var/log/spring-music.log \
  && chmod 666 /var/log/spring-music.log \
  \
  && wget -q -O /usr/local/tomcat/webapps/ROOT.war ${GITHUB_REPO}/${APP_FILE} \
  && mv /usr/local/tomcat/webapps/ROOT /usr/local/tomcat/webapps/_ROOT

COPY tomcat-users.xml /usr/local/tomcat/conf/tomcat-users.xml

# install Filebeat
ENV FILEBEAT_VERSION=filebeat_1.2.3_amd64.deb
RUN curl -L -O https://download.elastic.co/beats/filebeat/${FILEBEAT_VERSION} \
 && dpkg -i ${FILEBEAT_VERSION} \
 && rm ${FILEBEAT_VERSION}

# configure Filebeat
ADD filebeat.yml /etc/filebeat/filebeat.yml

# CA cert
RUN mkdir -p /etc/pki/tls/certs
ADD logstash-beats.crt /etc/pki/tls/certs/logstash-beats.crt

# start Filebeat
ADD ./start.sh /usr/local/bin/start.sh
RUN chmod +x /usr/local/bin/start.sh
CMD [ "/usr/local/bin/start.sh" ]
Docker Compose v2 YAML
This project takes advantage of improvements in Docker 1.12, including Docker Compose’s new v2 YAML format. Improvements to the docker-compose.yml file include eliminating the need to link containers and expose ports, and the addition of named networks and volumes.
version: '2'

services:
  proxy:
    build: nginx/
    ports:
    - 80:80
    networks:
    - net
    depends_on:
    - app
    hostname: proxy
    container_name: proxy

  app:
    build: tomcat/
    ports:
    - 8080
    networks:
    - net
    depends_on:
    - mongodb
    hostname: app

  mongodb:
    build: mongodb/
    ports:
    - 27017:27017
    networks:
    - net
    depends_on:
    - elk
    hostname: mongodb
    container_name: mongodb
    volumes:
    - music_data:/data/db
    - music_data:/data/configdb

  elk:
    image: sebp/elk:latest
    ports:
    - 5601:5601
    - 9200:9200
    - 5044:5044
    - 5000:5000
    networks:
    - net
    volumes:
    - music_elk:/var/lib/elasticsearch
    hostname: elk
    container_name: elk

volumes:
  music_data:
    external: true
  music_elk:
    external: true

networks:
  net:
    driver: bridge
The Results
If the build process has gone correctly, Docker Compose should have built and deployed six running Docker containers onto the springmusic VirtualBox VM. The containers include (1) NGINX container, (3) Tomcat containers, (1) MongoDB container, and (1) ELK container.
The build results can be seen from the command line by running a few simple Docker commands.
$ docker-machine ls
NAME          ACTIVE   DRIVER       STATE     URL                         SWARM              DOCKER        ERRORS
springmusic   *        virtualbox   Running   tcp://192.168.99.100:2376                      v1.12.1

$ docker volume ls
DRIVER              VOLUME NAME
local               music_data
local               music_elk

$ docker network ls
NETWORK ID          NAME             DRIVER              SCOPE
ca901af3c4cd        music_net           bridge              local

$ docker images
REPOSITORY          TAG                 IMAGE ID            CREATED              SIZE
music_proxy         latest              0c7103c814df        About a minute ago   250.3 MB
music_app           latest              9334e69eb412        2 minutes ago        400.3 MB
music_mongodb       latest              55d065b75ac9        3 minutes ago        366.4 MB

nginx               latest              4a88d06e26f4        47 hours ago         183.5 MB
sebp/elk            latest              2a670b414fba        2 weeks ago          887.2 MB
tomcat              8.5.4-jre8          98cc750770ba        2 weeks ago          334.5 MB
mongo               latest              48b8b08dca4d        2 weeks ago          366.4 MB

$ docker ps
CONTAINER ID        IMAGE               COMMAND                  CREATED              STATUS              PORTS                                                                                                      NAMES
5b3715650db3        music_proxy         "/usr/local/bin/start"   About a minute ago   Up About a minute   0.0.0.0:80->80/tcp, 443/tcp                                                                                proxy
9204f2959055        music_app           "/usr/local/bin/start"   2 minutes ago        Up 2 minutes        0.0.0.0:32780->8080/tcp                                                                                    music_app_3
ef97790a820c        music_app           "/usr/local/bin/start"   2 minutes ago        Up 2 minutes        0.0.0.0:32779->8080/tcp                                                                                    music_app_2
3549fd082ca9        music_app           "/usr/local/bin/start"   2 minutes ago        Up 2 minutes        0.0.0.0:32778->8080/tcp                                                                                    music_app_1
3da692c204da        music_mongodb       "/entrypoint.sh mongo"   4 minutes ago        Up 4 minutes        0.0.0.0:27017->27017/tcp                                                                                   mongodb
2e41cbdbc8e0        sebp/elk:latest     "/usr/local/bin/start"   4 minutes ago        Up 4 minutes        0.0.0.0:5000->5000/tcp, 0.0.0.0:5044->5044/tcp, 0.0.0.0:5601->5601/tcp, 0.0.0.0:9200->9200/tcp, 9300/tcp   elk
Testing the Application
Below are partial results of a simple curl test, hitting the NGINX server on port 80. Note the three different IP addresses in the Upstream-Address field between requests. This demonstrates NGINX’s round-robin load-balancing is working across the three Tomcat application instances, music_app_1, music_app_2, and music_app_3.
Also, note the sharp decrease in the Request-Time between the first three requests and subsequent three requests. The Upstream-Response-Time of the Tomcat instances doesn’t change, yet the total Request-Time is much shorter, due to caching of the application’s static assets by NGINX.
$ for i in {1..6}; do curl -I $(docker-machine ip springmusic);done

HTTP/1.1 200
Server: nginx/1.11.4
Date: Sat, 17 Sep 2016 18:33:50 GMT
Content-Type: text/html;charset=ISO-8859-1
Content-Length: 2094
Connection: keep-alive
Accept-Ranges: bytes
ETag: W/"2094-1473924940000"
Last-Modified: Thu, 15 Sep 2016 07:35:40 GMT
Content-Language: en
Request-Time: 0.575
Upstream-Address: 172.18.0.4:8080
Upstream-Response-Time: 1474137230.048

HTTP/1.1 200
Server: nginx/1.11.4
Date: Sat, 17 Sep 2016 18:33:51 GMT
Content-Type: text/html;charset=ISO-8859-1
Content-Length: 2094
Connection: keep-alive
Accept-Ranges: bytes
ETag: W/"2094-1473924940000"
Last-Modified: Thu, 15 Sep 2016 07:35:40 GMT
Content-Language: en
Request-Time: 0.711
Upstream-Address: 172.18.0.5:8080
Upstream-Response-Time: 1474137230.865

HTTP/1.1 200
Server: nginx/1.11.4
Date: Sat, 17 Sep 2016 18:33:52 GMT
Content-Type: text/html;charset=ISO-8859-1
Content-Length: 2094
Connection: keep-alive
Accept-Ranges: bytes
ETag: W/"2094-1473924940000"
Last-Modified: Thu, 15 Sep 2016 07:35:40 GMT
Content-Language: en
Request-Time: 0.326
Upstream-Address: 172.18.0.6:8080
Upstream-Response-Time: 1474137231.812

# assets now cached...

HTTP/1.1 200
Server: nginx/1.11.4
Date: Sat, 17 Sep 2016 18:33:53 GMT
Content-Type: text/html;charset=ISO-8859-1
Content-Length: 2094
Connection: keep-alive
Accept-Ranges: bytes
ETag: W/"2094-1473924940000"
Last-Modified: Thu, 15 Sep 2016 07:35:40 GMT
Content-Language: en
Request-Time: 0.012
Upstream-Address: 172.18.0.4:8080
Upstream-Response-Time: 1474137233.111

HTTP/1.1 200
Server: nginx/1.11.4
Date: Sat, 17 Sep 2016 18:33:53 GMT
Content-Type: text/html;charset=ISO-8859-1
Content-Length: 2094
Connection: keep-alive
Accept-Ranges: bytes
ETag: W/"2094-1473924940000"
Last-Modified: Thu, 15 Sep 2016 07:35:40 GMT
Content-Language: en
Request-Time: 0.017
Upstream-Address: 172.18.0.5:8080
Upstream-Response-Time: 1474137233.350

HTTP/1.1 200
Server: nginx/1.11.4
Date: Sat, 17 Sep 2016 18:33:53 GMT
Content-Type: text/html;charset=ISO-8859-1
Content-Length: 2094
Connection: keep-alive
Accept-Ranges: bytes
ETag: W/"2094-1473924940000"
Last-Modified: Thu, 15 Sep 2016 07:35:40 GMT
Content-Language: en
Request-Time: 0.013
Upstream-Address: 172.18.0.6:8080
Upstream-Response-Time: 1474137233.594
Spring Music Application Links
Assuming the springmusic VM is running at 192.168.99.100, the following links can be used to access various project endpoints. Note each Tomcat instance exposes a uniquely random port, such as 32771, which maps to port 8080 internally. These random ports are not required by NGINX, which routes requests to Tomcat instances on port 8080. The unique port is only required for direct access to Tomcat’s Admin Web Console. Use the docker ps command to retrieve a Tomcat instance’s unique port.
- Spring Music Application: 192.168.99.100
- NGINX Status: 192.168.99.100/nginx_status
- Tomcat Web Console – music_app_1*: 192.168.99.100:32771/manager
- Environment Variables – music_app_1: 192.168.99.100:32771/env
- Album List (RESTful endpoint) – music_app_1: 192.168.99.100:32771/albums
- Elasticsearch Info: 192.168.99.100:9200
- Elasticsearch Status: 192.168.99.100:9200/_status?pretty
- Kibana Web Console: 192.168.99.100:5601
* The Tomcat user name is admin and the password is t0mcat53rv3r.
Helpful Links
- Cloud Foundry’s Spring Music Example
- Getting Started with Gradle for Java
- Introduction to Gradle
- Spring Framework
- Spring @PropertySource example
- Understanding Nginx HTTP Proxying, Load Balancing, Buffering, and Caching
- Common conversion patterns for log4j’s PatternLayout
- Java log4j logging
- Spring Test MVC ResultMatchers
Conclusion
In this tutorial, we went through the process of using Docker and Semaphore to deploy a non-trivial Java web application to a production-like environment on AWS. We hope you’ll find it helpful. Feel free to share your comments, questions, or tips in the comments below.
P.S. Want to continuously deliver your applications made with Docker? Check out Semaphore’s Docker support.
Read next:
