It’s no secret that code sharing speeds up development. And there is no better way of teaming up and collaborating than with a monorepo — provided you have the right tools.
What is Lerna
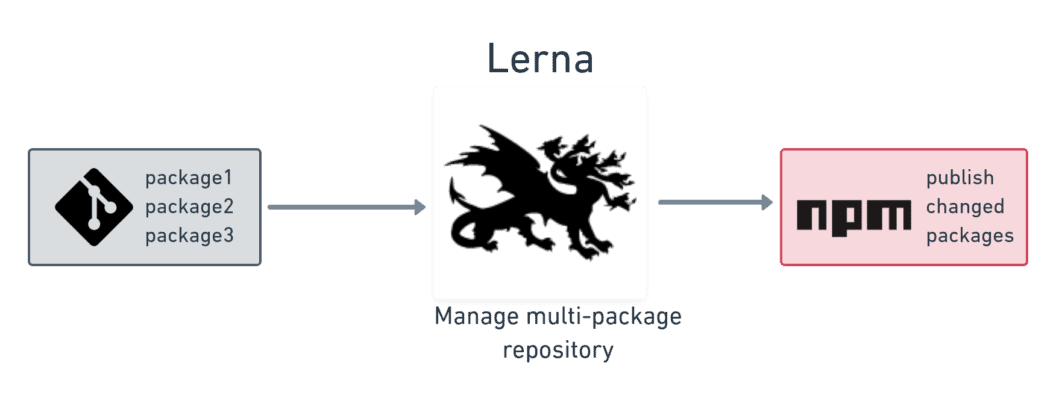
Lerna is a monorepo manager for JavaScript projects. It helps you take a large codebase and split it into independently deployable packages. Lerna handles every step in the release process — from downloading dependencies, and linking packages together, to testing and publishing updated packages to the NPM registry.
By running on top of traditional tools such as npm and Yarn, Lerna can understand how the packages in the repository are interconnected. Needless to say, this makes it so easy to share code in the repository.
Who is using Lerna
You don’t have to take my word on it. Lerna is an integral part of the development cycle of incredibly popular projects such as Babel, Facebook’s Jest, Gatsby, Google’s AngularJS, EmberJS, and MeteorJS.
Versioning modes in Lerna
Before using Lerna you need to decide on a versioning scheme for your repository. Lerna supports two modes: fixed and independent.
In fixed mode, Lerna maintains the same version for every package in the repository. Updated packages will always be bumped to the same version together. This is the default mode.
Independent mode means that each package is versioned separately, allowing maintainers to bump versions independently. On publication, you’ll be prompted on what to do with each updated package.
Creating a new monorepo
We have a little JavaScript monorepo demo to play with down here. Feel free to fork it and clone it as you follow this tutorial.
We’ll start by generating a Lerna config with lerna init. If you prefer the independent mode, add --independent to the command.
$ lerna init
Creating package.json
Creating lerna.json
Creating packages directory
Initialized Lerna files
Move all your applications, libraries, subprojects, and shared code into the packages folder. Each project should have a package.json and, ideally, a lockfile.
$ lerna import api
$ lerna import web
Lerna should now be detecting the packages. Which, for the demo, are two: a GraphQL API service and a Next.js static website.
$ lerna ls
api
web
found 2 packages
Use lerna bootstrap to download NPM dependencies and cross-link packages in the repository.
$ lerna bootstrapNow you should be able to run all tests found in every package with lerna run. Try them to make sure they work well as a group — the demo ships with unit and integration tests.
$ lerna exec npm run lint
$ lerna exec npm dev &
$ lerna exec npm test
$ lerna exec npm run test integration
Pre-release checks
We’re going to publish the packages to npmjs.com. To try out this part, you’ll need at least a free account on the service. Once logged in, generate an automation token and copy the value shown somewhere safe. We’ll need it in a few minutes.
While you’re at it, if you haven’t already, authenticate your machine with npm login.
NPM requires that all packages have unique identifiers, so we can’t use the names that came with the demo repository. Hence, rename the packages by editing their respective packages.json.
Probably the easiest way of making the package name unique is by scoping them. You can make a package scoped by prefixing it with your NPM username. In my case, I would change the first few lines of packages.json like this:
"name": "@tomfern/api",
"publishConfig": {
   "access": "public"
}
Commit the changes to the Git repository is clean:
$ git add lerna.json package.json packages
$ git commit -m "install lerna, ready to publish"
Publishing your packages
Publishing a package is a two-step process. First, Lerna pushes all the changes to the remote repository and creates a Git tag. Then, it deploys the update to NPM. Lerna uses Git tags to mark releases and track changes.
The first step is accomplished with lerna version.
$ lerna version
? Select a new version (currently 0.0.0) (Use arrow keys)
  Patch (0.0.1)
  Minor (0.1.0)
  Major (1.0.0)
  Prepatch (0.0.1-alpha.0)
  Preminor (0.1.0-alpha.0)
  Premajor (1.0.0-alpha.0)
  Custom Prerelease
  Custom Version
Lerna wants to know what the following version number should be. Using semantic versioning, we have to decide how to number this release. The convention is to use:
- patch (1.2.X): when it doesn’t introduce behavior changes. For example, to fix a bug.
- minor (1.X.3): when the version includes backward-compatible changes.
- major (X.2.3): when version introduces breaking changes.
Before making the change, Lerna will ask for confirmation:
Changes:
 - @tomfern/api: 1.0.0. => 1.2.3
 - @tomfern/web: 1.0.0 => 1.2.3

? Are you sure you want to create these versions?
After picking a version, Lerna creates a tag and pushes it:
$ lerna publish from-git
Found 2 packages to publish:
 - @tomfern/api => 1.2.3
 - @tomfern/web => 1.2.3
? Are you sure you want to publish these packages?
You can also combine versioning and publishing in one command:
$ lerna publish patchChange-detection
Lerna understands Git and JavaScript. Therefore, it can detect when a package has change. To see which packages should be published next use:
$ lerna changed
Looking for changed packages since v1.2.3
@tomfern/api
found 1 package ready to publish
You can find per-package changes details with lerna diff.
Configuring the CI/CD pipeline
For this part you’ll need a Semaphore account. If you don’t have one, you can create a trial account for free with GitHub.
Now the trick is to automate all these processes in a CI/CD pipeline. The plan is to:
- Install and cache all dependencies.
- Run all tests.
- If we are on a tagged release, publish the packages.
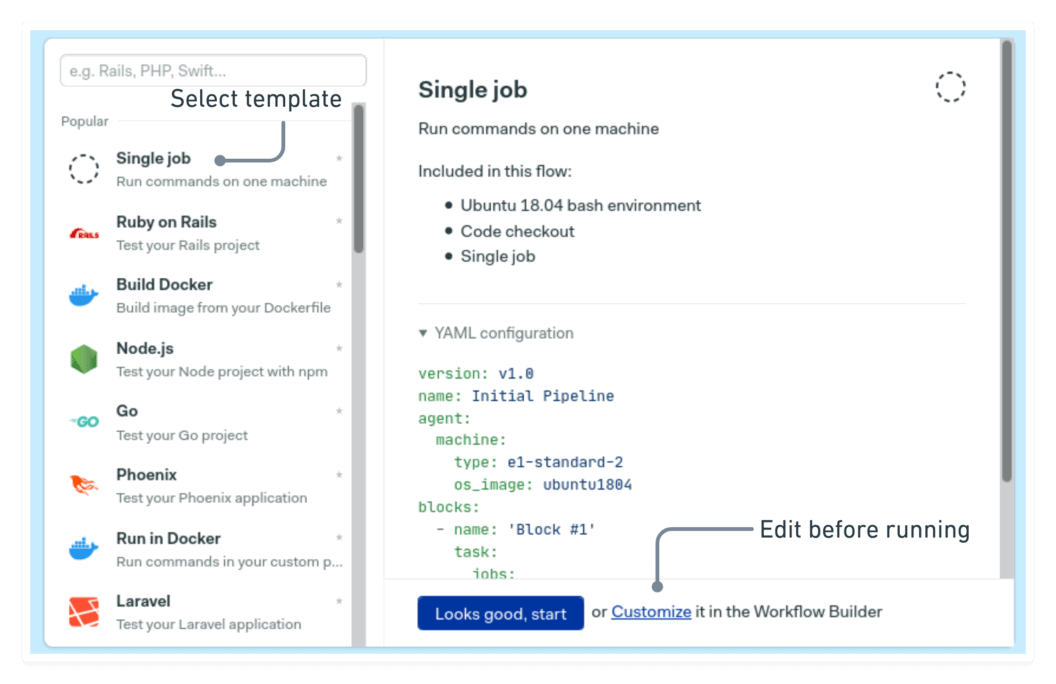
After login in to Semaphore, click on create new to add a new project.
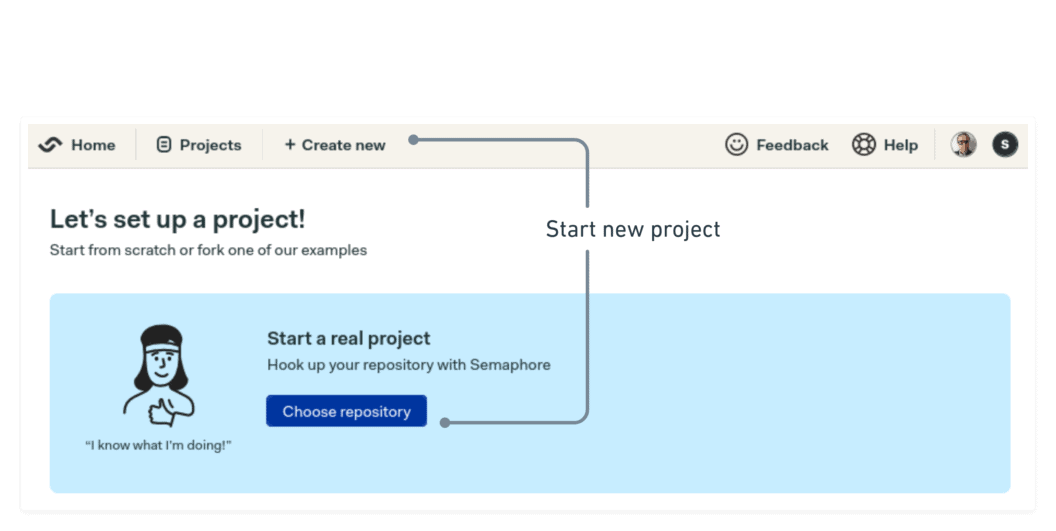
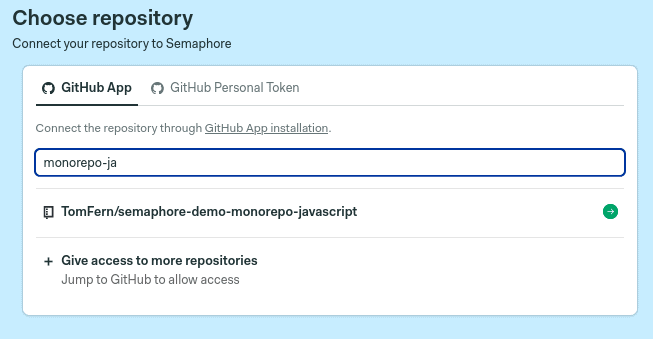
Choose the forked repository.
Finally, select “single job” and click on customize.
Install job
The build stage bootstraps the repository and caches the downloaded dependencies. We use lerna bootstrap and then npm exec cache to store the contents of node_modules in the Semaphore cache.
npm install --global lerna
checkout
lerna exec -- cache restore node-modules-\$LERNA_PACKAGE_NAME-$SEMAPHORE_GIT_BRANCH,node-modules-\$LERNA_PACKAGE_NAME
lerna bootstrap
lerna exec -- cache store node-modules-\$LERNA_PACKAGE_NAME-$SEMAPHORE_GIT_BRANCH,node-modules-\$LERNA_PACKAGE_NAME node_modules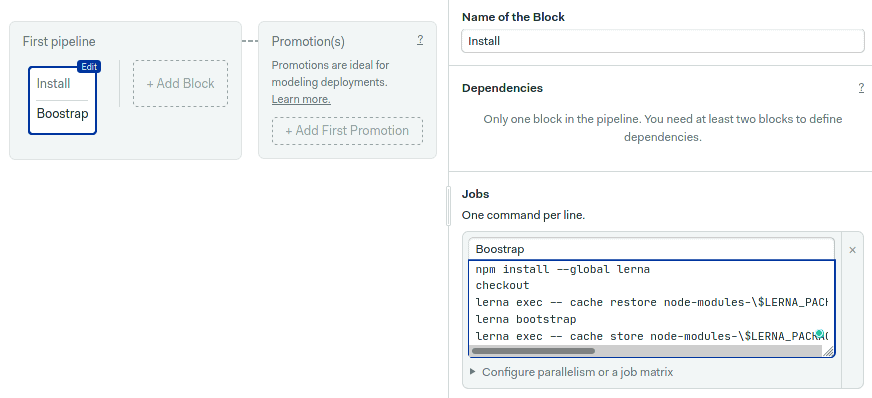
Test block
No continuous integration should lack tests. Our demo includes three types of tests:
- Linter: runs eslint to run static code analysis tests.
- Unit tests: executes unit tests in all packages.
- Integration test: executes the integration test suite.
Click on add block and scroll down on the right pane to the prologue. The prologue is executed before any jobs in the block. Type the following commands to retrieve the cached dependencies.
npm install --global lerna
checkout
lerna exec -- cache restore node-modules-\$LERNA_PACKAGE_NAME-$SEMAPHORE_GIT_BRANCH,node-modules-\$LERNA_PACKAGE_NAME
lerna bootstrap
The test jobs are all one-liners. This is the linter:
lerna run lintCreate two more jobs in the block, one for the unit tests:
lerna run testAnd one for the integration tests:
lerna run test-integration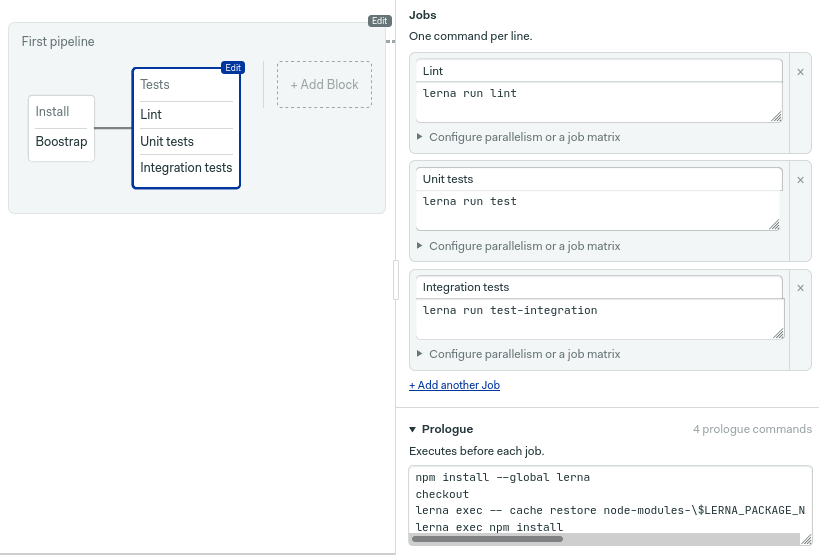
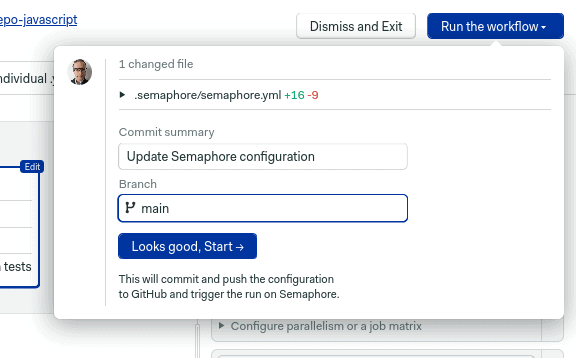
Click on “run the workflow” > start to try out the pipeline.
Continuous Deployment
The goal here is to publish packages to the NPM registry using continuous delivery.
We’ll begin by creating a secret on Semaphore. Click on settings on the main menu.

Then go to secrets and press create secret. In value, type NPM_TOKEN and fill in the automation token generated earlier. Save the secret.
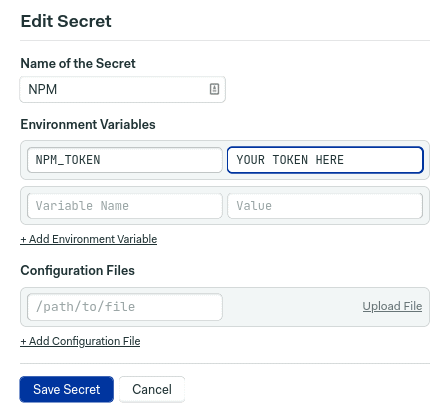
Go back to the workflow in Semaphore and click on edit workflow to open the editor.
Click on add promotion to create a second pipeline. Enable the automatic promotion checkbox and type this line, which selects tagged releases:
tag =~ '.*' AND result = 'passed'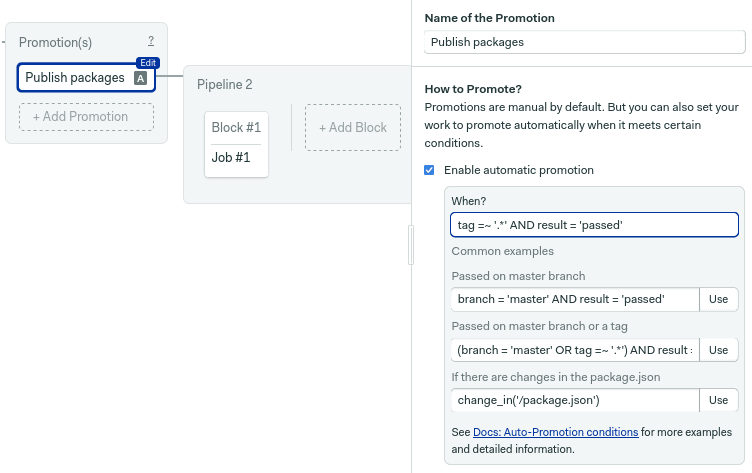
Click on the first job on the delivery pipeline and use the following commands in the job.
npm install --global lerna
checkout
echo "//registry.npmjs.org/:_authToken=$NPM_TOKEN" > .npmrc
lerna exec -- cache restore node-modules-\$LERNA_PACKAGE_NAME-$SEMAPHORE_GIT_BRANCH,node-modules-\$LERNA_PACKAGE_NAME node_modules
lerna bootstrap
lerna publish from-git --no-git-tag-version --no-push --yes
Scroll down and check the NPM secret created earlier.
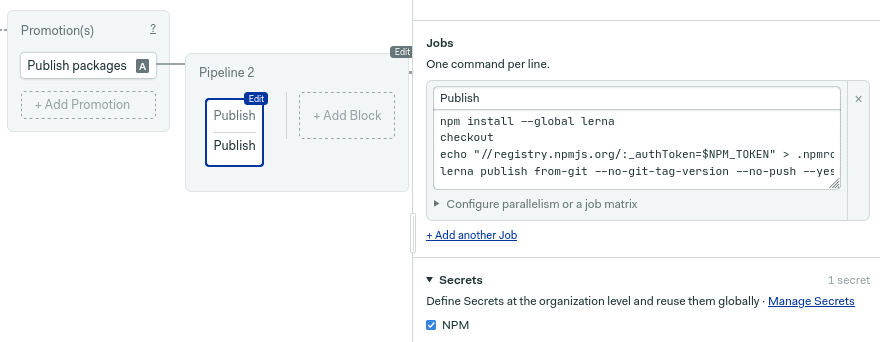
Save the pipeline. It will run one more time, but no releases will take place. Next, try updating one of the packages using lerna version from your own machine.
$ git pull origin main
$ lerna version patch
The pipeline should start when Lerna pushes the tagged release.

Changed-based testing
Lerna detects by itself which packages have changed since the last release and publishes only the new versions. But this feature only works for publishing, not testing.
While Lerna doesn’t support change-based testing, Semaphore does. And it’s pretty easy to configure. The trick is in the change_in function, which calculates folder and file changes. Let’s see how to use it.
To use change_in, you’ll need to create separate test paths for each package or group of packages. In other words, you have to edit the jobs in “Test” so they only operate on one of the packages using the --scope option. As an example, this makes the lint job run only on the @tomfern/api package.
lerna run lint --scope @tomfern/apiRepeat the change in the rest of the test jobs.
lerna run test --scope @tomfern/api

lerna run test-integration --scope @tomfern/api
Now create a second testing block for the other package and make it dependent on the “Bootstrap” block. This time, use --scope to select the other package.
The magic trick comes now. Scroll down until you reach “Skip/Run conditions” and select Run this block when conditions are met. For example, the following condition is triggered when a file changes in the /packages/api folder.
change_in('/packages/web/', { default_branch: 'main'})
If your repository’s default branch is master, you can omit the { default_branch: 'main' } part.
Repeat the same procedure for the api package:
change_in('/packages/api/', { default_branch: 'main'})Click on Run the workflow to save the setup and try the pipeline. Well used, change detection can significantly speed up pipelines.
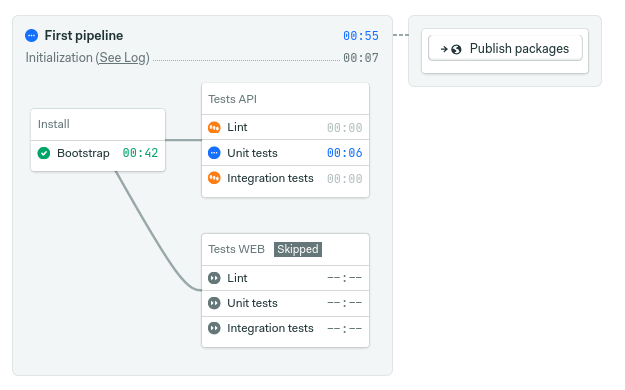
Next steps
As always, there is still some room for improvement. For example, you might want to use Lerna’s package hoisting to reduce the size of the node_modules.
Bear in mind that Lerna can team up with Yarn, if you so prefer. You can switch from npm to yarn by adding these lines into lerna.json:
  "npmClient": "yarn",
  "useWorkspaces": true
One of the benefits of this is that we can use Yarn workspaces to avoid using node_modules altogether.
That’s it
Monorepos are gaining popularity. In great part, thanks to improved tooling support. If you have many JavaScript packages in one repository and want to publish them to NPM, Lerna is the right tool for the job.
Are you a JavaScript developer? We have a lots of exciting material for you:
