Introduction
Angular is one of the most popular front-end frameworks around today. Developed by Google, it provides a lot of functionality out of the box. Like its predecessor, AngularJS, it was built with testing in mind. By default, Angular is made to test using Karma and Jasmine. There are, however, some drawbacks to using the default setup, such as performance.
Jest is a testing platform made by Facebook, which can help us work around some of these issues. In this article, we’ll look at how to set up an Angular project to use Jest and how to migrate from Karma/Jasmine testing to Jest.
Prerequisites
Before starting this article, it is assumed that you have:
- An understanding of Angular and how to write unit tests for Angular. If you need a primer on this, please read the Semaphore series on Unit Testing with Angular 2,
- Knowledge of TypeScript and how it relates to JavaScript,
- An understanding of ES6/ES2015 concepts such as arrow functions, modules, classes, and block-scoped variables,
- Comprehension of using a command line or terminal such as Git Bash, iTerm, or your operating system’s built-in terminal,
- Node >= v6 and NPM >= v5 installed,
- Knowledge of how to run NPM scripts,
- Knowledge of how to setup an NPM project, and
- Knowledge of how to install dependencies through NPM
Testing Angular
Angular, as the introduction explained, comes with built-in support for using Karma and Jasmine to perform unit testing. There are other options for testing, such as using the Mocha testing framework with the Chai assertions library and Sinon mocking library, but using Jasmine out of the box gives us all three of these capabilities.
Karma and Jasmine
Jasmine
Jasmine is a testing framework as well as assertion library and mocking library. It provides all the functionality we need to write tests. The testing framework functionality gives us functions like describe, it, beforeEach, and afterEach.
Its assertion library provides the ability to verify that the tests have run, by providing the function expect and its chaining assertions, such as toEqual and toBe.
Finally, its mocking capability let’s us stub external functions, through spies, by calling jasmine.spy or spyOn or jasmine.createSpyObj. Mocking functionality is important because it allows us to keep our tests isolated to just the code we want to test, which is the point of a unit test.
Karma
Karma is a test runner. It was developed by the AngularJS team to make testing a core tennet of the framework. A test runner, as its name implies, runs tests. Karma will load up an environment which will then find test files and use the specified testing framework to execute those tests.
Karma requires a configuration file, usually named karma.conf.js, which specifies where the test files, which frameworks and plugins to use, and how to configure those plugins.
Jest
Jest is advertised as a zero-configuration testing platform. It’s important to note that it’s neither a framework nor a library, but a platform. Out of the box, Jest not only gives us everything Jasmine provides, but also provides the functionality of Karma.
Jest is developed by Facebook and used to test all their JavaScript code, including the React codebase. Just that alone is a ringing endorsement for the quality of the Jest platform.
Why Jest?
The Jest website explains well why we should use it to write our tests. Comparing it to the default Karma and Jasmine setup, we can see that it comes with some added benefits:
- Parallel testing: Jest, by default, runs tests in parallel, to minimize the time it takes to execute tests,
- Sandboxing: Jest sandboxes all tests to prevent global variables or state from a previous test to affect the results of the next one, and
- Code coverage reports: with Karma and Jasmine, you have to set up a plugin for code coverage. Adding TypeScript into the mix makes things even more difficult to process. By contrast, Jest will provide code coverage reports out of the box.
Not only does Jest solve our performance woes, but it also keeps our tests isolated from each other and gives us code coverage, all out of the box.
Jest and JSDom
It should be noted that one potential disadvantage of Jest is that it uses JSDom to simulate the brower’s DOM. Karma has an advantage here as it can run tests in a variety of browsers.
The Sample Project
In this post, we’ll create a toy project to highlight how to use Jest. The application will just output some text to the screen using an Angular component and then we’ll incorporate a service to augment that text. By doing so, we’ll see how to test two of the most important features of Angular–components and services–through Jest.
Cloning the Repository
If you’d like to view the code for this article, it’s available at this GitHub repository.
It can be downloaded by going to your terminal/shell and entering:
git clone https://github.com/gonzofish/angular-jest-tutorial
Throughout the article, there will be stopping points, where a Git tag will be made available to see the code to that point. A tag can be checked out using:
git checkout <tag name>
Setting Up the Project to Use Jest
For our project we’ll be using a very basic Angular setup. There are a few steps to this:
- Generate the NPM package,
- Add Angular dependencies,
- Add Jest dependencies,
- Add source directory,
- Set up TypeScript,
- Set up Jest, and
- Set up .gitignore (optional).
The starting layout of our code directory will be:
src/
  setup-jest.ts
  tsconfig.spec.json
.gitignore
package-lock.json
package.json
tsconfig.json
Generating the NPM Package
The first step is to create your project using NPM:
npm init -f
Which will create the package.json project without asking any questions. Next, go in to the generated package.json and set the test script to jest.
Adding Angular Dependencies
Install the Angular dependencies using npm:
npm install --save @angular/common \
    @angular/compiler \
    @angular/core \
    @angular/platform-browser \
    @angular/platform-browser-dynamic \
    core-js \
    rxjs \
    zone.js
npm install --save-dev typescript \
    @types/node
These dependencies will let us use Angular to write our application and test it properly. Here’s what each package does:
@angular/common: provides acces to theCommonModulewhich adds the basic directives, such asNgIfandNgForOf.@angular/compiler: provides the JIT compiler which compiles components and and modules in the browser.@angular/core: gives access to commonly used classes and decorators.@angular/platform-browser: provide functionality, in conjunction withplatform-browser-dynamic, to bootstrap our application.@angular/platform-browser-dynamic: provide functionality, in conjunction withplatform-browser, to bootstrap our application.@types/node: the TypeScript type definitions for Node, which are needed for compiling code.core-js: provides polyfills for the browser.rxjs: the Observable library which Angular requires.typescript: the TypeScript compiler, which converts TypeScript to JavaScript.zone.js: a library, developed by the Angular team, to create execution contexts, which aid in rendering the Angular application.
Adding Testing Dependencies
Then, install the development dependencies:
npm install --save-dev @types/jest \
    jest \
    jest-preset-angular
Let’s list out what each of these does:
@types/jest: the TypeScript type definitions for Jest,jest: the Jest testing framework, andjest-preset-angular: a preset Jest configuration for Angular projects.
Setting Up TypeScript
To set up TypeScript, we need a tsconfig.json file. The TypeScript config we’ll use is:
{
    "compileOnSave": false,
    "compilerOptions": {
        "baseUrl": "src",
        "emitDecoratorMetadata": true,
        "experimentalDecorators": true,
        "lib": [
            "dom",
            "es2015"
        ],
        "module": "commonjs",
        "moduleResolution": "node",
        "noImplicitAny": true,
        "sourceMap": true,
        "suppressImplicitAnyIndexErrors": true,
        "target": "es5",
        "typeRoots": [
            "node_modules/@types"
        ]
    },
    "include": [
        "src"
    ]
}
This configuration provides the essential attributes needed for writing Angular applications with TypeScript, as per the Angular documentation. We’ll also add a couple of extra options:
compileOnSave: this is for IDE support, setting it tofalsetells IDEs with support not to compile the code into a JS file on save,baseUrl: the base directory to resolve non-relative URLs as if they are relative. With this set, instead of doing:import { XService } from '../../services/x.service';
we can just do:
import { XService } from 'services/x.service';
include: tells TypeScript only to convert files in the list, we’re telling it to only compile TypeScript files under thesrcdirectory.
Adding the Source Directory
This step is pretty simple, just create a directory named src in the root directory of your project.
Setting Up Jest
Although Jest can work out of the box, to get it to work with Angular there is a minimal amount of setup.
Jest Configuration
First, we need open up package.json and ensure that we’ve set the test script to jest:
"scripts": {
    "test": "jest"
}
Secondly, add a jest section to package.json:
"jest": {
    "preset": "jest-preset-angular",
    "roots": [ "<rootDir>/src/" ],
    "setupTestFrameworkScriptFile": "<rootDir>/src/setup-jest.ts"
}
Here’s what each attribute of our Jest setup does:
preset: specifies that we’ll be using thejest-preset-angularpreset for our setup. To see what this configuration looks like, visit the jest-preset-angular documentation.roots: specifies the root directory to look for test files, in our case, that’s thesrcdirectory;<rootDir>is a Jest caveat to go to the project’s root directory.setupTestFrameworkScriptFile: the file to run just after the test framework begins running, we point it to a file namedsetup-jest.tsunder thesrcdirectory.
Creating the TypeScript Configuration for Testing
Add a tsconfig.spec.json file, which is required by jest-preset-angular, in the src directory:
{
    "extends": "../tsconfig.json"
}
Creating the Jest Setup File
Next, add a file setup-jest.ts to the src directory:
import 'jest-preset-angular';
This pulls in the globals required to run tests. We’re now setup to use Jest.
Creating .gitignore (optional)
This step is only required if you’re creating a Git repository. You don’t want to commit all the node_modules, so create a .gitignore file and add node_modules to it.
The First Stop
At this point we have our project set up, and to see the code as it exists at this point, checkout tag stop-01:
git checkout stop-01
Writing Tests
Let’s add a component, and call it hello-ewe. This function will take in a name and output Baaaa, {{ name }}! (which means “Hello” for sheep).
Inside of the src folder, add a folder named hello-ewe. Inside the hello-ewe folder add two files: hello-ewe.component.ts and hello-ewe.component.spec.ts.
The configuration of jest-preset-angular looks for all files that end in .spec.ts and run them as test files. So we’ll start by setting up our test file, hello-ewe.component.spec.ts:
import {
    async,
    ComponentFixture,
    TestBed
} from '@angular/core/testing';

import { HelloEweComponent } from './hello-ewe.component';

describe('HelloEweComponent', () => {
    let component: HelloEweComponent;
    let fixture: ComponentFixture<HelloEweComponent>;

    beforeEach(async(() => {
        TestBed.configureTestingModule({
            declarations: [ HelloEweComponent ]
        });
        fixture = TestBed.createComponent(HelloEweComponent);
        component = fixture.componentInstance;
    }));

    test('should exist', () => {
        expect(component).toBeDefined();
    });
});
If you’ve written unit tests with Jasmine, this code will look very familiar. Jest uses a syntax extremely similar to Jasmine. We import all the same parts of the core testing module that we would for any Angular component test. We also import the HelloEweComponent from the component TypeScript file.
Next, we scope our tests, just like Jasmine, using the describe function. Again, like with Jasmine, we use the beforeEach function to set up things for testing. We pull in the HelloEweComponent with TestBed.configureTestingModule, get the component fixture via TestBed.createComponent, and get the component by pulling the componentInstance from the fixture.
We’ll create a sanity test to verify that our component has been compiled. This is the first departure from Jasmine. In Jasmine, the it function identifies an actual test to run; with Jest the analogous function is test. It should be noted that in order to make the transition from Jasmine easier, Jest has test also aliased as it.
And, finally, like with Jasmine, we use expect to start an assertion. Off of calling expect, there are assertions that we can call. We can also use the assertion .toBeDefined() to assure that our component has been created.
If we run npm test, first we see the test start to run:
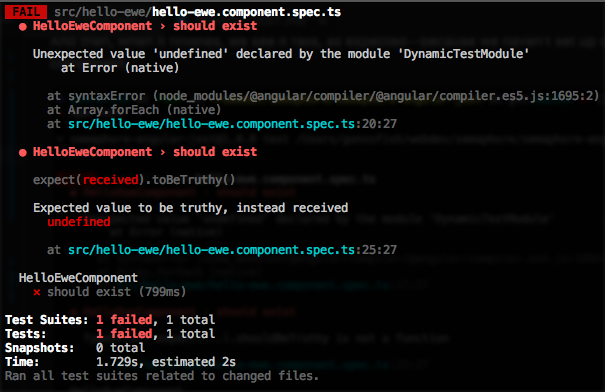
When it finishes, we see it failed as expected because we haven’t set up our actual component:
The Jest outputs are very informative and easy to understand. This output says that our test failed because there isn’t a HelloEweComponent to create. As a result, our toBeDefined assertion fails because the value we’re asserting against, component, isn’t defined.
Let’s make our test pass by creating our HelloEweComponent in hello-ewe.component.ts:
import {
    Component
} from '@angular/core';

@Component({
    selector: 'hello-ewe',
    styles: [],
    template: '<p></p>'
})
export class HelloEweComponent {

}
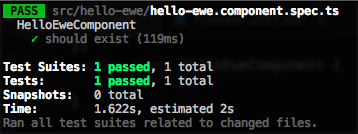
As you can see, it’s a rather empty component that just provides a simple template of a paragraph. If we save that and re-run our tests, we get a passed test!
Watch Mode
When doing test-driven development, or writing multiple unit tests, it’s nice to be able to turn on a “watch” mode that re-runs our tests every time we update a file.
With Jest this is very simple. We just call jest --watch. To make this easy to run in our project, open up package.json and add to the scripts section:
"test:watch": "jest --watch"
The name of the script, test:watch, can be whatever we want it to be, but test:watch clearly states our intention.
We can now run our tests using npm run test:watch. With Jest, the --watch flag will clear the scren before every run, making it easier to see what passed or failed on the last run. With other test setups, this would require some additional configuration.
Also, with Jest, there is another nuance to the --watch flag. In addition to --watch there is a --watchAll flag. The --watchAll will re-run all tests when any file changes, with --watch only the tests related to the changed files are re-run.
This means if we have a service that we’ve already fully tested and we’re working on a component, whenever our component or its test file change, the tests for the service aren’t re-run. This significantly decreases the time to run tests using watch mode.
More Tests
Now that we’re using watch mode, we can add tests and see them all re-run when our code changes. To see this in action, let’s add a second test. We’ve said that our HelloEweComponent was going to output Baaaa, {{ name }}!, but we have nothing that makes that happen, so let’s add it to hello-ewe.component.spec.ts.
First let’s test that we have a default name:
// imports

describe('HellowEweComponent', () => {
    // setup and other test

    test('should have a default name', () => {
        expect(component.name).toBe('Matt');
    });
});
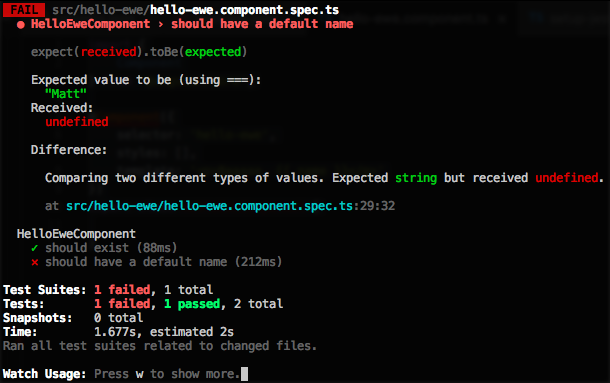
Since we’re using watch mode, our tests automatically re-run and fail because there is no name attribute on our component, let alone one set to Matt:
The output shows only the errors of the failed tests, making it simple to understand what failed. Something else to notice here is the part of our Jest output that reads:
Expected value to be (using ===):
    "Matt"
Received:
    undefined

Difference:

    Comparing two different types of values. Expected string but received undefined.

    at src/hello-ewe/hello-ewe.component.spec.ts:29:32
This output is very straightforward. It tells us exactly why our test failed, as opposed to other set ups which can provide very cryptic messages when a test fails. We’ve said that we want component.name to be the string "Matt" but component.name is undefined. Which is exactly the message we’re given in the Difference section of the output!
We’ll fix this by adding a name attribute to hello-ewe.component.ts:
// imports & component declaration
export class HelloEweComponent {
    name = 'Matt';
}
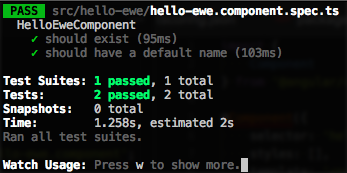
our tests succeed:
And, finally, we can test that our output meets the expectation that we set that it will out Baaaa, {{ name }}:
// imports

describe('HelloEweComponent', () => {
    // previous variable declarations
    let dom: any;

    beforeEach(async(() => {
        // module setup & variable instantiation
        dom = fixture.nativeElement;
    }));

    // previous tests

    test('should output a <p> with "Baaaa, {{ name }}!"', () => {
        fixture.detectChanges(); // renders the dom
        expect(dom.innerHTML).toBe('<p>Baaaa, Matt!</p>');
    });
});
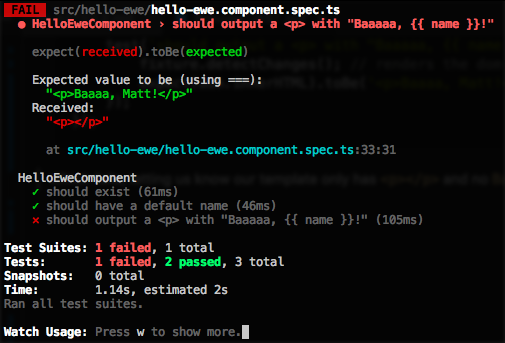
Here we grab the DOM element using the nativeElement of the fixture we previously created. We then call detectChanges on our fixture to render the DOM. Finally, we test that the innerHTML of our DOM is set to a paragraph with Baaaa, Matt! in it.
This fails, letting us know our template only has <p></p> and no Baaaa, Matt!:
So we fix the template in hello-ewe.component.ts:
// imports

@Component({
    // selector & styles
    template: '<p>Baaaa, {{ name }}!</p>'
})
export class HelloEweComponent {
    name = 'Matt';
}
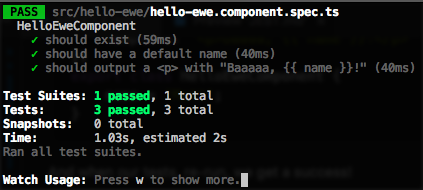
When our tests are re-run, they all pass!
Stop running Jest by hitting q. The code, to this point, can be seen by checking out stop-02:
git checkout stop-02
Adding a Service
Next, we’ll add a service so we can see how the watch mode really works. Create a folder under src called services. Add two files to that folder: name.service.ts and name.service.spec.ts.
First, let’s set up our test file:
import { TestBed } from '@angular/core/testing';

import { NameService } from './name.service';

describe('NameService', () => {
    let service: NameService;

    beforeEach(() => {
        TestBed.configureTestingModule({
            providers: [ NameService ]
        });
        service = TestBed.get(NameService);
    });

    test('should exist', () => {
        expect(service).toBeDefined();
    });
});
Start watch mode again. Of course, it fails, because we have no such service. Note the time it took for the tests to run.
When we add the service it to name.service.ts:
import { Injectable } from '@angular/core';

@Injectable()
export class NameService {

}
It passes! You’ll notice that the time it took to run the tests is significantly lower in our case. It went from 4 seconds to ~1 second. This is because Jest is only running tests relevant to the files we change.
Let’s add a getter to our service that outputs a private name variable in the service. First, we add our tests:
// imports

describe('NameService', () => {
    // setup & previous test

    test('should have a name getter', () => {
        expect(service.name).toBe('Matt');
    });
});
and the accompanying code for name.service.ts:
// import & Injectable
export class NameService {
    private _name = 'Matt';

    get name() { return this._name; }
}
Adding a Setter
We’ll also add a method to set that private name variable. We can use the name getter to verify it works.
// imports

describe('NameService', () => {
    // setup & previous tests

    test('#setName should set the private name', () => {
        service.setName('Goku');
        expect(service.name).toBe('Goku');
    });
});
The test fails with an informative message that setName is not a function. We’ll add it to NameServie:
// import & Injectable
export class NameService {
    // _name & name

    setName(name: string) {
        this._name = name;
    }
}
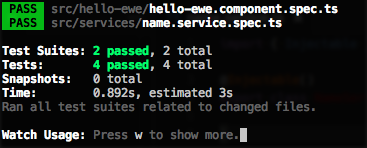
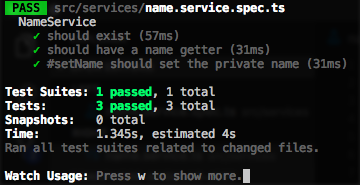
And, our output shows that our tests have passed:
This shows that the only tests which were executed were those related to the NameService. None of the HelloEweComponent tests ran because those files didn’t change.
You can check out the code we’ve created as stop-03.
git checkout stop-03
No Tests for Committed Files
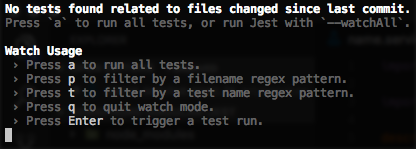
Again, stop Jest, using q. Now, start it back up using the watch mode. The output may look similar to:
Jest has a neat feature where, if there weren’t any changes since the last Git commit, it won’t run any tests.
Watch Options
You’ll notice the message at the bottom of the watch output:
Watch Usage: Press w to show more
Pressing w gives us a list of options to run. By default, the watch mode is only going to run tests related to changed files. However, these options give us the ability to run all tests, run a tests using a regex pattern for file names or test names, to quit, or to re-run the tests.
So, not only do we also have a watch mode, but we have one that affords a greater flexibility on how to run tests. If we only want to run a single test, we can do that very easily.
Code Coverage
It was mentioned above that Jest provides code coverage out of the box. In other setups we’d have to do a significant amount of configuration to get code coverage outputs that made sense. Jest leverages the Istanbul library to execute code coverage.
As you probably guessed, getting code coverage is as simple as running jest with a flag. Open up package.json and add a script:
"test:cov": "jest --coverage"
Then go ahead and run npm run test:cov. Our tests will run and, at the end, we’re presented with a nice table output of our code coverage:
You may notice that in that table is our setup-jest.ts file. Although it isn’t “real” code, it needs to be included for the coverage reports to properly compile.
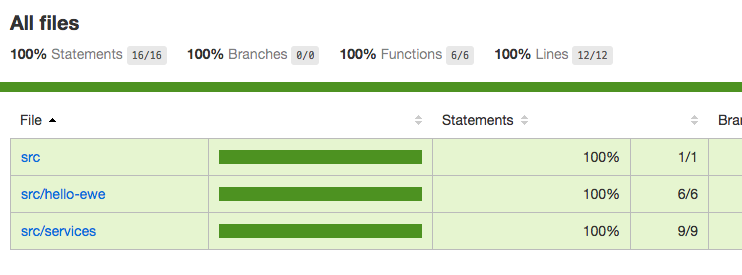
In addition to the in-terminal table outuput, Jest will create HTML code coverage reports via Istanbul, located in the generated coverage folder.
If you’ve created a Git project, make sure to add coverage to your .gitignore.
You can checkout the code with test coverage we’ve created as stop-04.
git checkout stop-04
More Jest Options
Jest provides even more than we’ve shown here. For instance, it can do snapshot testing to verify that your UI outputs as expected.
Jest is a powerful tool that gets setting up a testing harness out of the way and lets us write tests efficiently.
Continuous Integration with Semaphore
We’re not really done testing until we’ve incorporated it into our continuous integration service. We’ll use Semaphore for continuous integration.
If you haven’t done so already, push your code to a repository on either GitHub or Bitbucket.
Once our code is committed to a repository, we can add a CI step to our Angular 2 development without much effort.
- Go to Semaphore,
- Sign up for an account,
- Confirm your email and sign in,
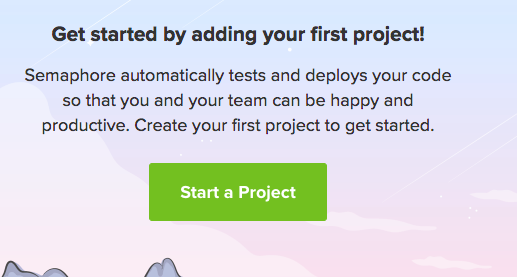
- Next, if you do not have any projects set up, select “Add new project”,
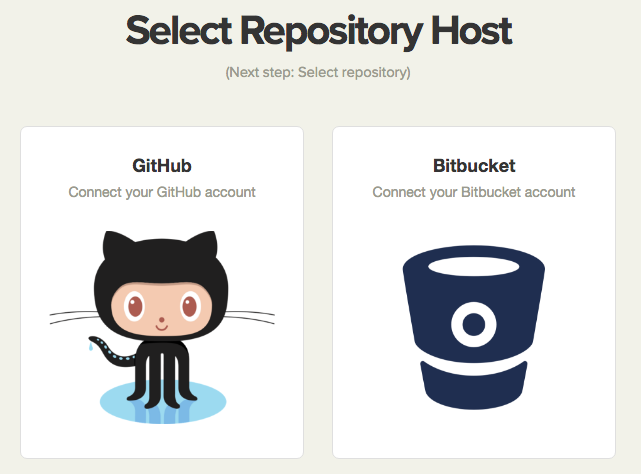
- Next, select either Github or Bitbucket, depending on where your repository is:
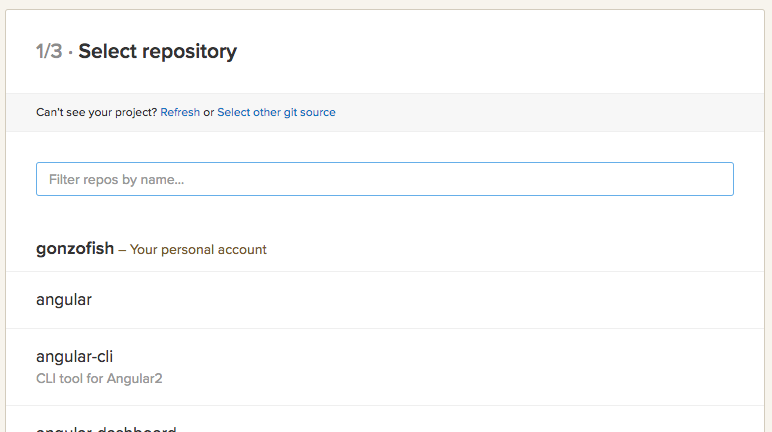
- Then, from the provided list, select the project repository:
- Next, select the branch (most likely
master),
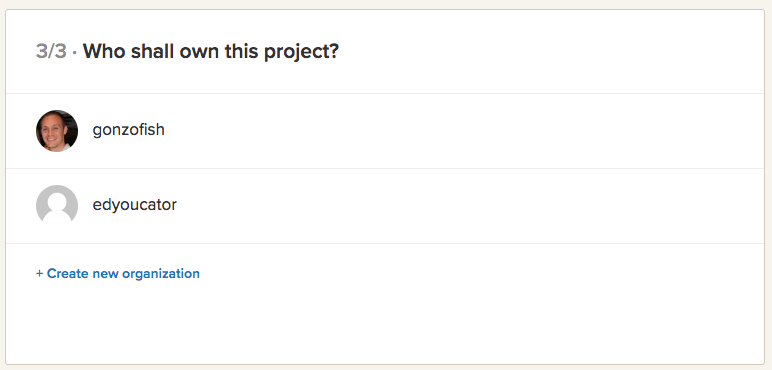
- Identify who the owner of the project should be,
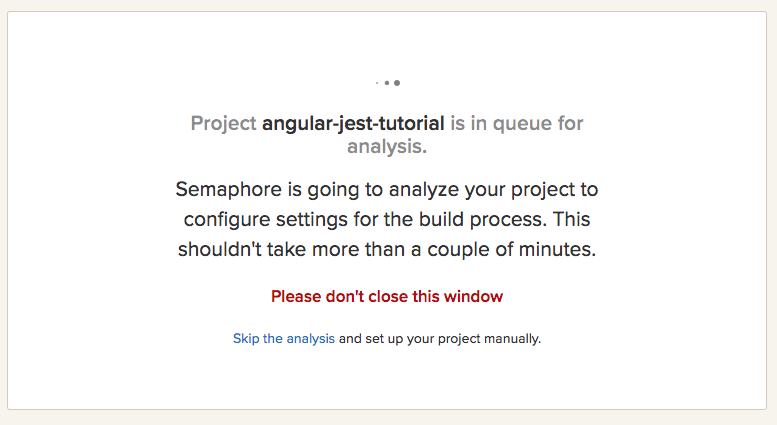
- Semaphore will analyze your project to identify a configuration,
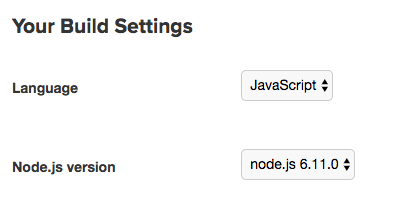
- Set the version of node to >= 6,
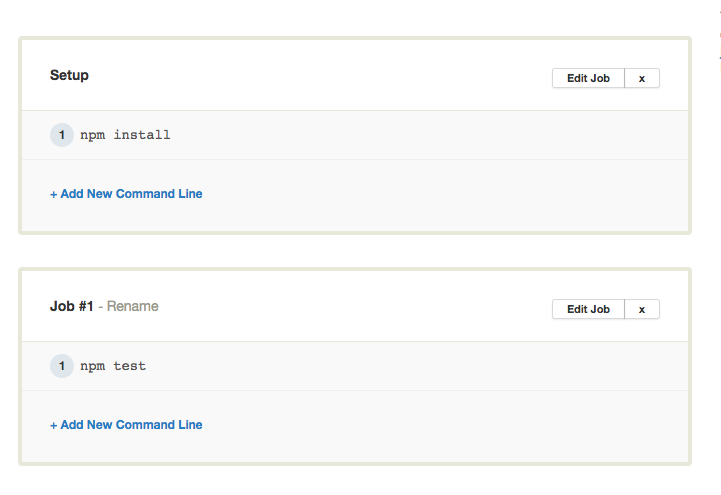
- On the same page, ensure your build is set up to do
npm installandnpm test,
- Click “Build With These Settings” and it’s building.
From now on, any time you push code to your repository, Semaphore will start building it, making testing and deploying your code continuously fast and simple.
Conclusion
In this article, using a toy application, we’ve seen the power of Jest at work with Angular. We saw how Jest improves testing by cutting down on test run time while also providing a lot out of the box with little to no configuration.




quick and crisp nice introduction. thanks a lot and please keep writing these blogs somewhere in the world people like me are looking for these