After the launch of Large Language Models (LLMs) models such as ChatGPT or LLaMA, many companies are building applications around them. They are using ChatGPT and HuggingFace to integrate AI-based systems into their workflow for specific use cases.
Building an AI-based system requires deep familiarity with the LLM provider’s API. To ease the development of AI apps Vercel has recently launched an open-source AI SDK which can help developers build conversational, streaming, and chat user interfaces in JavaScript and TypeScript. This SDK currently supports Next.js, Svelte, and SvelteKit.
To learn more about it, we will develop an AI Chatbot using Next.js and the Vercel AI SDK in this tutorial.
Prerequisites
To move forward with this tutorial, you will need:
- Node.js installed on your machine
- Basic knowledge of developing web apps using React
- TypeScript (optional)
- An OpenAI API key. This is a paid product but new accounts get $5 of free credit for the first three months.
Setting up the Next.js Project
In this section, we are going to set up a new Next.js project and build the UI of our Chatbot app.
Create a new project using the following command:
npx create-next-app@latestAfter executing this command, you will get a list of questions to set up your Next.js project as follows. You should make the selection as described below:
$ npx create-next-app@latest

npx: installed 1 in 2.39s
✔ What is your project named? ai-chatbot
✔ Would you like to use TypeScript? Yes
✔ Would you like to use ESLint? Yes
✔ Would you like to use Tailwind CSS? Yes
✔ Would you like to use `src/` directory? No
✔ Would you like to use App Router? (recommended) Yes
✔ Would you like to customize the default import alias? No
After selecting all those options you will have a new project ai-chatbot in your root directory.
You can open the project in your code editor, as we will be building the basic UI of the app and installing the required dependencies before we dive into more detail about the SDK.
Open the project in the terminal and run:
npm install aiThe AI module is the npm library for using the Vercel AI SDK in your application.
Next, open your app/page.tsx delete the current code and add the following code instead:
'use client'

import { useChat } from 'ai/react'
import styles from "./page.module.css"


export default function Chat() {
  const { messages, input, handleInputChange, handleSubmit } = useChat()

  return (
    <div className="chat">
      <h1 className={styles.chat_title}>Welcome to the AI Chatbot</h1>
      <div className={styles.message_content}>
        {messages.map((m) => (
          <div key={m.id}>
            <span>{m.role === 'user' ? '👤' : '🤖'}: </span>
            <span className={m.role === 'user' ? 'text-blue-400' : ''}>
              {m.content}
            </span>
          </div>
        ))}
      </div>
      <div className={styles.text_area}>
        <form onSubmit={handleSubmit}>
          <input
            value={input}
            placeholder="Say something..."
            onChange={handleInputChange}
            className={styles.input}
          />
        </form>
      </div>
    </div>
  )
}
We have created the Chat component for our application.
- Firstly, we imported the styles for our component, and the
useChathooks from theailibrary. - In the first section, we imported the necessary functions as
messages,input,handleInputChangeandhandleSubmitfrom theuseChathook. - Next, we have a div section to display the conversation between the
Userand theAssistant. Here, we mapped over the messages using the JS map function. - We have also added a text area for the user input, and a form to submit the input using the
handleSubmitfunction. - The
inputstate is updated using thehandleInputChangefunction.
Create a new file under app as page.module.css to add the styles for this component:
.message_content {
    padding: 10px;
    margin: 10px;
}

.text_area {
    position: absolute;
    width: 80%;
    bottom: 0;
    padding: 20px;
    margin: 20px;
}
.input {
    width: 100%;
    padding: 12px 20px;
    margin: 8px 0;
    display: inline-block;
    border: 1px solid #ccc;
    border-radius: 4px;
    box-sizing: border-box;
}
Finally, locate the file app/globals.css and empty its contents.
The final UI would look like this:
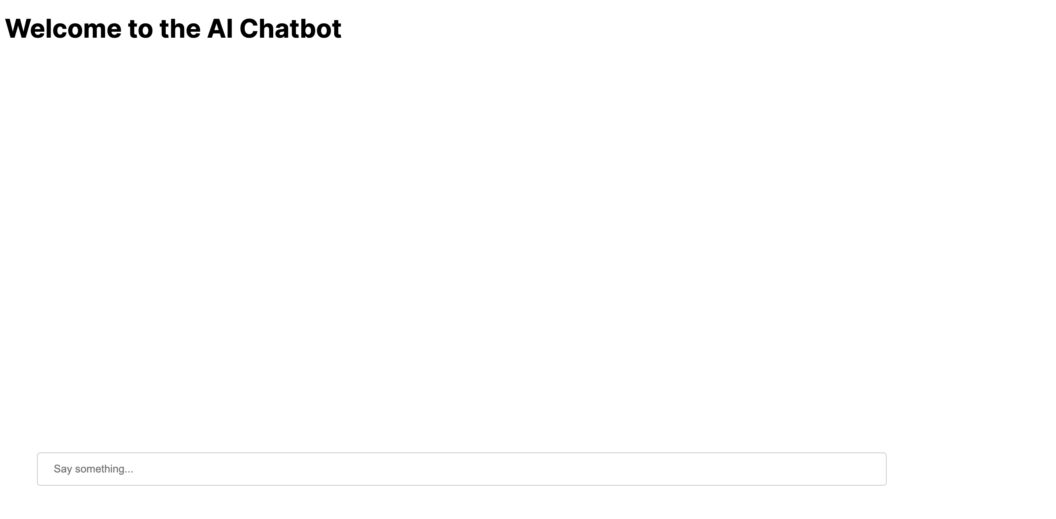
You have now the UI of the app to build the final bot. Let’s learn now about the AI SDK, and use that in our application.
Introduction to Vercel AI SDK
The Vercel AI SDK is an open-source library which provides a set of utilities for developing AI applications. It supports easy integration with some of the top AI-based providers like OpenAI, HuggingFace, or Anthropic. It can be used to build conversational chatbots, content generation models and more.
It has different APIs, some of the most useful ones are:
useChat– This utility will allow you to build conversational AI apps. It enables streaming chat responses from the AI provider you are using. We will be using this API for building our chatbot.useCompletion– This utility allows you to build content generation models. It provides completion for given text input. This is useful when we need to have any completions-based functionality in our apps.
You can read more about all the APIs here.
Building AI Chatbot
Now, you have understood the basic of the AI SDK, and its use cases. Let’s now use the useChat utility for building our conversational AI Chatbot application. We will be using an OpenAI provider for building our applications.
First, we need to install a few more dependencies required for using the AI SDK in our app.
npm install openai openai-edgeNow, let’s add our OpenAI API key and then configure the useChat API hook endpoint. Create a file .env.local in the root of your app folder. Add your OPENAI API key in it as OPENAI_API_KEY=<Your Key>. This key will be used by the app whenever any API calls are made to the Open AI for a response.
Next.js provide us with the feature to add our API endpoint within the app too. So, we will be adding our API endpoint under the project which will be used by our Chat component to get the response whenever we send out any chat.
Create a folder api under the app folder. Under it add a file route.ts under the chat folder. Next.js have this convention for declaring the API endpoints.
You can add this code in the route.ts file you created:
// ./app/api/chat/route.ts

import { Configuration, OpenAIApi } from 'openai-edge'
import { OpenAIStream, StreamingTextResponse } from 'ai'

// Create an OpenAI API client (that's edge friendly!)
const config = new Configuration({
  apiKey: process.env.OPENAI_API_KEY
})
const openai = new OpenAIApi(config)

// IMPORTANT! Set the runtime to edge
export const runtime = 'edge'

export async function POST(req: Request) {
  // Extract the `prompt` from the body of the request
  const { messages } = await req.json()

  // Ask OpenAI for a streaming chat completion given the prompt
  const response = await openai.createChatCompletion({
    model: 'gpt-3.5-turbo',
    stream: true,
    messages: messages.map((message: any) => ({
      content: message.content,
      role: message.role
    }))
  })

  // Convert the response into a friendly text-stream
  const stream = OpenAIStream(response, {
    onCompletion:async (completion:string) => {
        await console.log('Chat completed')
    }
  })
  // Respond with the stream
  return new StreamingTextResponse(stream)
}
Let’s understand the above API route code step by step:
- We have declared this route as a POST endpoint that receives any messages sent to the chatbot and responds with a streaming text response.
- First, we have made the necessary imports from the
openai-edgeandaimodules. - OpenAIStream has been imported because we use the OpenAI provider for our chatbot. If you want to use another provider, another stream must be imported.
- In the next part, we have configured our API KEY and then created an instance of the OpenAI API, which we will use with our endpoint.
- We read the messages from the request’s body later in the API function. The messages are sent to OpenAI
createChatCompletionfunction, which returns a response sent back as an API response to the ChatBot.
Now we are almost done with writing the code for our AI Chatbot. Let’s understand the complete working flow before we see the live demo.
So, whenever you type and submit a message in the text field, the handleSubmit method of the useChat hook will append the user message to the chat history and trigger an API call to our API. The API will read the message and stream the response to the chat history as an assistant response. The hook will automatically update the message’s state and trigger a re-render.
You can run your final app now by using the following command:
npm run build
npm start
The AI Chatbot in Action
OK, now we have developed the AI chatbot which is using the OpenAI API. Now, let’s see next how we can add completion functionality to our Chatbot.
Using the completion API
So, the app you have built can now answer all your questions, but what if you need some auto-completion feature in your input box? In this section, we will look at how we can use the completion API of the Vercel AI SDK with our app to add an auto-completion feature.
To use the completion API of the AI SDK, we need to do the following two changes:
- Add a route for the
completion API - Update the
Chatcomponent to use the input text as the completion prompt results.
Let’s first add the completion route under our api folder. Create a folder completion and add a file route.ts under it. In the route.ts file, add this code.
// ./app/api/completion/route.ts

import { Configuration, OpenAIApi } from 'openai-edge';
import { OpenAIStream, StreamingTextResponse } from 'ai';

// Create an OpenAI API client (that's edge friendly!)
const config = new Configuration({
  apiKey: process.env.OPENAI_API_KEY,
});
const openai = new OpenAIApi(config);

// Set the runtime to edge for best performance
export const runtime = 'edge';

export async function POST(req: Request) {
  const { prompt } = await req.json();

  // Ask OpenAI for a streaming completion given the prompt
  const response = await openai.createCompletion({
    model: 'text-davinci-003',
    stream: true,
    temperature: 0.6,
    prompt: `You are a chatbot helping human with their questions.
    Help them ask the best questions by completing this input ${prompt}.`,
  });
  // Convert the response into a friendly text-stream
  const stream = OpenAIStream(response);
  // Respond with the stream
  return new StreamingTextResponse(stream);
}
This API code is moreover same as the chat route, with just a difference here that we are using the OpenAI completion client to get back the response for our prompt messages. One thing to note here is that you can modify the prompt as per your use case for better completion response.
Also, we are using the text-davinci-003 model for the best results of the completion.
We have now chat completion API endpoint as api/completion. Now, we can tweak our Chat component to have both the completion and the chat API functionality.
Update the code of page.tsx to this:
'use client'

import { useState } from 'react'
import { useChat, useCompletion } from 'ai/react'
import { useDebouncedCallback } from 'use-debounce'
import styles from "./page.module.css"


export default function Chat() {

  const [chatMessage, setChatMessage] = useState('')
  const { messages, input, setInput, handleSubmit, handleInputChange } = useChat()

  const { complete, completion } = useCompletion({
    api: '/api/completion',
    onResponse: res => {
      if (res.status === 429) {
        console.error('You are being rate limited. Please try again later.')
      }
    },
    onFinish: () => {
      console.log(completion)
      setInput(completion)
    }
  })

  const generateCompletion = useDebouncedCallback(e => {
    complete(chatMessage)
  }, 500)

  const handleChatInputChange = (e: React.ChangeEvent<HTMLInputElement>) => {
    setChatMessage(e.target.value)
    handleInputChange(e)
  }

  const handleChatSubmit = (e: React.FormEvent<HTMLFormElement>) => {
    handleSubmit(e)
    setChatMessage('')
  }

  return (
    <div className="chat">
      <h1 className={styles.chat_title}>Welcome to the AI Chatbot</h1>
      <div className={styles.message_content}>
        {messages.map((m) => (
          <div key={m.id}>
            <span>{m.role === 'user' ? '👤' : '🤖'}: </span>
            <span className={m.role === 'user' ? 'text-blue-400' : ''}>
              {m.content}
            </span>
          </div>
        ))}
      </div>
      <div className={styles.text_area}>
        <form onSubmit={(e) => handleChatSubmit(e)}>
          <input
            value={input}
            placeholder="Say something..."
            onChange={(e) => handleChatInputChange(e)}
            className={styles.input}
          />
        </form>
        <button onClick={generateCompletion}>Generate completion</button>
      </div>
    </div>
  )
}
You also need to install one more dependencies which is used by the generateCompletion() function:
npm install use-debounceThis module is used to hold the call to the completion API until a certain time has passed. This avoids making too many API calls if you clicked the completion button multiple times.
Let’s now understand the changes we have done to our Chat component:
- We are using the
useCompletionhook fromai/reactto call the completion API. - We have a
generateCompletionfunction which calls thecompletefunction from theuseCompletionhook. This is debounced to avoid calling it too frequently. - When the completion response is received, we set the input value to the
completionresult using thesetInputfunction which will be submitted as user message. - We have a separate
handleChatInputChangefunction to handle input changes for the chat functionality. - We call the
generateCompletionfunction on click of the “Generate completion” button.
That’s all there, you have now both the Chat and the Completion functionality in your app.
You can now build and run your app.
Final Chatbot App
Conclusion
In the tutorial, we learned about how to build AI based apps using the Vercel AI SDK in Next.js. We have explored the different utility of the AI SDK, which includes Chat API, Completion API and the different AI service provider streams. You can find the complete code for this tutorial app here on Github.
If you have any questions and comments, feel free to leave them in the section below.

Please how do I let the AI bot answer base on my data?