This is a guest post by Abe Haskins, a Firebase engineer at Google. For the past five years, Abe has been helping engineers build Firebase-powered things to help them take over the world.
Firebase has you covered when it comes to building and architecting your app, but what about deploying your projects onto Firebase? Until now that’s been a manual process done via firebase-tools (the command-line interface for Firebase), but now we can use the power of Semaphore to create an entirely automated continuous deployment process.
In general, building serverless applications with platforms like Firebase is a fantastic way to lower costs and increase development speed. Firebase lets you remove the stress of running your own authentication, database, and storage services by providing powerful and scalable cloud versions of these services. These services come with easy to use SDKs for Mobile and Web along with server-side SDKs for all your favorite languages.
Semaphore compliments Firebase as an intuitive way to manage deployments and track changes across your app. The combination of Firebase and Semaphore allows you to focus on your product without worrying about servers, deploying, or managing things as the project scales.
Deploying with the Firebase CLI
First, let’s walk through a normal Firebase deploy then we’ll cover how to automate this with Github and Semaphore.
In general, if you create a new Firebase app via firebase init you’ll have a directory structure like this:
shell
	your-project-name/
	-- public/
	-- -- index.html
	-- -- 404.html
	-- functions/
	-- -- package.json
	-- -- index.js
	-- firebase.json
	-- .firebaerc
Keep in mind, this will vary depending on which Firebase features you enable when creating the app. For example, if you also selected Cloud Firestore you’d see a firestore.rules file as well. In this case, I’m building a simple web app, so I’ve enabled just Firebase Hosting and Cloud Functions.
We’re already ready to manually deploy our app by running firebase deploy from the command line. This command looks at the configuration in firebase.json and deploys it to the “default” project listed in .firebaserc.
Our app is live! Awesome.
This works great if you’re a single developer working on a single machine, you’re not enforcing any pre-deployment tests, and have a simple build process (or no build process at all). However, as soon as your project starts to grow, the manual deployment becomes more and more of a pain.
As an aside, if you’re like me, deployment becomes a hassle even before the project grows. I’m always forgetting how to build and deploy my side-projects. They all use different technologies and I rarely document anything (my bad). Moving the build and deployment into Semaphore makes shipping new versions of my old apps as easy as merging into master, there’s no chance I’ll forget how to do that.
Luckily, the smart people at Firebase made sure to add features to the firebase command line tool which makes continuous deployment trivial to implement.
Adding a Branch
You’ll want to create a new Github repo, checking in all the files which were created by the CLI (excluding functions/node_modules). Then you’ll create a new Semaphore project connected to that repo. When asked what commands to run to build this branch, we’ll keep it simple.
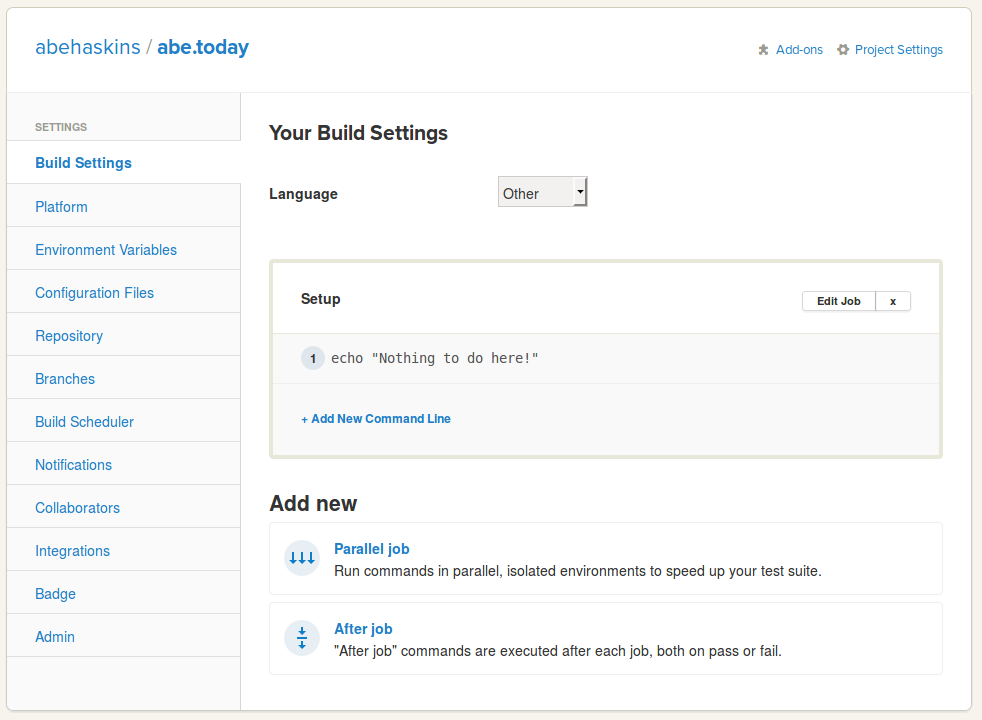
At this point, our app has no build step and no tests to pass, so I’ve added a simple echo command. As your app grows you’ll want to add more here, but since we’re focusing on deploying to Firebase, there’s nothing more needed.
Adding a Deployment
Once your branch is set up, click the button to add a deployment and select a “Generic Deployment”.

You can then follow the deployment setup as usual, selecting automatic or manual deployment (I generally like automatic) and associating it with the branch you created earlier.
Once we get to the “Write Commands” section, you’ll want to add the following command.
shell
	npm install -g firebase-tools
	firebase deploy --non-interactive --token $FIREBASE_TOKEN
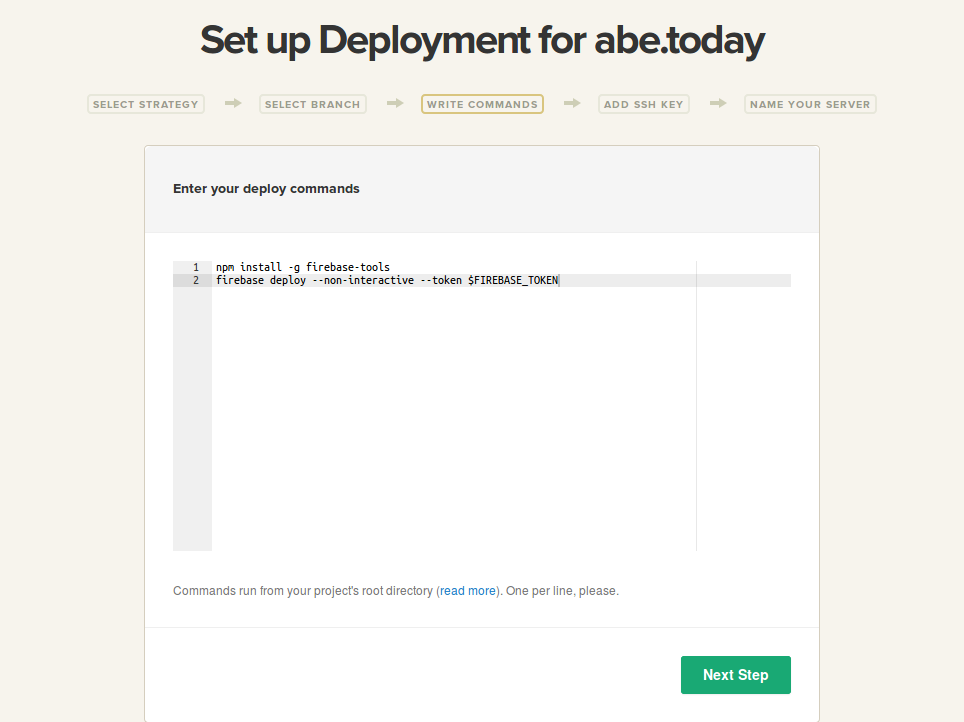
This command is all we need to deploy our Firebase app. Keep in mind, all the configuration data for our app is stored in that firebase.json file and the project we’re deploying to is stored in .firebaserc so all we need to supply is that authentication token.
But how does Semaphore know what $FIREBASE_TOKEN is? It doesn’t, yet. Go ahead and finish setting up the deployment, skip the “Add SSH Key” step and name the server something creative like “Firebase Hosting.”
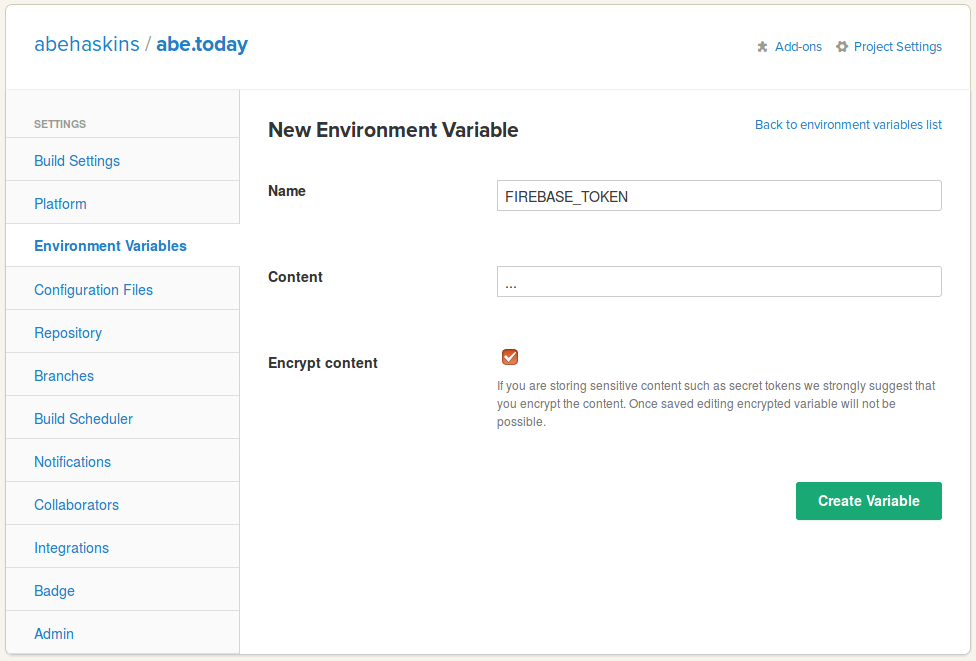
At this point, you may be tempted to try to try to deploy your application, but if you do it’ll fail. We still need to define $FIREBASE_TOKEN, so go to your Project Settings and pick the Environment Variables tab, then click Add an environment variable.
Setting an environment variable will allow us to securely pass our authentication token to the deployment command without storing it in our repository.
Let’s name this variable FIREBASE_TOKEN and make sure you’ve selected Encrypt content.
In regards to the actual content (our authentication token), we haven’t generated it yet. Head back to your terminal and run this command to generate a new CI token.
shell
	firebase login:ci
This command will reauthenticate your account and provide you with an evergreen authentication token which we’ll store in Semaphore.
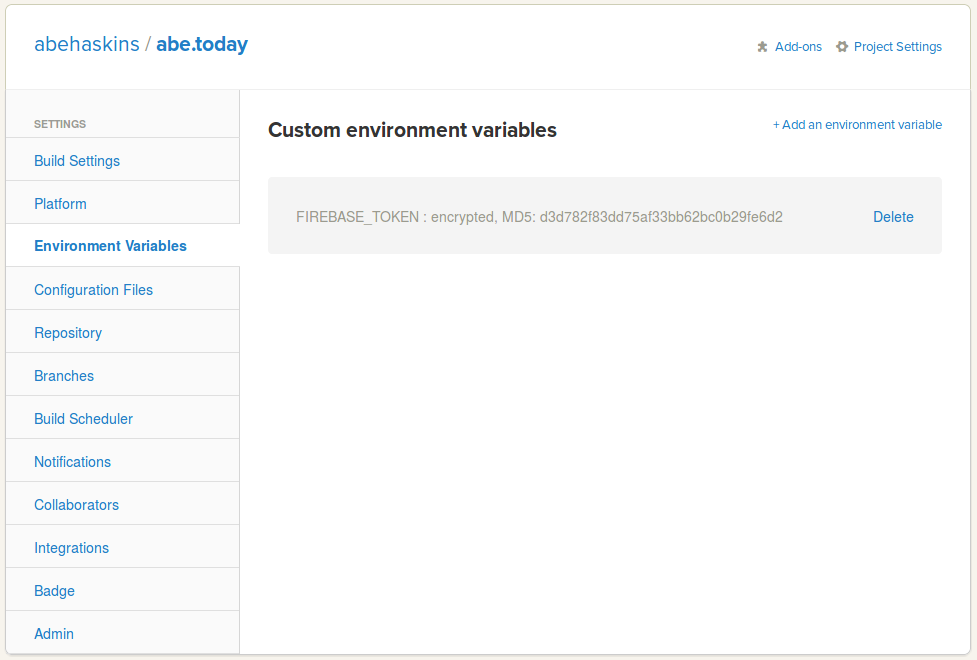
Once you’ve done this, go ahead and create the variable! Notice how the content shows up as encrypted so you can’t accidently show your token (even in a screenshot for a blog post!)
Deploy!
You’re all set! You can either go commit some change to your Github repo (perhaps changing public/index.html) if you’ve selected automatic deploys or you can navigate to a commit in your branch and hit the Deploy Manually button.
Either way your build should pass and be shipped to the Firebase servers moments later.
If something goes wrong and you end up with a broken deploy you can easily roll back to any previous deploy in the Firebase Console or simply redeploy an old commit in Semaphore.
If your build or deployment does fail, you’ll see plenty of debug information by clicking on the failed item in Semaphore. If you’re still struggling, feel free to leave a comment or reach out to me on Twitter.
Happy building!
