Today we are introducing a feature called Deployment Targets (available in our Startup and Scaleup plans).
As we all know, deployment to production is a procedure that should be approached with caution. This is especially the case in highly regulated environments. Customers are required to have proper, bullet-proof deployment control mechanisms that will allow them to stay compliant with all the industry regulations.
In this case, having a tight control over who can run a promotion and push code to production is a must. With the help of deployment targets, you can limit who can trigger promotions to specific environments, save secrets directly in deployment targets and set other crucial conditions for deployment to start.
Let’s take a closer look at what the feature entails.
What are deployment targets?
Deployment targets allow your organization to specify which pipelines exactly can deploy to this or that target, identify who can trigger a deployment, and limit from which branches, tags, or pull requests your team can deploy.
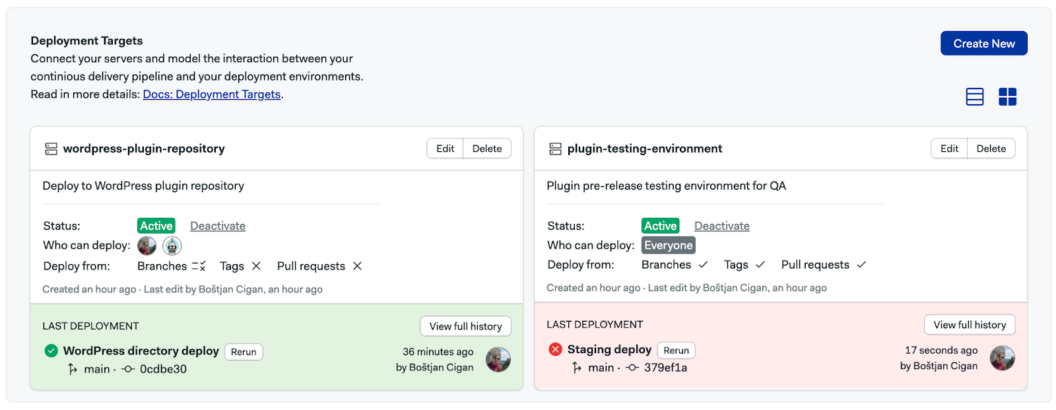
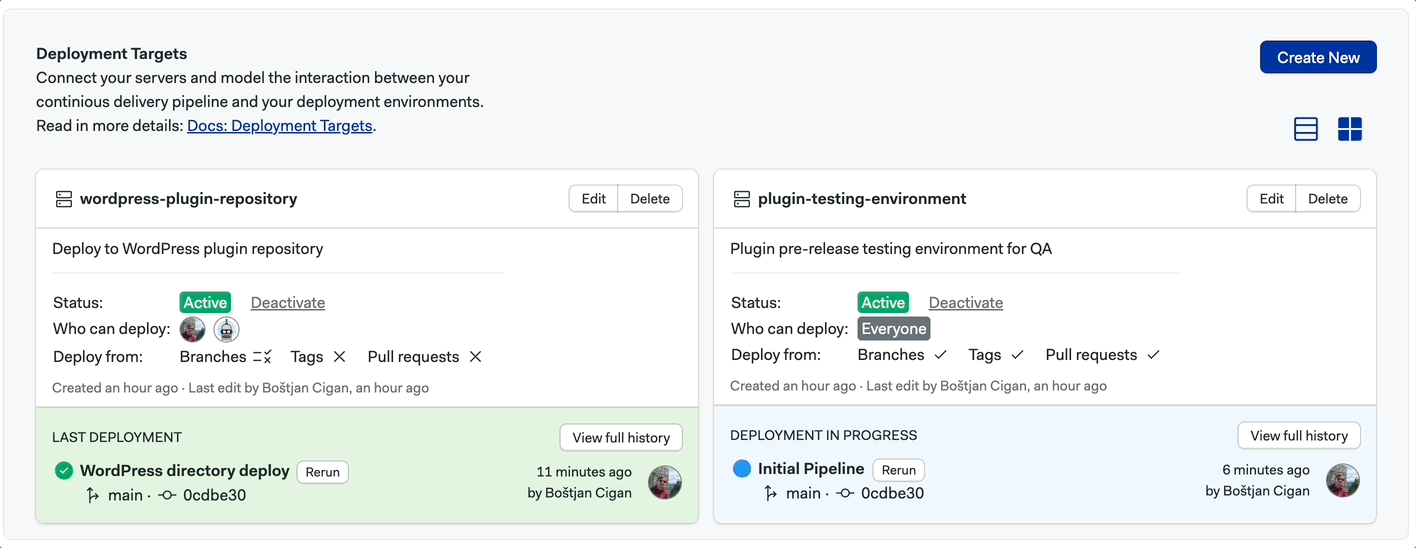
You can find deployment targets under Project > Deployments. All deployment targets have an under-area that displays the status of the latest deployment for that target:
- 🟢 Green indicates that the deployment was successful
- 🔴 Red means that the deployment failed
- 🔵 Blue means that the deployment is in progress
For each deployment target, you can see the following information: the name of the target (1), its status which tells us if the deployment target is active or temporarily disabled (2), who has the ability to deploy and where from (3), who deployed last time and when (4), the deployment branch and pull request (4).
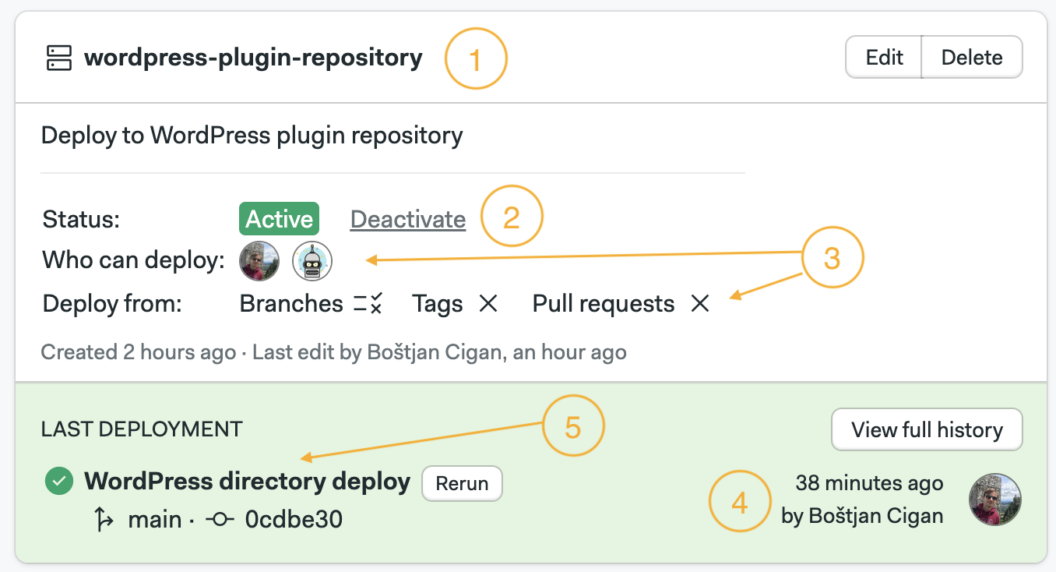
On the dashboard, you can also choose to edit or delete the deployment target.
Deployment target history
To access deployment target history, click the View full history button on the dashboard.
Here, you can see all the events associated with this specific deployment target: when the latest deployment happened and who triggered it. With this you can have a clear overview of all your deployments and you can also use filters (by branches, tags, pull requests or users) to browse through all the deployments that were executed.
How to create a new deployment target?
To create a new deployment target, hit the button “Create new”. The setup wizard will take you through the steps needed to setup a new target.
Step 1. Specify name, description and URL
On this step, you’ll need to provide some information that will help your team to identify what the target is and what it does. For example if this deployment target is used to build a mobile version of our app (that is named Friendly Traffic Light) to the App Store, we can name it friendly-traffic-light-ios-production-build. Remember to add as much context as possible to keep things clear.

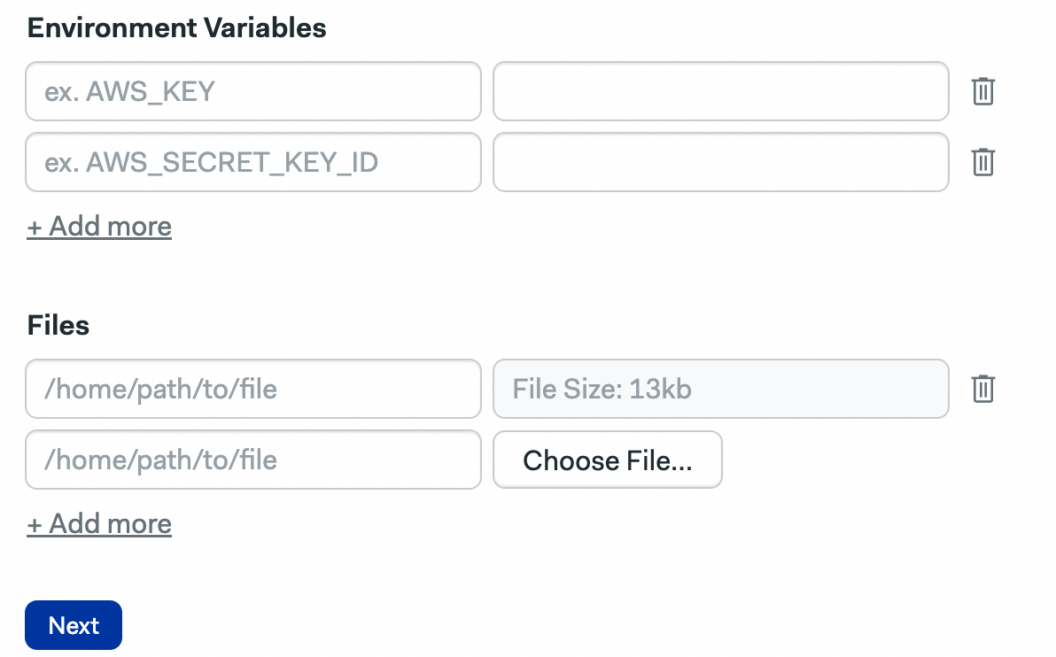
Step 2. Specify credentials
On this step, you’ll need to provide a set of variables that will help your pipeline to connect to this target. You can enter the secret keys and specify paths to files that you’ll need to connect to the deployment target. Think of this as secrets, but secrets that are only stored in this deployment target and not viewable on a project or organization level.
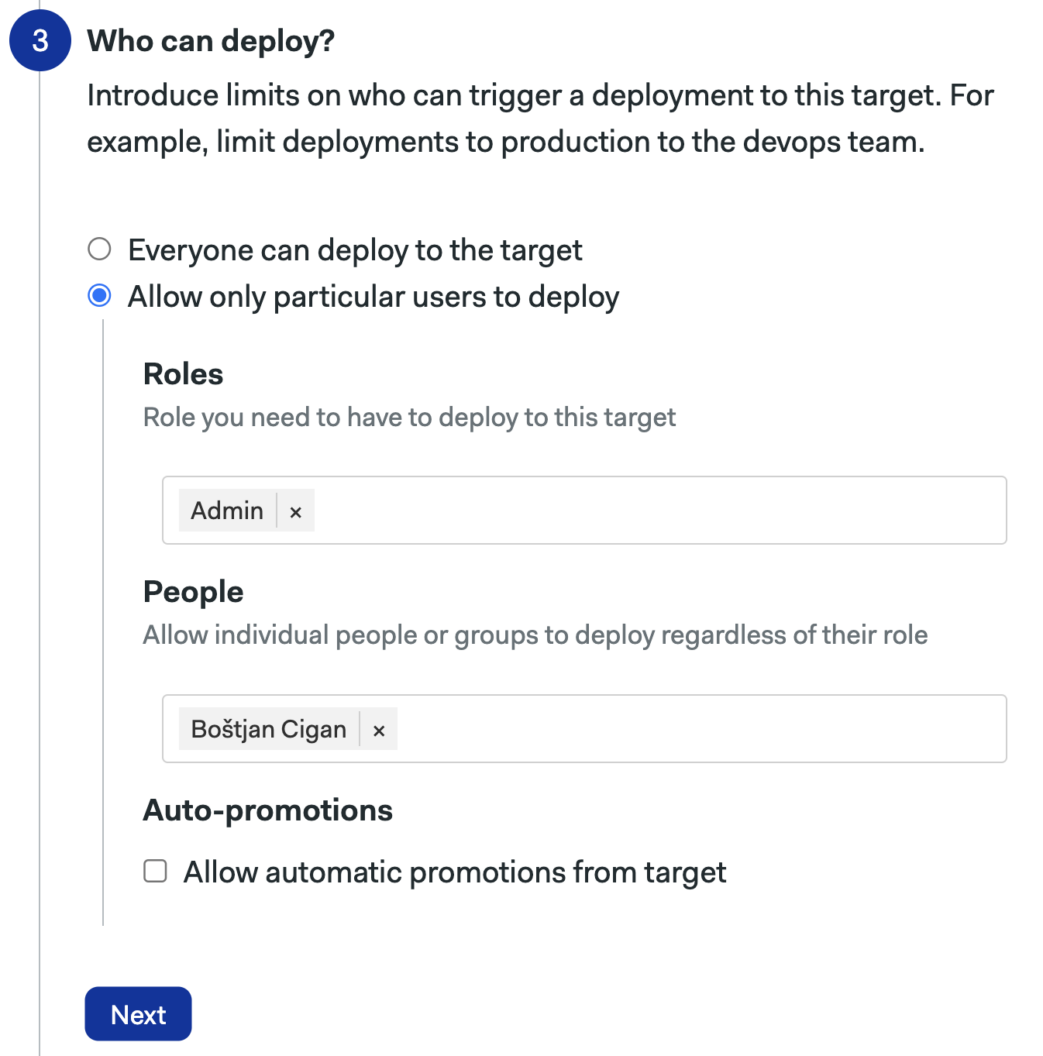
Step 3. Define who can deploy
On the Scaleup plan you can select the users that will be able to deploy the target. You can also choose specific roles (e.g., deployers or admins). In this case, all the people with these roles assigned will be able to deploy.
You can also select specific people and add them to the list. The rules for deployers sum up. So, everyone who meets any of the conditions (has a certain role or is specifically selected as a deployer) will be able to deploy.
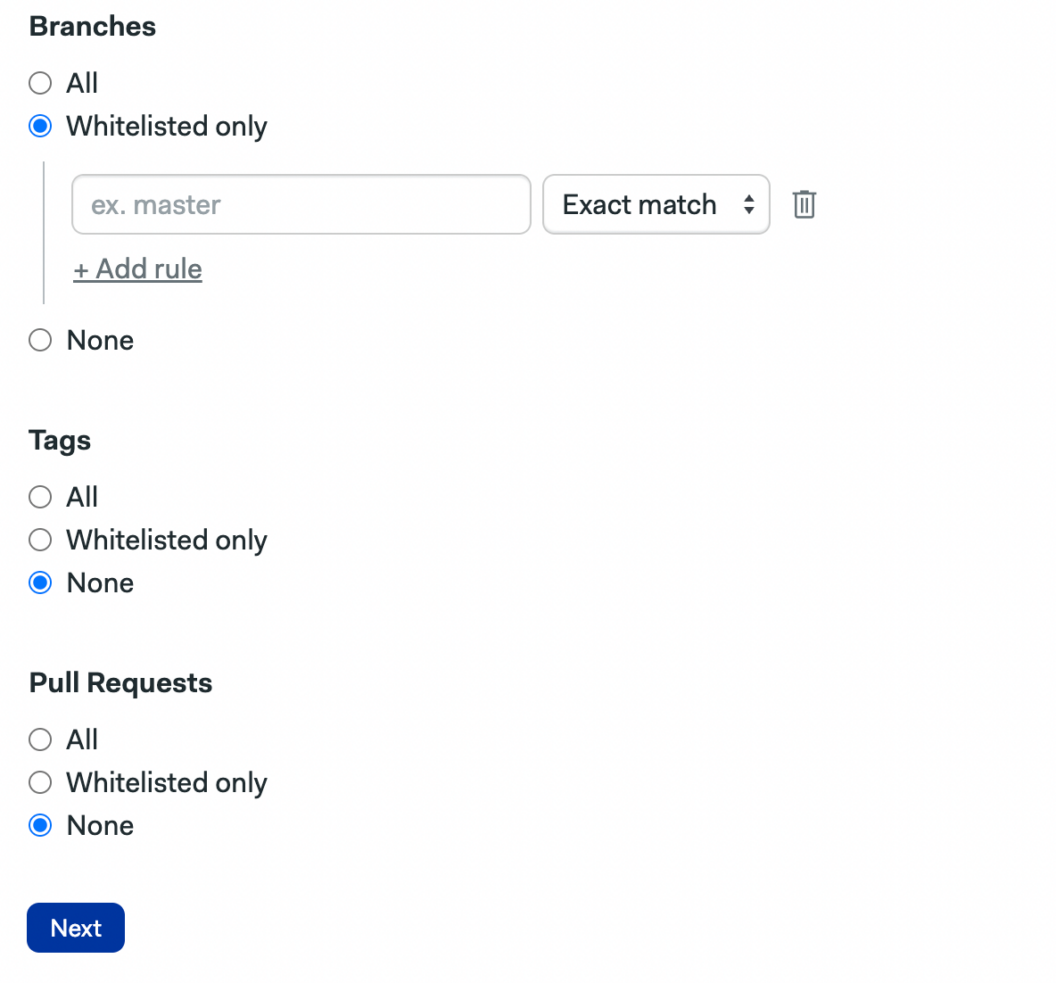
Step 4. Limit branches, tags and pull requests
Here, you can limit from which branches, pull requests and on which tags your team can deploy to this specific deployment target.
Step 5. Adding deployment target to your promotion
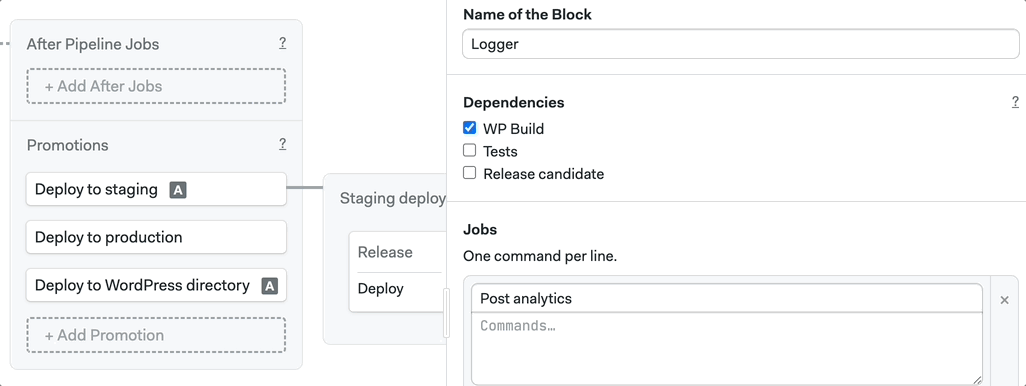
Now add the deployment target we have created to our builds by going to the Workflow Editor, selecting your promotion and specifying the deployment target.
Your deployment target is now ready!
Deployment targets demo
Deployment targets set-up tutorial
How are deployment targets helpful?
Deployment targets empower your team to add an extra layer of security for your deployments. With the help of deployment targets, promotion will be triggered only if all the conditions are met. Define who exactly can trigger the promotion, on what branches and tags.
Here’s a list of all the limitations and conditions that you can set for your deployment targets:
- Limit who can run promotions
- Limit which pipelines can use which secrets
- Limit who can rerun a pipeline and indirectly cause an auto-promotion
- Limit who can run a pipeline over the API
Are you interested in learning more about the feature? Feel free to reach out to us at support@semaphoreci.com, and we’ll be happy to help.
Happy building!