This post is adapted from Rails Testing Handbook, a free ebook on building sustainable Rails apps with BDD.
In this tutorial, we will guide you through the process of generating a new Rails 5 application, with all the necessary tools to set up a behavior-driven development (BDD) flow.
We will set up 5 tools that represent the base of BDD development in Rails:
- RSpec for writing unit test,
- Cucumber for writing acceptance tests,
- Shoulda Matchers for enhancing model tests,
- Factory Bot for factory based database fixtures, and
- Database Cleaner for setting up a clean environment between test runs.
- Rails Controller Testing for expanding our controlling testing arsenal
When you’re finished setting up the project on your machine, we will set it up on Semaphore, and establish a fully automated continuous integration workflow.
System Prerequisites
To follow our guide, you need to have the following installed on your Unix-based machine.
- Git,
- Ruby 2.4.0 or newer,
- Node.js, and
- PostgreSQL 9.5+.
Bootstrapping a Rails Application
Let’s start by installing Rails on our machines. Run the following command in your terminal:
gem install rails
Now, we are ready to generate a new Rails application.
rails new bdd-app -d postgresql
The -d postgresql specifies that our application will use PostgreSQL as our database management system instead of SQLite, which is set as a default for Rails.
Let’s now switch to your application’s directory:
cd bdd-app
Install your Rails application’s dependencies:
bundle install --path vendor/bundle
By passing the --path parameter we are telling bundler to install gems in the bdd-app/vendor/bundle directory. If you leave off the parameter, gems will be installed globally, which isn’t a good practice if you are working on more than one Ruby application on the development machine.
Finally, set up your database:
bundle exec rails db:create
bundle exec rails db:migrate
Installing RSpec
First, we will set up RSpec for writing unit specs.
Start by adding rspec in the Gemfile file, under the development and test group:
group :development, :test do
  ...
  gem 'rspec-rails', '~> 3.5'
end
Run bundle install to install the gem on your local machine.
To finish the install, invoke the rails generator to set up the spec directory in your application.
bundle exec rails generate rspec:install
When the command finishes, you should have a new spec directory in your project. This directory is the base for all of your unit specs.
Installing Cucumber
Next, we will continue to set up Cucumber, the tool used for writing acceptance tests.
Add cucumber-rails gems to the :development, :test group of your Gemfile:
group :development, :test do
  ...
  gem 'cucumber-rails', require: false
end
Run bundle install to install the gem on your local machine.
To finish the install, invoke the rails generator to set up the features directory in your application:
$ bundle exec rails generate cucumber:install

Running via Spring preloader in process 2192
      create  config/cucumber.yml
      create  script/cucumber
       chmod  script/cucumber
      create  features/step_definitions
      create  features/step_definitions/.gitkeep
      create  features/support
      create  features/support/env.rb
       exist  lib/tasks
      create  lib/tasks/cucumber.rake
        gsub  config/database.yml
        gsub  config/database.yml
       force  config/database.yml
When the command finishes, you should have a new features directory in your project. This directory is the base for all of your acceptance tests.
Installing Shoulda-matchers
The Shoulda-matchers gem speeds up our testing time by using wrappers around common Rails functionality, such as validations, associations, and redirects.
To install shoulda-matchers, we need to add the shoulda-matchers gem to our development and test group inside the Gemfile:
group :development, :test do
  ...
  gem 'shoulda-matchers', git: 'https://github.com/thoughtbot/shoulda-matchers.git', branch: 'rails-5'
end
Install the gem by running:
bundle install
We need to configure this gem by specifying the test frameworks and libraries we want to use it with. Open spec/rails_helper.rb and paste the following block at the end:
Shoulda::Matchers.configure do |config|
  config.integrate do |with|
    with.test_framework :rspec

    with.library :active_record
    with.library :active_model
    with.library :action_controller
    with.library :rails
  end
end
Installing FactoryBot
Factory Bot is a gem used for making “fake” objects as test data. It is essentially a fixtures replacement with a clear definition syntax. It allows you to create fake objects in tests without providing a value for each attribute of the given object. If you don’t provide any values to the attributes of the object, factory_bot uses the default values that are previously defined in factory’s definition.
Add the following line to the development and test group of your Gemfile:
group :development, :test do
  ...
  gem 'factory_bot_rails'
end
Install the gem with:
bundle install
After the installation, you can place factories for your database models in the spec/factories directory.
Installing the Database Cleaner
We want to make sure that the state of the application is consistent every time we run our tests. The best way to do this is to clean all the data in the database between each test run, and construct a new clean state for each test.
The database-cleaner gem is a set of strategies for cleaning our database between test runs.
First, add the gem to the :test group in your Gemfile:
# Gemfile
group :test do
  gem 'database_cleaner'
end
Run bundle install to install the gem.
When the gem is installed, we will set up a cleaning strategy for RSpec tests. Open the spec/rails_helper.rb file, and add the following snippet:
RSpec.configure do |config|

  config.before(:suite) do
    DatabaseCleaner.strategy = :transaction
    DatabaseCleaner.clean_with(:truncation)
  end

  config.around(:each) do |example|
    DatabaseCleaner.cleaning do
      example.run
    end
  end

end
We don’t have to make any modifications to Cucumber. The cucumber-rails generator already created all the necessary hooks to integrate itself with the database-cleaner gem.
Setting up the Rails Controller Testing gem
The rails-controller-testing gem expands the capabilities of our controller specs. It allows us to test variable and template assignments.
Add it to your Gemfile under the test group:
gem 'rails-controller-testing'
Run bundle install to install the gem.
RSpec automatically integrates with this gem. Adding the gem to your Gemfile is sufficient for the helpers to work in your controller specs.
Setting up a Repository
We will use GitHub to set up your repository for this project.
First, let’s make sure that our repository is ready to be published and that we won’t push any unnecessary file or directory to GitHub.
Add the vendor/bundle directory to your .gitignore file to prevent pushing gems to Github.
echo 'vendor/bundle' >> .gitignore
Then, let’s create our first commit.
git add .
git commit -m "Bootstrapping Rails BDD application"
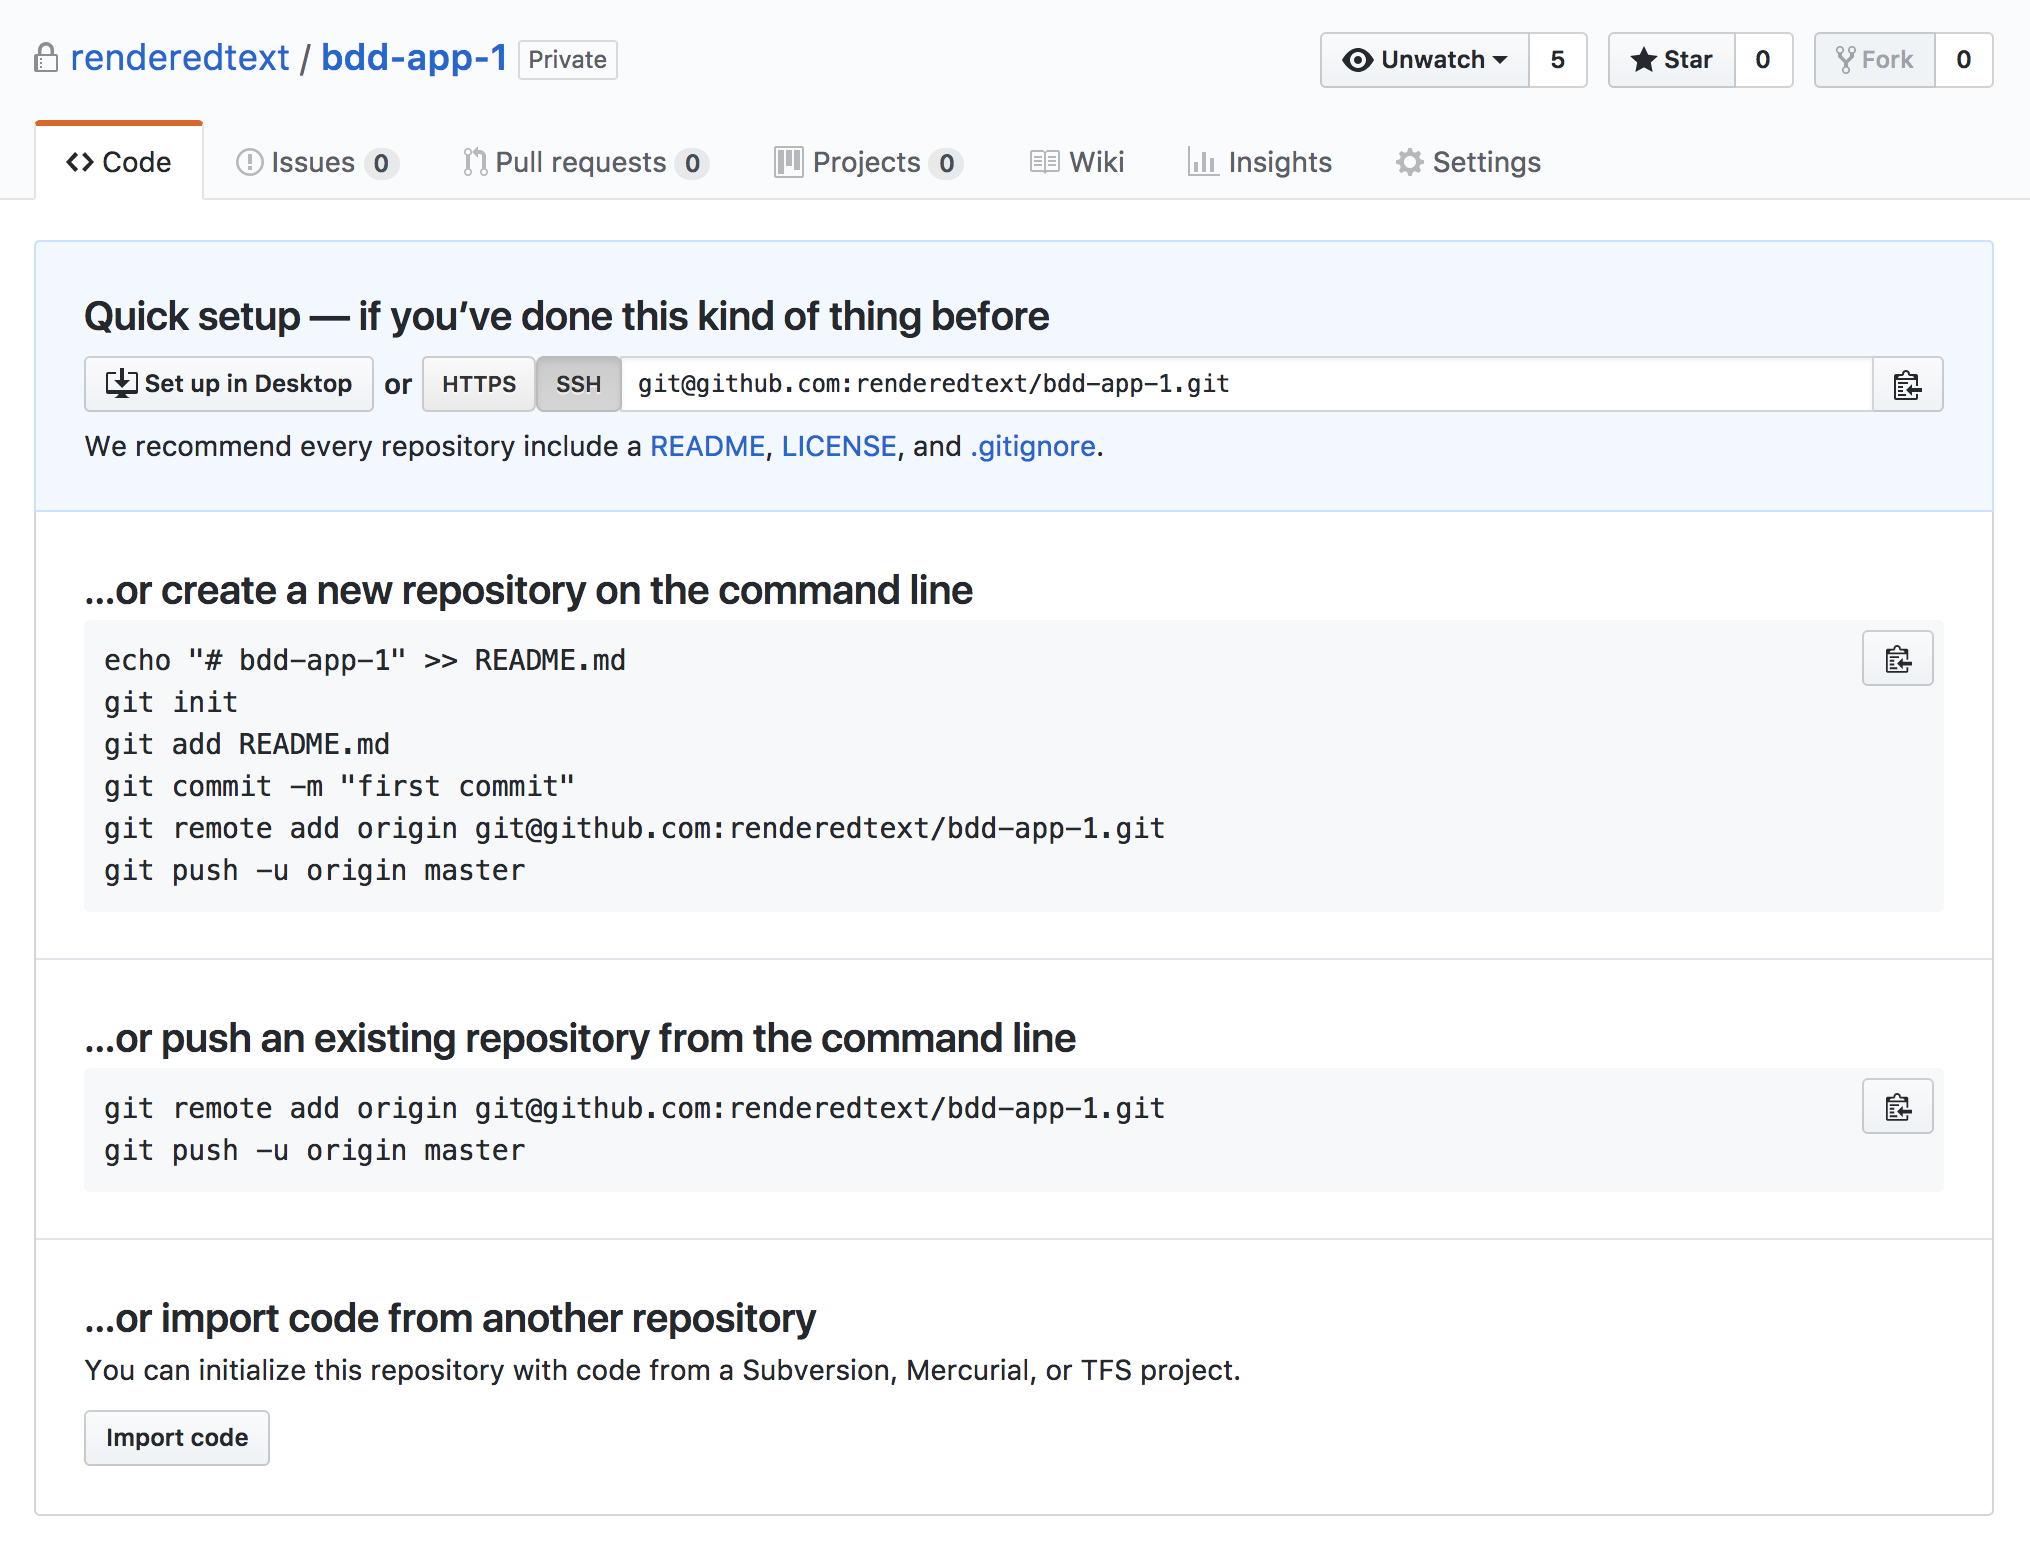
Visit https://github.com/new and create a new repository for your project. GitHub will give show you the instructions how to connect your local repository with the remote one.
Finally, add the new remote and push your code to GitHub.
git remote add origin git@github.com:<YOUR-USERNAME>/<YOUR-REPO>.git
git push -u origin master
Setting up Continuous Integration
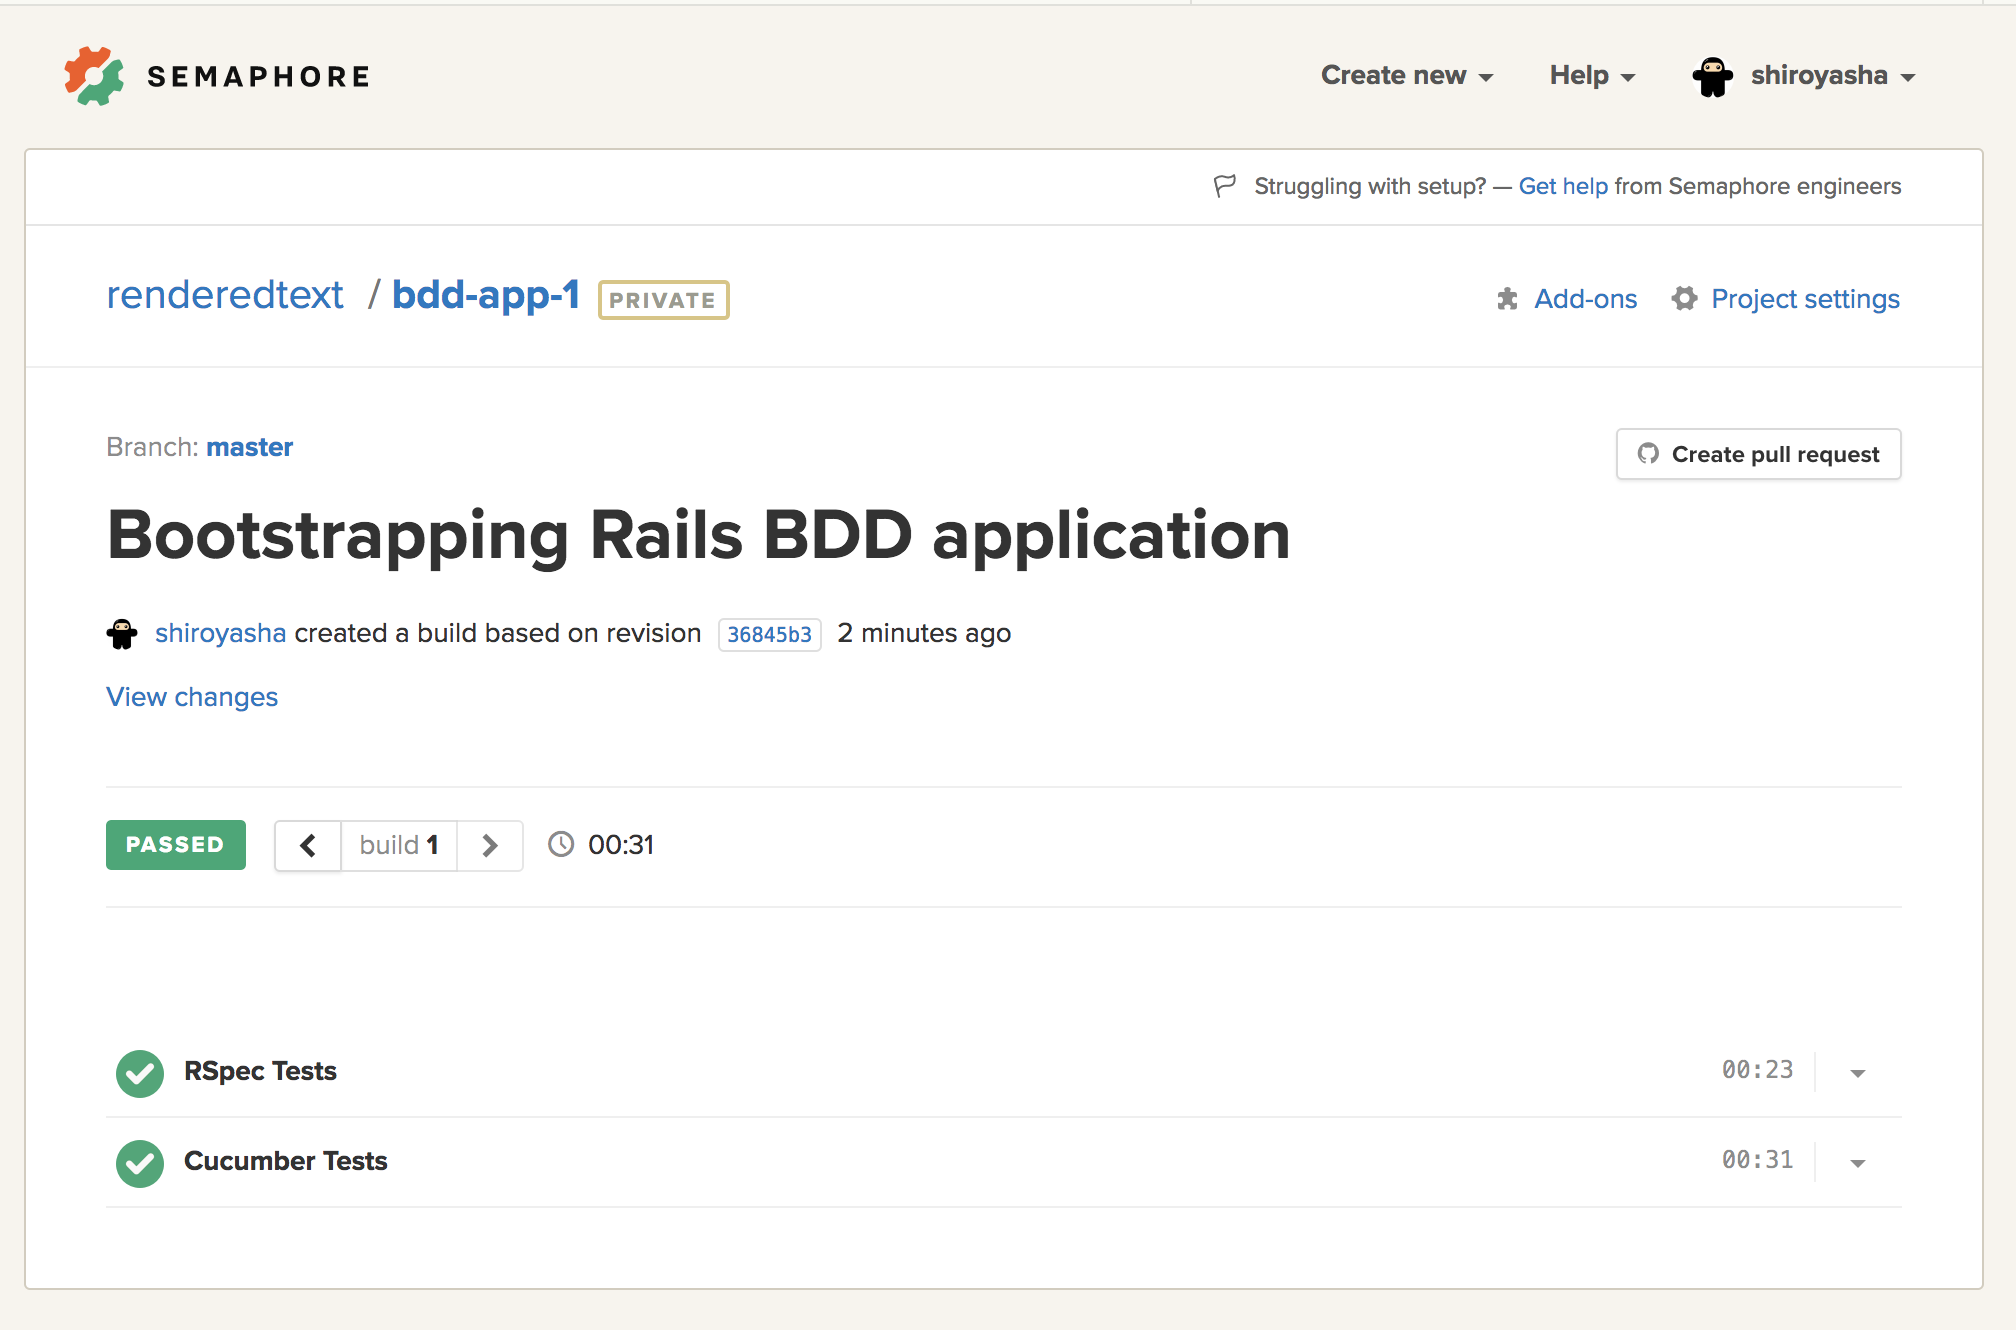
As the final step in this tutorial, we will ensure that our project is started with a clean, greens build. This will be our first safe point of return for our application, and will act as the solid foundation for further development.
The first step is to create a free Semaphore account.
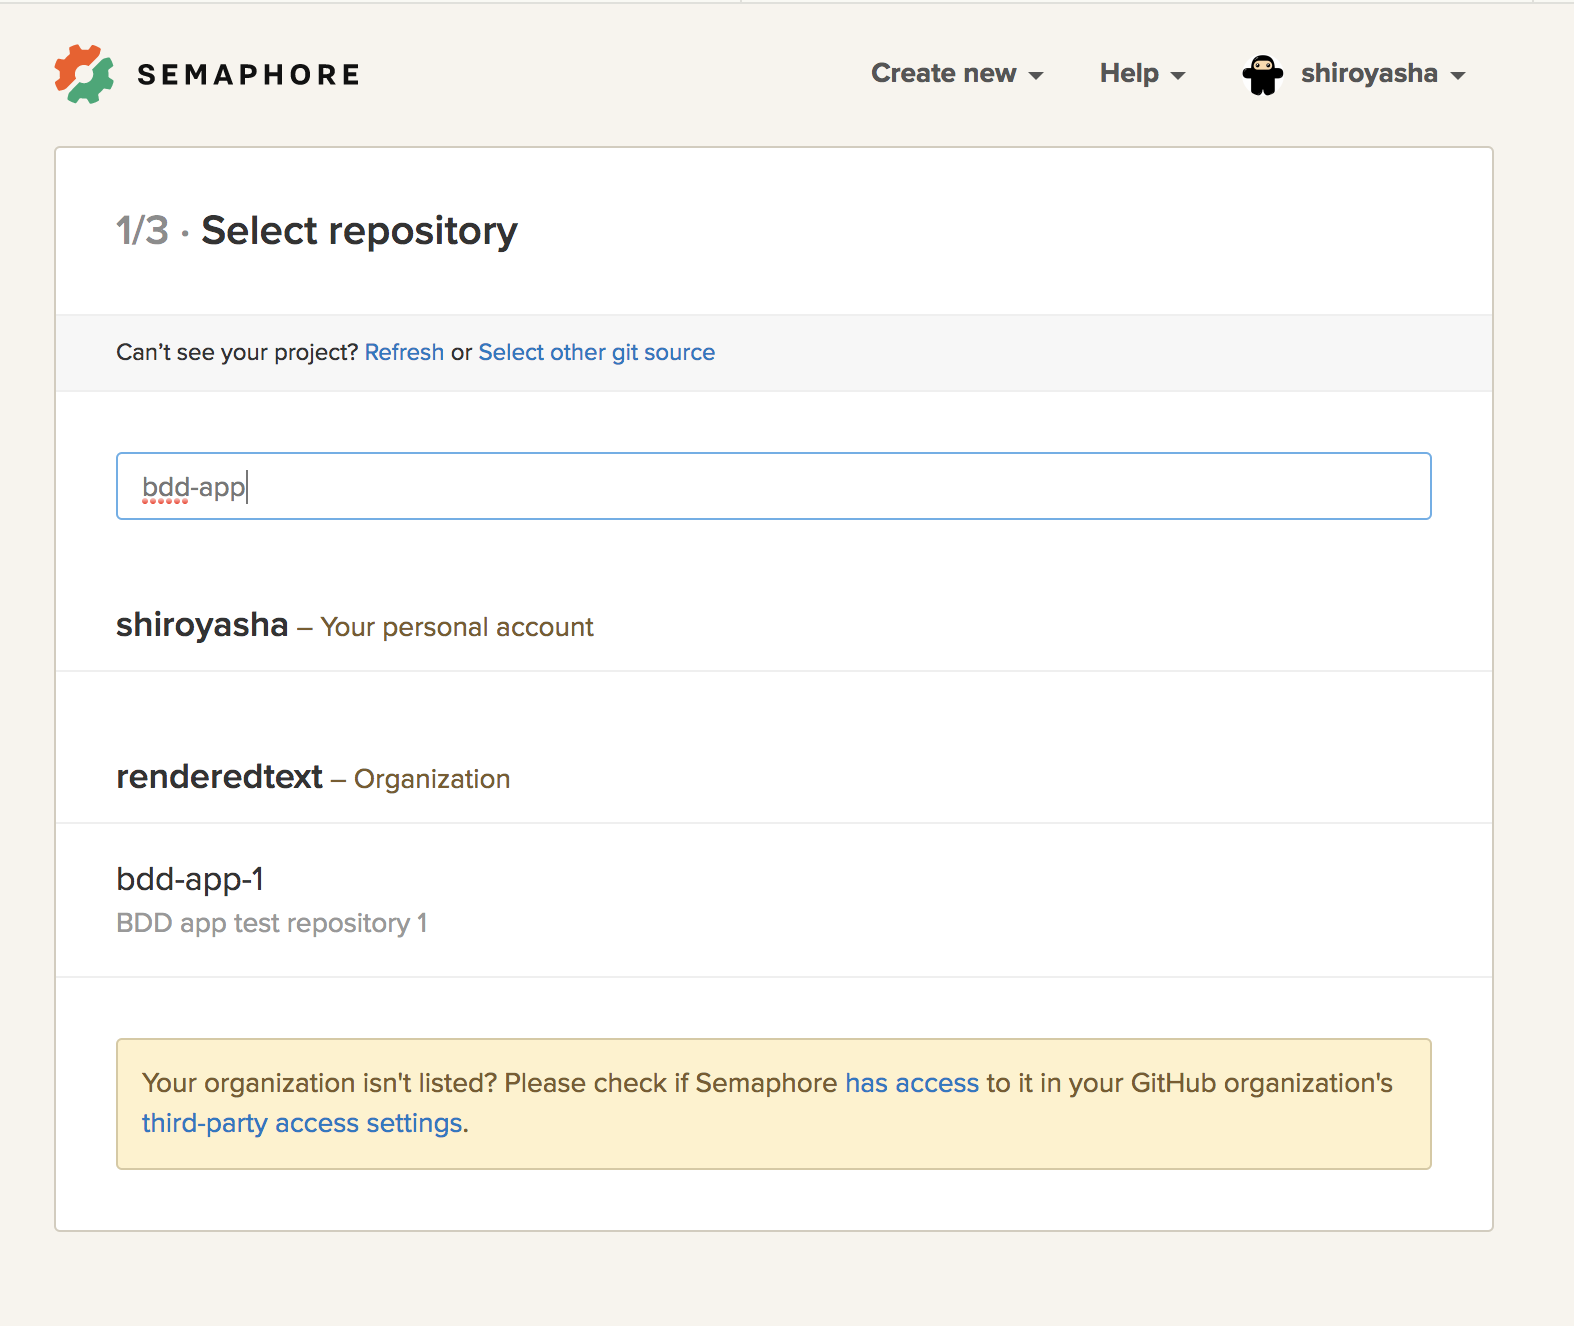
Choose your GitHub repository from the list:
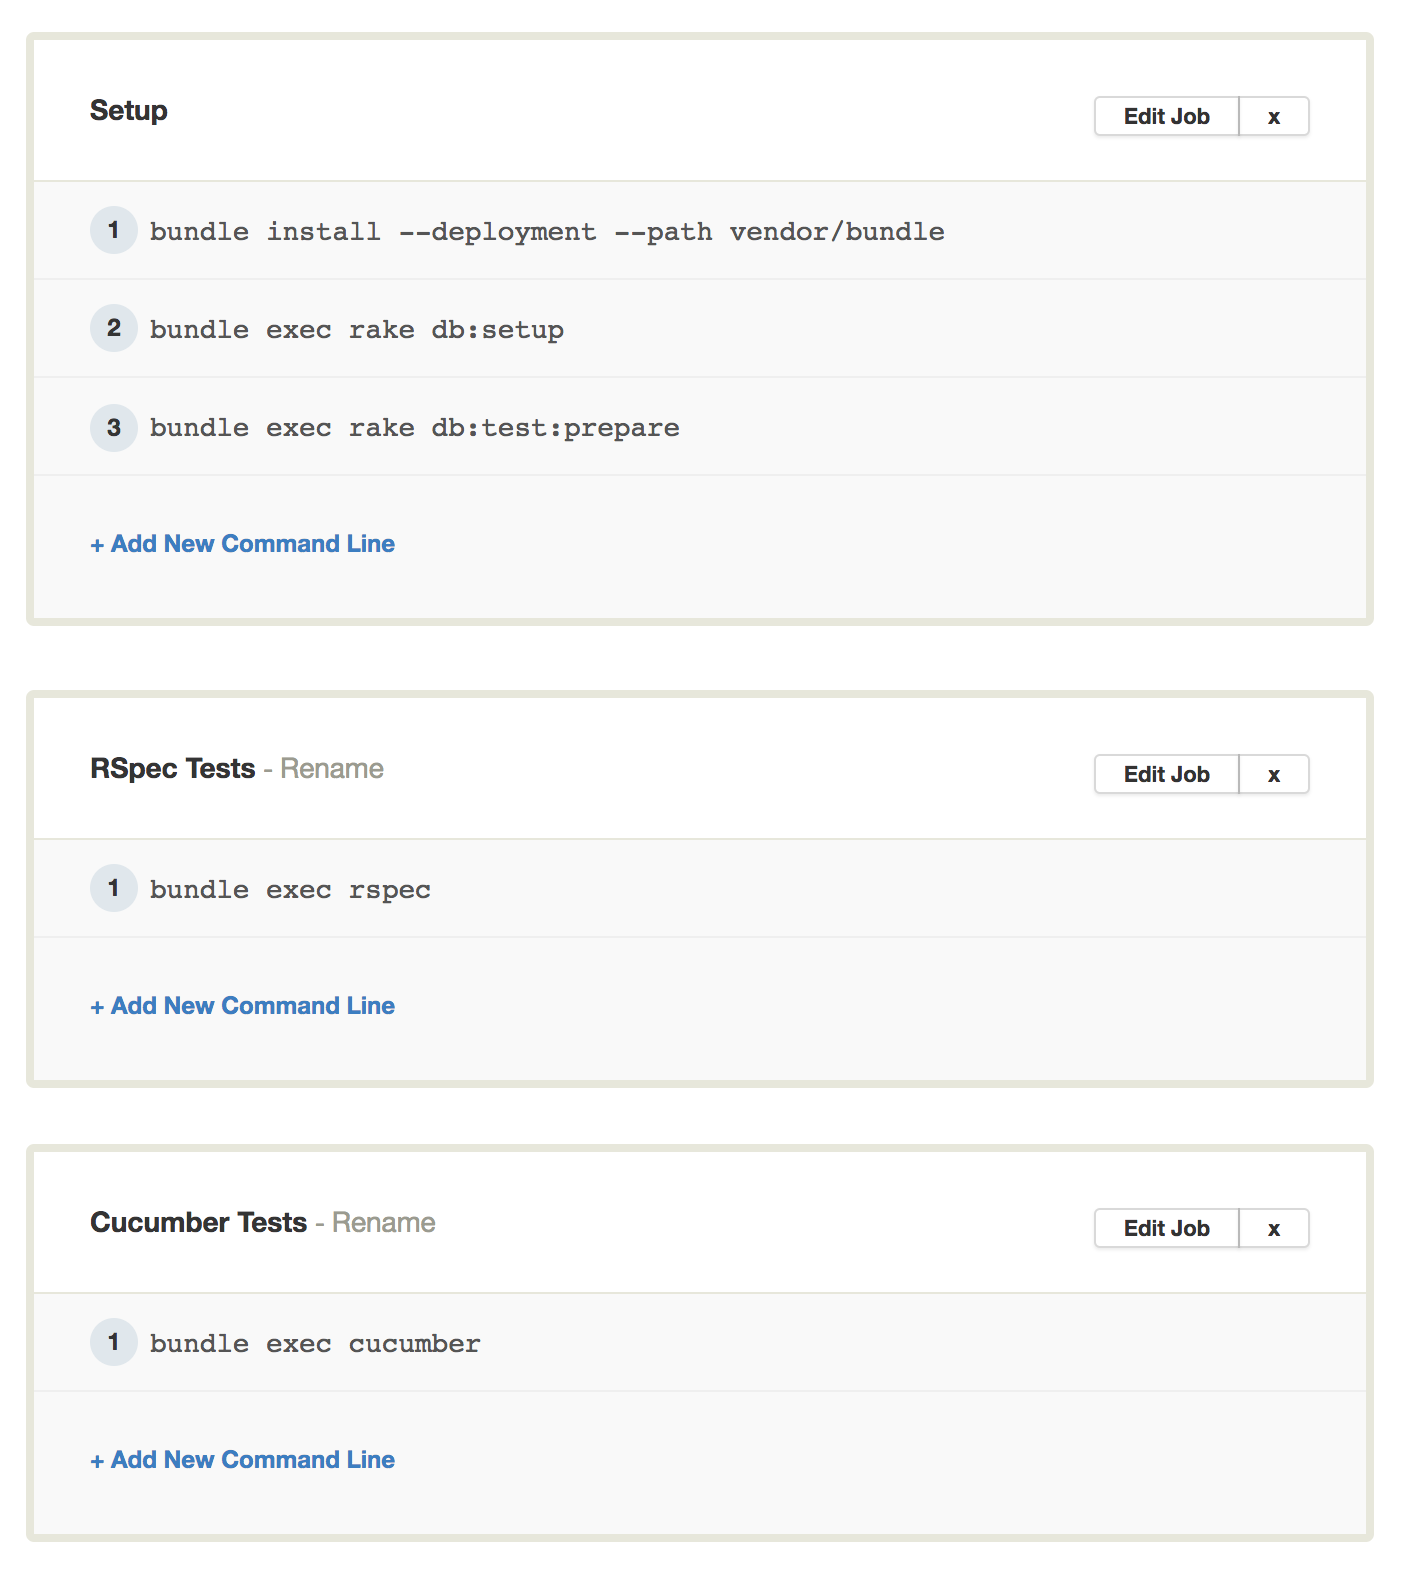
Follow the setup guide. Semaphore will recognize that you have a Rails project with Postgresql, and will generate all the commands for a successful first build.
Let’s tweak the command list, and add our RSpec and Cucumber test suites.
Hit “Build With These Settings” to start the first build for your project.
Conclusion
Congratulations! You’ve set up a great foundation for behavior-driven development with Rails 5, RSpec and Cucumber. You are now fully equipped to work in the BDD cycle and deliver clean, working code.
Looking for more hands-on examples? Download the free Rails Testing Handbook to get in-depth knowledge on building sustainable Rails apps with tests.


