Introduction
If you’re developing React applications, then you know that the React community has been bursting with new ideas and tools over the last year. When investigating any new technology to incorporate into a stack, we should consider if it either makes the workflow much easier, or solves a key problem. MobX and Enzyme are 2 new libraries in the React world that fit the bill. This sample todo application is incredibly easy to build with React and MobX, and in this article we’ll cover unit and UI/functional testing for React and MobX with Enzyme.
Code Smell in React
There’s no shortage of ways to build applications with React, but one thing is for sure — React shines the brightest when it is used as a reactive view layer sitting on top of the state of your application. If you use it for more than that, e.g. the UI is responsible for determining when and how to load data or the UI stores certain aspects of state, this can quickly lead to code smell.
In order to keep our React projects from growing messy, we need store the application state completely outside of the UI. This will not only make our application more stable, but it will also make testing extremely simple, as we can test the UI and the state separately.
Enter MobX
While frameworks and patterns like Flux, Redux and Relay give you a powerful way to manage the state of your application outside of the React view layer, they are complicated to set up, and it can take a while to make simple changes. One of the big reasons that MobX is quickly growing in popularity is the fact that it is very simple, which is nearly as simple as coding an object literal . That means you get a tremendous developer experience without sacrificing application stability.
What is Enzyme?
Enzyme will be our testing tool of choice, since it will allow us to test React components with jQuery-like syntax. This means functional and integration-style tests will be easy to write.
Accessing the Code:
- You can find the code for the simple todo application on GitHub: learncodeacademy/react-js-tutorials,
- The only requirement is Node.js version 4 or higher,
- To get it up and running, type
npm install && npm start, and - Visit the application on
localhost:8080.
Now, let’s get to testing this application.
Installing Enzyme and Jest
While Mocha works great with Enzyme, Jest is a little bit simpler to set up. Our 3 testing dependencies will be: jest for testing, babel-jest for transpiling our ES6, and enzyme for our functional React tests. Let’s clone the repository, then run npm install and also install those dependencies.
git clone git@github.com:learncodeacademy/react-js-tutorials.git
cd react-js-tutorials/6-mobx-react
npm install
npm install --save-dev enzyme jest babel-jest
With these packages installed, Jest is fully configured out of the box. Babel will still work great as long as Babel is configured with a .babelrc file. Some people configure Babel in webpack.config.js, if that’s you, then you’ll need to move it to the .babelrc file so Jest and Webpack can both use the config.
We can now run jest and notice that no tests are found:
$ jest
Using Jest CLI v14.1.0, jasmine2, babel-jest
NO TESTS FOUND. 5 files checked.
  testPathDirs: /Users/cmn/Code/sandbox/react-mobx - 5 matches
  testRegex: __tests__/.*.js$ - 0 matches
  testPathIgnorePatterns: /node_modules/ - 5 matches
Unit Testing with MobX
Since MobX classes behave like object literals, testing is incredibly simple. Let’s begin by unit testing our TodoList store. Jest will run anything in the __tests__ directory by default, so let’s run these 2 commands to make the directory as well as our first test file.
mkdir __tests__
touch __tests__/TodoStore.test.js
Jasmine is the default runner for Jest, so we have access to describe, it, and expect without configuring anything. This means that we can get straight to writing our first test.
import { TodoStore } from "../src/js/TodoStore"

describe("TodoStore", () => {
  it("creates new todos", () => {
    const store = new TodoStore
    store.createTodo("todo1")
    store.createTodo("todo2")
    expect(store.todos.length).toBe(2)
    expect(store.todos[0].value).toBe("todo1")
    expect(store.todos[1].value).toBe("todo2")
  })
We created a new TodoStore, did some actions and observed the result just as if it were an object literal. The biggest advantage of MobX is its simplicity. Any changes we made would have been passed onto any observers as well. It’s important to note that we imported the store constructor { TodoStore } and not the default export, which is an instantiated store. This allows our next test to instantiate its own fresh store as well:
it("clears checked todos", () => {
  const store = new TodoStore
  store.createTodo("todo1")
  store.createTodo("todo2")
  store.createTodo("todo3")
  store.todos[1].complete = true;
  store.todos[2].complete = true;
  store.clearComplete()

  expect(store.todos.length).toBe(1)
  expect(store.todos[0].value).toBe("todo1")
})
With unit testing in place, let’s use Enzyme to do some unit tests against our UI layer:
Unit Testing with React and Enzyme
Let’s being by making the file:
touch __tests__/TodoList.unit.test.js
Again, since MobX stores act just like object literals, we can test our React component by injecting it with any object literal to simulate a store state. We can use a single beforeEach to provide this state to all tests:
import { shallow } from 'enzyme'
import React from "react"

import TodoList from "../src/js/TodoList"

describe("TodoList", function() {
  //don't use an arrow function...preserve the value of "this"
  beforeEach(function() {
    this.store = {
      filteredTodos: [
        {value: "todo1", id: 111, complete: false},
        {value: "todo2", id: 222, complete: false},
        {value: "todo3", id: 333, complete: false},
      ],
      filter: "test",
      createTodo: (val) => {
        this.createTodoCalled = true
        this.todoValue = val
      },
    }
  })

  //tests will go here and receive this.store

})
Notice how we do not use an ES6 arrow function for the beforeEach? We want to make sure that the value of this remains the same or this.store will not get passed on to our tests. When using context for tests, it’s a good idea to stop using arrow functions. However, we want to use an arrow function on our createTodo function, so we can set this.todoClicked and this.todoValue on the parent context when it gets called.
Now, adding a test is straightforward:
//don't use an arrow function, preserve the value of "this"
it("renders filtered todos", function() {
  const wrapper = shallow(<TodoList store={this.store} />)

  expect(wrapper.find("li span").at(0).text()).toBe("todo1")
  expect(wrapper.find("li span").at(1).text()).toBe("todo2")
  expect(wrapper.find("li span").at(2).text()).toBe("todo3")
})
We use Enzyme to create a wrapper for our store-injected-component, then we can ensure that all 3 todos printed correctly. Now, let’s add some tests that simulate user interaction on the component:
it("calls createTodo on enter", function() {
  const wrapper = shallow(<TodoList store={this.store} />)

  wrapper.find("input.new").at(0)
    .simulate("keypress", {which: 13, target: {value: 'newTodo'}})

  expect(this.createTodoCalled).toBe(true)
  expect(this.todoValue).toBe("newTodo")
})

it("updates store filter", function() {
  const wrapper = shallow(<TodoList store={this.store} />)

  wrapper.find("input.filter").at(0)
    .simulate('change', {target: {value: 'filter'}})

  expect(this.store.filter).toBe("filter")
})
Enzyme allows us to easily simulate real JS events. The first argument of simulate is the event type, and the 2nd argument is the event object. Now, we have verified that the component calls createTodo when todos are created and also updates the filter when changed.
Integration Tests
Every now and then, you may find it useful to test that components work together the way they should. If you want to do this with React and MobX, you should simply replace the mock store with a real MobX store. Create TodoList.functional.test.js and add this:
import { shallow } from 'enzyme'
import React from "react"

import TodoList from "../src/js/TodoList"
import { TodoStore } from "../src/js/TodoStore"

describe("TodoList.functional", () => {

  it("filters todos", () => {
    const store = new TodoStore

    store.createTodo("todo1")
    store.createTodo("todo2")
    store.createTodo("todo3")
    store.filter = "2"

    const wrapper = shallow(<TodoList store={store} />)

    expect(wrapper.find("li").length).toBe(1)
    expect(wrapper.find("li span").at(0).text()).toBe("todo2")
  })
})
We are able to verify that the component behaves correctly with an actual MobX store as well. We can also verify that user interaction modifies the store appropriately:
it("clears completed todos when 'clear completed' is clicked", () => {
  const store = new TodoStore

  store.createTodo("todo1")
  store.createTodo("todo2")
  store.createTodo("todo3")
  store.todos[0].complete = true
  store.todos[1].complete = true

  const wrapper = shallow(<TodoList store={store} />)

  wrapper.find("a").simulate("click")

  expect(wrapper.find("li").length).toBe(1)
  expect(wrapper.find("li span").at(0).text()).toBe("todo3")
  expect(store.todos.length).toBe(1)
})
Notice our expect at the bottom, we can verify that both the UI and the store changed appropriately when the “clear completed” link is clicked.
Continuous Testing
Since we’ve come this far, why not wrap up the day by adding continuous testing in just a few clicks?
- Head to semaphoreci.com and click
Sign Upto create a Semaphore CI account, - Once you’ve confirmed your email, log in and click “Add New Project”,
- Select your “Cloud Account” by clicking on your username,

- At this point, you’ll be prompted to authorize GitHub or BitBucket if you haven’t done so already,
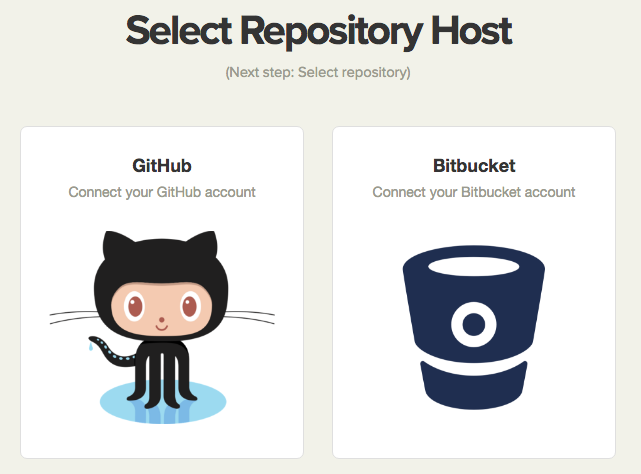
- Select the GitHub repository that you want to build,
- We’re good to go — It’s already building!
Semaphore excels as a CI tool for 2 main reasons: simplicity and speed. When pushes are made to this React and MobX project, it only takes 35 seconds to install dependencies and test the project. For reference, that’s 5 seconds faster than running npm install && jest on a MacBook Pro.
Wrapping Up
Adding MobX and Enzyme to our React application really made the data and testing layers fun to work with. Getting our application tested continuously took nearly no time.
Good tools make the developer’s job simpler. MobX, Enzyme and Semaphore CI are 3 of those tools – they stay out of the way, so you can get things done. If you have any questions and comments, feel free to leave them in the section below.
Thanks for the nice article, Will!
I’m not sure that it’s a code smell to handle local component state. In the codebase I’m working in at the moment, everything is wrapped in an observer, and there are 15 different stores. Anything changing in any store at any time is expected to trigger reactive re-renders, and it just doesn’t work that way without a lot of cajoling and manual QA testing.
I think having any type of “global store” used in an inconsistent way is more of a code smell than local component state.