Introduction
In this tutorial, we’ll cover how to create a server with Amazon Web Services, do configuration management with Ansible, deploy Rails applications with Capistrano, and how to do continuous integration with Semaphore.
All the code from this tutorial is available in a repository on GitHub. If you get stuck, you can always compare it against the code in there which is known to work.
Before we jump into creating our server, let’s introduce all of these concepts so we understand what we’re getting into.
Configuration Management
The first thing we’ll do is set up a server using configuration management. We’ll be using a tool called Ansible. It allows us to express the configuration of our server using YAML. This replaces the need for us to manually connect to the server and run all the commands ourselves, which can be error prone and slow, in case more servers are added. It’s effectively a way of managing the state of our server in code rather than in our heads.
This tutorial is written using Ansible version 2.4.2.0.
Deployment
We’ll be deploying our Rails application with Capistrano. Capistrano is similar to Rake tasks in Ruby, except it allows us to run them on remote servers through SSH.
This tutorial is written using Capistrano 3.10.1.
Continuous Integration
To fully automate our development process, we’ll be setting up Semaphore to automatically pull our code whenever we push to GitHub, run our tests, and deploy our Rails application to our server if the build is successful.
Creating a Server
We’ll start this tutorial by creating our server. We’ll be using Ubuntu Linux for our server’s operating system. We’ll provision this server later using Ansible.
You can use any server running Ubuntu Linux you can get your hands on, however, in this tutorial, we’ll be creating a server using Amazon Web Services (AWS). The specific Amazon Web Service we’ll use for this is the Elastic Compute Cloud (EC2).
AWS has a free tier, so you can follow this tutorial along, using AWS, without having to pay anything.
Start by heading to the AWS EC2 site and click on the Get Started button. This will prompt you to sign up. You can skip this step if you’ve already signed up for an AWS account.
This should bring you to the EC2 Management Console page. Next, we’ll create a new EC2 instance. To do this, click the Launch Instance button, as seen in the following image.

This will start a wizard which will guide you through creating the EC2 instance. We start by choosing an Amazon Machine Image (AMI). For this tutotial, you want to choose Ubuntu Server 16.04 LTS, as seen in the image below.

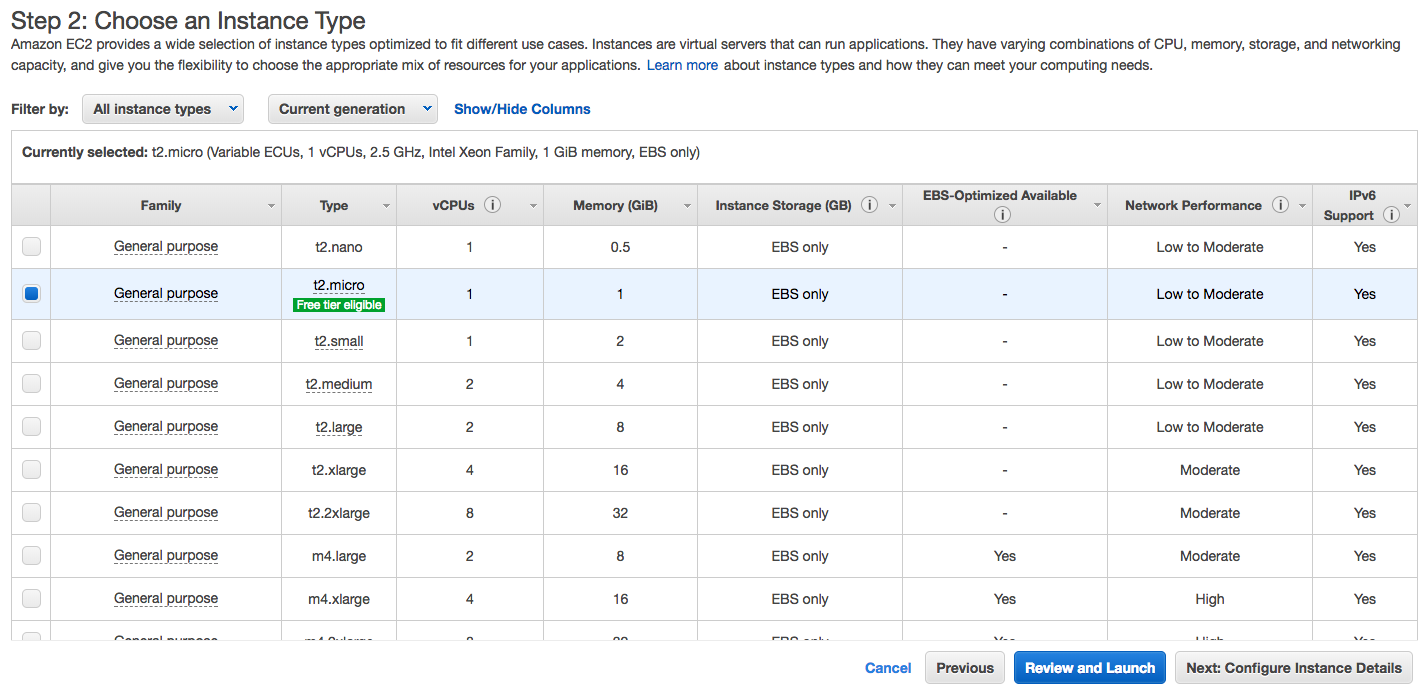
Next, we’ll be asked which type of instance we want. For the purpose of this tutorial, any size should be fine. In this case, we chose the t2.micro instance type, which is elegible for the free tier, as seen in the image below.
That’s all you need – click “Review and Launch”. On the following page, click “Launch”. After clicking “Launch”, you’ll be prompted to select or create a key pair for the instance. This is so we can connect to our instance over Secure Shell (SSH) and authenticate securely.
If you already have a key pair, feel free to use it. For this tutorial we’ll assume we need to create one. Choose “Create new key pair” from the first dropdown menu, and give it a name of your choice, as seen in the image below.
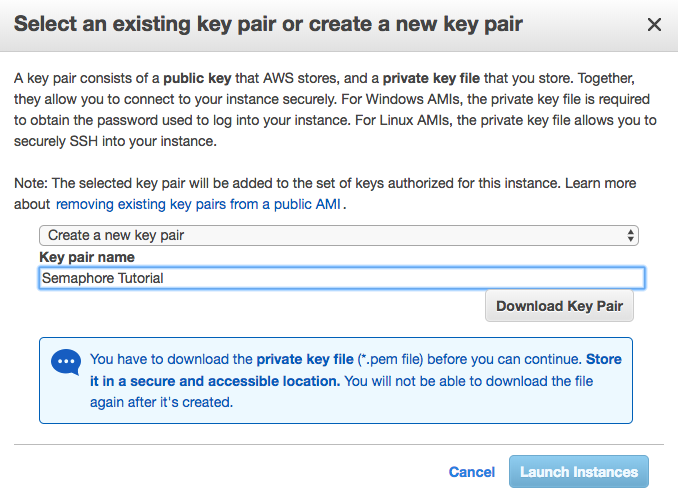
Finally, click “Download Key Pair”, keep this file handy and safe. To prevent other users or programs on your machine from viewing it, change the file permissions accordingly. SemaphoreTutorial.pem is the name of the key pair file you downloaded.
chmod 400 SemaphoreTutorial.pem
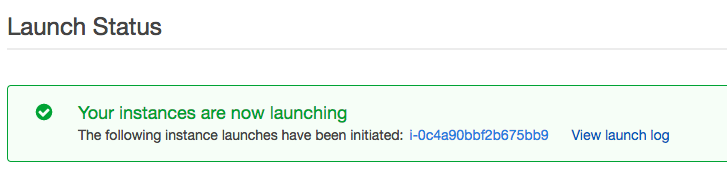
Then, click on “Launch Instances”. From this point on, your instance will be running, until you explicitly stop it. Keep in mind that the free tier has a limited number of hours, so to avoid unexpected charges, make sure you stop your instance when you’re done with it.
On this page, you’ll be presented with a link to your instance. This will be an ID, in our case it is i-0c4a90bbf2b675bb9, as seen on the image below. Click on this link to view your instance’s details.
You should now see a control panel where the instance is listed, along with some details about it. What we’re interested in here is the IPv4 Public DNS of the instance, since we need it to connect to it. In our case it’s ec2-52-56-37-197.eu-west-2.compute.amazonaws.com, as seen on the image below.

To test out our connection, we’re going to need to use SSH. Most systems that are not Windows will already have this installed. Since we’re on Ubuntu, the username we’ll use is ubuntu.
$ ssh -i SemaphoreTutorial.pem ubuntu@ec2-52-56-37-197.eu-west-2.compute.amazonaws.com
The authenticity of host 'ec2-52-56-37-197.eu-west-2.compute.amazonaws.com (52.56.37.197)' can't be established.
ECDSA key fingerprint is...
Are you sure you want to continue connecting (yes/no)? yes
When asked if you want to continue, type in yes.
ubuntu@ip-172-31-0-14:~$ logout
Connection to ec2-52-56-37-197.eu-west-2.compute.amazonaws.com closed.
Before we log out, we’ll need to install Python on our server. Python is required for Ansible to be able to provision the server. On the server, use apt-get to install Python:
$ sudo apt-get install python
Once Python has been installed, type logout to log out from the server. If authenticating did not work, try retracing your steps, or leave a comment below so we can help you figure out what went wrong.
At this point, our server is ready to be provisioned by Ansible!
Configuring Ansible
Installation
There are two main methods to install Ansible. The first one is using your operating system’s (OS) package manager, and the second one is using pip, a package manager for Python.
If you don’t know which method to choose, try your OS’s package manager first. On Apple’s OS X, this can be done with Homebrew.
$ brew install ansible
To see examples for other package managers, refer to the Ansible installation instructions.
The alternative, using Python’s pip, requires you to have Python and pip installed. Python needs to be installed with your OS’s package manager (although chances are it’s included with your OS already). Once you have Python, then pip can be installed using easy_install.
$ sudo easy_install pip
Then use pip to install Ansible.
$ sudo pip install ansible
Once Ansible is successfully installed, you should be able to run it and check for its version.
$ ansible --version
ansible 2.4.1.0
...
Project Layout
Let’s start by setting up our Ansible project. As we create files, we’ll go through what their purpose is. We’ll follow Ansible’s best practices when it comes to the directory layout.
Start by creating a directory to hold the entire project.
$ mkdir -p ansible_tutorial/ansible
We’ll be putting everything related to Ansible into the ansible folder. There will be other files, such as our Ruby on Rails application, in the parent folder.
Inventory
The first file we’re creating is called an inventory. An inventory file is essentially a list of servers we want to provision. The servers can be optionally organized into groups (for example, web servers and database servers) in case we want to provision multiple different servers with different roles.
We’ll be following the best practices and setting up an inventory file per environment. For this tutorial, we’ll set up a server in the production environment.
The inventory file can be written in two formats, YAML and INI. We’ll be using INI. Within the ansible folder, create a file called production.
; ansible_tutorial/ansible/production

rails ansible_host=ec2-52-56-37-197.eu-west-2.compute.amazonaws.com ansible_user=ubuntu
When following this tutorial make sure to swap out the value for ansible_host in your file with the public DNS of your server.
When using the ansible command, we’ll be using the -i flag (short for --inventory) to specify what inventory file we want Ansible to use.
We’ll also need to tell Ansible to use the private key we downloaded from AWS earlier, so it can authenticate to the server. This is done with the --private-key flag.
Now, let’s test our setup to make sure everything works. We’ll run Ansible with the -m flag to make it execute the ping module. Finally, we’ll tell Ansible to perform it on the server that we’ve named rails.
$ ansible -i ansible/production --private-key SemaphoreTutorial.pem -m ping rails
rails | SUCCESS => {
    "changed": false,
    "ping": "pong"
}
If this did not work for you and you’re stuck, try adding -vvvv to enable debugging output. It might tell you more about what exactly the problem is. This is a helpful flag to add whenver writing Ansible scripts, to aid in debugging.
Now let’s set up our server!
Playbook
Playbooks are the main part of Ansible, they are where we will declare all of our configuration to provision our server. Playbooks are expressed using YAML.
In this section, we’ll write a playbook that does some general setup for our server, as well as installing everything we need for our Ruby on Rails application. We’ll run our playbooks as we add tasks to make sure everything works.
Playbook Setup
Before we add any tasks, let’s set up our playbook first. Create a file at ansible/site.yml. In this playbook, we’ve expressed that we want it to be run on the rails host and that we want all the tasks to be done as the root user.
# ansible/site.yml

---
- hosts: rails
  remote_user: root
  become: yes
  tasks:
Now, let’s add our first task, to upgrade all the packages on the server to the latest version. This is done using the apt module. Each task has a name, followed by what we want it to execute.
# ansible/site.yml

---
- hosts: rails
  remote_user: root
  become: yes
  tasks:
    - name: Update all packages to the latest version
      apt:
        upgrade: dist
Next, let’s run the playbook. Playbooks are run with ansible-playbook instead of the ansible command. The arguments it takes are similar.
$ ansible-playbook -i ansible/production --private-key SemaphoreTutorial.pem ansible/site.yml

PLAY [rails] ******************************************************************

TASK [Gathering Facts] ********************************************************
ok: [rails]

TASK [Update all packages to the latest version] ******************************
changed: [rails]

PLAY RECAP ********************************************************************
rails                      : ok=1    changed=1    unreachable=0    failed=0
Once this playbook has been run, our server’s packages should be fully up to date.
Ansible provides us with some useful output every time we run a playbook. It tells us the result of running each task. When the result is changed, it means that Ansible did some work and changed the state of the server. In this case, it upgraded the packages. When it says ok, Ansible did not make any changes.
To demonstrate this, let’s run the playbook a second time.
$ ansible-playbook -i ansible/production --private-key SemaphoreTutorial.pem ansible/site.yml

PLAY [rails] ******************************************************************

TASK [Gathering Facts] ********************************************************
ok: [rails]

TASK [Update all packages to the latest version] ******************************
ok: [rails]

PLAY RECAP ********************************************************************
rails                      : ok=2    changed=0    unreachable=0    failed=0
Note how zero tasks resulted in changes.
Adding Deploy User
Let’s move on and add a new user called deploy. We’ll use it to run our app instead of the default ubuntu user, which is used for administering the server. We’ll do this with the user module.
# ansible/site.yml

...
  tasks:
    - name: Update all packages to the latest version
      apt:
        upgrade: dist
    - name: Add deploy user
        user:
          name: deploy
          shell: /bin/bash
Next, let’s create an SSH key pair to use for authenticating our deploy user. If you already have an SSH key on your machine, you can use that and skip this step.
$ ssh-keygen -t rsa -b 4096 -C "your_email@example.com"
You should be asked where you want to save your key and for a passphrase. If you don’t have an existing key, you can use the default, but make sure you choose a secure passphrase.
See GitHub’s article on generating a new SSH key for further information.
Finally, add the key to the ssh-agent. If you did not choose the default path when creating your key, replace ~/.ssh/id_rsa with the path to your own key.
$ eval "$(ssh-agent -s)"
$ ssh-add -K ~/.ssh/id_rsa
Now, let’s put the generated key on our server, so we can log in to the deploy user with it. We’ll do this with the authorized_key module.
First, copy your public key. If you didn’t choose the default path, replace the key file path with the path of your key. For example, this is the public key used for this tutorial.
$ cat ~/.ssh/id_rsa.pub
ssh-rsa AAAAB3NzaC1yc2EAAAADAQABAAABAQDJwoq7YlVfGFAYlwPSAV4tFINsExdlhfDN/wNOL2r8r4OKDwNRjUHH0DunaMgm+zGezmjnPXypNk7uu8Vpji2CPoLuvmu6Dvc3u0fmhbPxOmUCP7bPD65MhbAl/yjiEyP31HK0LBPOix29ihXXbVGHy5rGNpqDmYH0g+7gHoS5lbegp04p+HV+N/L2oXvPJcrQTpNb6+GTof93pCaCMh31GKIflUnFnzkYETlJBZ1Jtqpf68lWIbSad3Bvho3tjSa2ISRKEmUz9EpMM+9JSBxSkuxlXkqAE94Vy16dpOvg4azFkTcrMjZ6Oiq++j4ZKizpC+VuemuNAa3OIX7jzgal heidar@cloud
Then we’ll add the task, where we put our public key to be added to the deploy user. Replace the value of key with your own public key.
...
  tasks:
    ...
    - name: Add deploy user
        user:
          name: deploy
          shell: /bin/bash
    - name: Add SSH key to server for deploy user
      authorized_key:
        user: deploy
        key: "ssh-rsa AAAAB3NzaC1yc2EAAAADAQABAAABAQDJwoq7YlVfGFAYlwPSAV4tFINsExdlhfDN/wNOL2r8r4OKDwNRjUHH0DunaMgm+zGezmjnPXypNk7uu8Vpji2CPoLuvmu6Dvc3u0fmhbPxOmUCP7bPD65MhbAl/yjiEyP31HK0LBPOix29ihXXbVGHy5rGNpqDmYH0g+7gHoS5lbegp04p+HV+N/L2oXvPJcrQTpNb6+GTof93pCaCMh31GKIflUnFnzkYETlJBZ1Jtqpf68lWIbSad3Bvho3tjSa2ISRKEmUz9EpMM+9JSBxSkuxlXkqAE94Vy16dpOvg4azFkTcrMjZ6Oiq++j4ZKizpC+VuemuNAa3OIX7jzgal heidar@cloud"
The key argument also takes a URL, so if you have your public key hosted somewhere (such as GitHub, which is common) you can put the URL to your public key for the value of key and Ansible knows to fetch the key from there.
Let’s run our playbook again and see if everything worked.
$ ansible-playbook -i ansible/production --private-key SemaphoreTutorial.pem ansible/site.yml
...
TASK [Add deploy user] *********************************************************
changed: [rails]

TASK [Add SSH key to server for deploy user] ***********************************
changed: [rails]

PLAY RECAP *********************************************************************
rails                      : ok=4    changed=2    unreachable=0    failed=0
Now, let’s test if we can SSH to our server as the deploy user, to make sure Ansible did what we wanted it to. Replace the hostname with the hostname of your server.
$ ssh deploy@ec2-52-56-37-197.eu-west-2.compute.amazonaws.com
Welcome to Ubuntu 16.04.3 LTS (GNU/Linux 4.4.0-1041-aws x86_64)
...
deploy@ip-172-31-0-14:~$
If all is well, then log out and go back to the playbook. Next, we’ll install the software we need to run Ruby on Rails on the server. Let’s start with Ruby.
Installing Ruby Dependencies
Ruby has some dependencies which need to be installed before installing Ruby. This task will install those. We’ve also included sqlite3 and nodejs, which are needed for our Rails application.
# ansible/site.yml

...
  tasks:
    ...
    - name: Install Ruby dependencies
      apt:
        name: "{{ item }}"
      with_items:
        - gcc
        - autoconf
        - bison
        - build-essential
        - libssl-dev
        - libyaml-dev
        - libreadline6-dev
        - zlib1g-dev
        - libncurses5-dev
        - libffi-dev
        - libgdbm3
        - libgdbm-dev
        - sqlite3
        - libsqlite3-dev
        - nodejs
The with_items key accepts a list of items. It’s a method used to perform loops in Ansible. All it does is run the task in question once with each of the items in the list. The double curly braces interpolate the variable into its string value.
Now, run the playbook to install these packages.
$ ansible-playbook -i ansible/production --private-key SemaphoreTutorial.pem ansible/site.yml
...
TASK [Install Ruby dependencies] ***********************************************
changed: [rails] => (item=[u'gcc', u'autoconf', u'bison', u'build-essential', u'libssl-dev', u'libyaml-dev', u'libreadline6-dev', u'zlib1g-dev', u'libncurses5-dev', u'libffi-dev', u'libgdbm3', u'libgdbm-dev'])

PLAY RECAP *********************************************************************
rails                      : ok=5    changed=1    unreachable=0    failed=0
Our server is now ready for us to install Ruby.
Installing Ruby with ruby-install
We’ll be installing Ruby 2.5, which is the latest version available when this tutorial was written. We’ll be using ruby-install to install Ruby, so let’s create tasks to set that up first.
In the first two tasks, we do not want to be on the root user, so we set become to no. We just want to download and extract the ruby-install tarball, which does not require any special privileges.
The first task downloads the ruby-install tarball from GitHub. In a production environment you should always verify the tarball you downloaded to make sure it has not been tampered with as instructed in the installation instructions for ruby-install. For the sake of keeping this tutorial from getting too long, we’ll skip that.
The next task extracts the tarball into the home directory of the ubuntu user.
Finally, we run make install as the root user to install ruby-install. One thing to note regarding the make install task is that it runs every time we run our playbook, regardless of ruby-install being installed or not. This might be a bit inefficient, but it’s not really worth adding tasks to check if we already have ruby-install installed, since it would have to support checking if we are updating ruby-install as well. It also runs very quickly, so it doesn’t waste much time.
# ansible/site.yml

...
  tasks:
    ...
    - name: Download ruby-install
      become: no
      get_url:
        url: https://github.com/postmodern/ruby-install/archive/v0.6.1.tar.gz
        dest: /home/ubuntu/ruby-install-0.6.1.tar.gz
    - name: Extract ruby-install tarball                                                                                                                                                become: no
      unarchive:
        src: /home/ubuntu/ruby-install-0.6.1.tar.gz
        dest: /home/ubuntu
        creates: /home/ubuntu/ruby-install-0.6.1
        remote_src: yes
    - name: Install ruby-install
      make:
        chdir: /home/ubuntu/ruby-install-0.6.1
        target: install
Let’s run our new tasks.
$ ansible-playbook -i ansible/production --private-key SemaphoreTutorial.pem ansible/site.yml
...
TASK [Download ruby-install] ***************************************************
changed: [rails]

TASK [Extract ruby-install tarball] ********************************************
changed: [rails]

TASK [Install ruby-install] ****************************************************
changed: [rails]
...
Now, let’s connect to our server and make sure we have ruby-install available to us.
$ ssh -i SemaphoreTutorial.pem ubuntu@ec2-52-56-37-197.eu-west-2.compute.amazonaws.com
Welcome to Ubuntu 16.04.3 LTS (GNU/Linux 4.4.0-1041-aws x86_64)
...
$ which ruby-install
/usr/local/bin/ruby-install
$ logout
If you don’t get any output from which, something probably went wrong. Double-check your Ansible output to see if there are any errors.
Next, we’ll use ruby-install to install Ruby 2.5. We use the command module to run ruby-install manually. There are a number of Ansible roles for ruby-install available in the Ansible Galaxy that streamline using ruby-install with Ansible, but what we are doing here is simple enough so we don’t need those.
# ansible/site.yml

...
  tasks:
    ...
    - name: Install Ruby
      become_user: deploy
      command: /usr/local/bin/ruby-install --no-install-deps ruby 2.5.0
      args:
        creates: /home/deploy/.rubies/ruby-2.5.0
We become the deploy rather than root user to run this task since we want to keep Ruby and any gems we use owned by that user. We pass the --no-install-deps flag since we already installed dependencies. Without this, ruby-install tries to use sudo privileges to install dependencies. This task will take a while to run since it downloads, compiles, and installs Ruby.
$ ansible-playbook -i ansible/production --private-key SemaphoreTutorial.pem ansible/site.yml
...
TASK [Install Ruby] ************************************************************
changed: [rails]
...
Setting the Ruby Version with chruby
We’ll need chruby, which is another collection of small shell scripts that allow us to choose what Ruby version we run on our system. We need to install and configure it for the deploy user to seamlessly use the version of Ruby we installed.
The install tasks are more or less the same as for ruby-install.
# ansible/site.yml

...
  tasks:
    ...
    - name: Download chruby
      become: no
      get_url:
        url: https://github.com/postmodern/chruby/archive/v0.3.9.tar.gz
        dest: /home/ubuntu/chruby-0.3.9.tar.gz
    - name: Extract chruby tarball
      become: no
      unarchive:
        src: /home/ubuntu/chruby-0.3.9.tar.gz
        dest: /home/ubuntu
        creates: /home/ubuntu/chruby-0.3.9
        remote_src: yes
    - name: Install chruby
      make:
        chdir: /home/ubuntu/chruby-0.3.9
        target: install
Now, run the playbook with the tasks for installing chruby added.
$ ansible-playbook -i ansible/production --private-key SemaphoreTutorial.pem ansible/site.yml
...
TASK [Download chruby] *********************************************************
changed: [rails]

TASK [Extract chruby tarball] **************************************************
changed: [rails]

TASK [Install chruby] **********************************************************
changed: [rails]
...
Let’s connect to our server and make sure chruby is installed.
$ ssh -i SemaphoreTutorial.pem ubuntu@ec2-52-56-37-197.eu-west-2.compute.amazonaws.com
Welcome to Ubuntu 16.04.3 LTS (GNU/Linux 4.4.0-1041-aws x86_64)
...
$ ls /usr/local/share/chruby/
auto.sh  chruby.sh
$ logout
Connection to ec2-52-56-37-197.eu-west-2.compute.amazonaws.com closed.
Now that chruby is installed, we need to load it into the deploy user’s shell and set the version of Ruby to use to 2.5. We’ll do this using an Ansible module called lineinfile.
It allows us to specify a file, a regular expression to check if the line is present already or not, and the line itself. This line will be put at the bottom of the file, unless otherwise specified. In our case we want it at the top because otherwise chruby will not be loaded properly when .bashrc gets run non-interactively by Capistrano.
# ansible/site.yml

...
  tasks:
    ...
     - name: Load chruby for deploy user
      lineinfile:
        path: /home/deploy/.bashrc
        regexp: 'chruby.sh$'
        line: 'source /usr/local/share/chruby/chruby.sh'
        insertbefore: BOF
    - name: Set ruby version for deploy user
      lineinfile:
        path: /home/deploy/.profile
        regexp: '^chruby'
        line: 'chruby ruby-2.5.0'
Now, run the playbook with the new tasks for configuring chruby.
$ ansible-playbook -i ansible/production --private-key SemaphoreTutorial.pem ansible/site.yml
...
TASK [Load chruby for deploy user] *********************************************
changed: [rails]

TASK [Set ruby version for deploy user] ****************************************
changed: [rails]
...
If we connect to our server as the deploy user and run ruby, we should be using version 2.5.
$ ssh deploy@ec2-52-56-37-197.eu-west-2.compute.amazonaws.com
Welcome to Ubuntu 16.04.3 LTS (GNU/Linux 4.4.0-1041-aws x86_64)
...
$ ruby -v
ruby 2.5.0p0 (2017-12-25 revision 61468) [x86_64-linux]
$ logout
Connection to ec2-52-56-37-197.eu-west-2.compute.amazonaws.com closed.
Bundler
We’ll also need to add a task to install bundler which needs to be present so we can install gems for our Rails application later.
# ansible/site.yml

...
  tasks:
    ...
    - name: Install bundler
      become_user: deploy
      command: 'chruby-exec ruby-2.5.0 -- gem install bundler'
      args:
        creates: /home/deploy/.gem/ruby/2.5.0/bin/bundle
Run the playbook to make sure bundler gets installed.
$ ansible-playbook -i ansible/production --private-key SemaphoreTutorial.pem ansible/site.yml
...
TASK [Install bundler] *********************************************************
changed: [rails]
...
Nginx
The only thing left to install is a web server to serve the pages from Ruby on Rails.
# ansible/site.yml

...
  tasks:
    ...
    - name: Install nginx
      apt:
        name: nginx
        state: latest
Now, run the playbook with the tasks to install nginx.
$ ansible-playbook -i ansible/production --private-key SemaphoreTutorial.pem ansible/site.yml
...
TASK [Install nginx] ***********************************************************
changed: [rails]
...
Ubuntu should automatically start nginx for us after installing it.
AWS Firewall Rules
Before we test that our web server works, we need to configure AWS to allow connections from port 80 to our instance.
First, navigate to the AWS EC2 website and sign in again if you have to. Then on the menu on the left, under “Network & Security”, click the link for “Security Groups”.
This should display a list of all the security groups you have. We only have two, a default one and another one created automatically for the instance we made for this tutorial. Find the right one and select it by clicking on it.

Once you’ve selected the right security group, you should have some tabs on the bottom of the page. Click on the one labelled “Inbound” and you should see a list of all the inbound rules. By default, only SSH is allowed.

Click the “Edit” button, then you should see a modal popup which lets you add and remove rules.
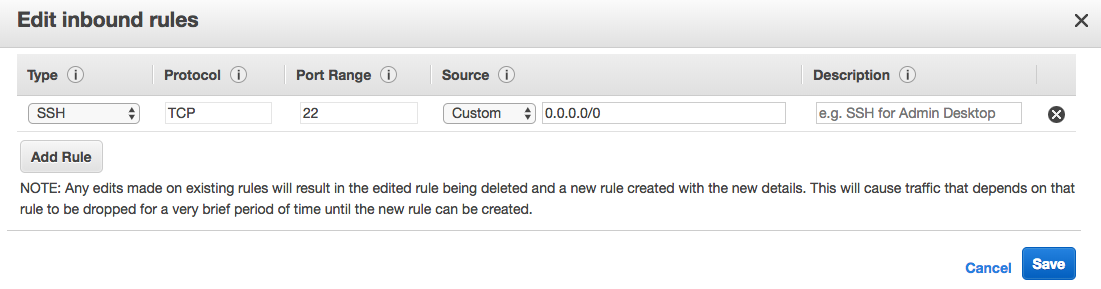
Click “Add Rule” and in the dropdown for that rule, under “Type”, select “HTTP” instead of the default “Custom TCP Rule”. Then click “Save”.
Test if it works by connecting to the server on port 80. You can do this in your browser, or using this example, with curl (you might need to install it). You’ll get the HTML output of the default nginx page.
$ curl ec2-52-56-37-197.eu-west-2.compute.amazonaws.com
<!DOCTYPE html>
<html>
<head>
...
We still need to configure nginx to serve pages from our Rails application, but we’ll do that later.
That’s our server fully provisoned! You could use this as a production server without any problems, however, there are some more basic things you could do to secure your server.
There’s a great blog post about the first 10 minutes on a server, which is a good starting point. Why not check it out an write your own Ansible tasks for some of the things in that article when you’re done with this one?
Our playbook has gotten quite long. Ansible has a concept called roles to help break down playbooks. It lets you split up playbooks into small, individual components.
For something like what we’re doing, putting everything in a single playbook is fine. However, you should treat your playbooks like code. When they get too big, refactor them into smaller components. It also allows you to compose any new server you have to provision out of reusable components.
Let’s move on and create our Rails application and deploy it to our server with Capistrano.
Creating a Rails Application
Let’s start by making a new Rails application. You’ll need to have Ruby installed on your machine for that to work. First, install the latest version of Rails.
$ gem install rails
Fetching: concurrent-ruby-1.0.5.gem (100%)
Successfully installed concurrent-ruby-1.0.5
...
Successfully installed rails-5.1.4
36 gems installed
Then, create the Rails application. We can create this one directory above the Ansible folder we used earlier.
$ pwd
/Users/heidar/Code/ansible_tutorial
$ ls
SemaphoreTutorial.pem   ansible/
$ rails new .
       exist
      create  README.md
      create  Rakefile
      ...
      Installing web-console 3.5.1
Bundle complete! 16 Gemfile dependencies, 70 gems now installed.
Use bundle info [gemname] to see where a bundled gem is installed.
         run  bundle exec spring binstub --all
* bin/rake: spring inserted
* bin/rails: spring inserted
Now that we’ve created a Rails application, run the Rails server to make sure it works.
$ bundle exec rails server
Then, open your browser and visit http://0.0.0.0:3000/ and you should be greeted with the default Rails page.
Let’s generate some code using the scaffolding functionality provided by Rails. This is just so we don’t have an empty Rails application.
$ bundle exec rails g scaffold post title:string body:text
Running via Spring preloader in process 51439
      invoke  active_record
      create    db/migrate/20171229160459_create_posts.rb
      ...
Migrate the database.
$ bundle exec rails db:migrate
== 20171229160459 CreatePosts: migrating ======================================
-- create_table(:posts)
   -> 0.0014s
== 20171229160459 CreatePosts: migrated (0.0015s) =============================
We should now have some tests generated by the scaffolding. Run rake to see them executed.
$ bundle exec rake
Run options: --seed 10405

# Running:

.......

Finished in 1.372265s, 5.1011 runs/s, 6.5585 assertions/s.
7 runs, 9 assertions, 0 failures, 0 errors, 0 skips
Let’s push our code to GitHub before we set up Capistrano.
Pushing to GitHub
When we created our Rails application, a git repository should have been automatically created for us. If not, refer to your package manager to install git. If you need more information, GitHub has a page explaining how to get started with git. Then run git init to create the repository.
Before we push our code to GitHub, we need to commit it.
$ git add .
$ git commit -m 'Add code from Ansible tutorial'
Next up, head to GitHub and sign in (register if you need to). Create a new repository for the purposes of this tutorial (you can call it ansible_tutorial). Then add the GitHub remote as origin.
Replace heidar with your GitHub username, and ansible_tutorial with the name of the repository you created.
$ git remote add origin git@github.com:heidar/ansible_tutorial.git
Then, push your repository to GitHub.
$ git push origin master
Counting objects: 132, done.
Delta compression using up to 4 threads.
Compressing objects: 100% (114/114), done.
Writing objects: 100% (132/132), 28.20 KiB | 2.01 MiB/s, done.
Total 132 (delta 12), reused 0 (delta 0)
remote: Resolving deltas: 100% (12/12), done.
To github.com:heidar/ansible_tutorial.git
 * [new branch]      master -> master
You should now be able to see your repository on GitHub with everything in it. For reference, this is the repository made for this tutorial.
Let’s set up Capistrano in our Rails application so we can deploy it to our server.
Deploying with Capistrano
Start by adding Capistrano to the Gemfile, under the development group, for our Rails application. We’ll also be adding capistrano-chruby since we’re using chruby on the server to set the version of Ruby.
# Gemfile

group :development do
  ...
  gem 'capistrano', '~> 3.10'
  gem 'capistrano-rails'
  gem 'capistrano-chruby'
end
Then, use bundler to install gems based on our Gemfile.
$ bundle install
...
Fetching capistrano 3.10.1
Installing capistrano 3.10.1
...
We now have Capistrano in our Rails application. Next, we have to configure it to do what we want: deploy our application to our server at AWS. Capistrano comes with an install command to get you started.
$ bundle exec cap install
mkdir -p config/deploy
create config/deploy.rb
create config/deploy/staging.rb
create config/deploy/production.rb
mkdir -p lib/capistrano/tasks
create Capfile
Capified
This creates a few files. It might seem overwhelming at first, but you don’t need to understand what they all do right now. We’ll do the minimum amount of changes to make it do what we want.
These are the three files we’ll be working with:
config/deploy.rb
config/deploy/production.rb
Capfile
Let’s start with config/deploy.rb. We’ll be changing four lines in it. Replace the GitHub URL with the URL to your repository, or you will be deploying the app from this tutorial instead!
# config/deploy.rb

# config valid for current version and patch releases of Capistrano
lock "~> 3.10.1"

set :application, "ansible_tutorial"
set :repo_url, "git@github.com:heidar/ansible_tutorial.git"
set :deploy_to, "/home/deploy/apps"
append :linked_dirs, "log", "tmp/pids", "tmp/cache", "tmp/sockets"
...
The rest of this file is just comments.
Next, we’ll configure our server by specifying the server’s hostname and the deploy user. This is done config/deploy/production.rb. Add the following line and replace the hostname of the server with yours.
# config/deploy/production.rb

server "ec2-52-56-37-197.eu-west-2.compute.amazonaws.com", user: "deploy"
Let’s test this out by running our deploy task.
$ bundle exec cap production deploy
00:00 git:wrapper
      01 mkdir -p /tmp
      ...
00:09 deploy:log_revision
      01 echo "Branch master (at 10fb2d9dce364b505acac369208aa00371fc4d3c) deployed as release 20171229171810 by heidar" >> /home/deploy/apps/revisions.log
    ✔ 01 deploy@ec2-52-56-37-197.eu-west-2.compute.amazonaws.com 0.178s
Since this was the first deploy, it should have created all the directories needed. We’re not quite done though – we need to tell Capistrano to install gems from our Gemfile using bundler, migrate the database, and compile assets.
Open up Capfile and uncomment a few lines in it to load the necessary components.
# Capfile

...
require "capistrano/chruby"
require "capistrano/bundler"
require "capistrano/rails/assets"
require "capistrano/rails/migrations"
...
Then, open up config/deploy.rb again and set the version of Ruby.
# config/deploy.rb
...
set :chruby_ruby, 'ruby-2.5.0'
...
We also need to specify roles for our server. Capistrano will automatically run certain tasks for certain roles, such as migrating the database and compiling assets.
Modify our server entry in config/deploy/production.rb from earlier to include roles.
# config/deploy/production.rb

...
server "ec2-52-56-37-197.eu-west-2.compute.amazonaws.com", user: "deploy", roles: %w(web app db)
...
Now, run the deploy task again to make sure everything works. This time it should install gems, compile assets, and migrate the database as well.
$ bundle exec cap production deploy
...
00:08 bundler:install
    ✔ 01 deploy@ec2-52-56-37-197.eu-west-2.compute.amazonaws.com 0.746s
00:09 deploy:assets:precompile
...
    ✔ 01 deploy@ec2-52-56-37-197.eu-west-2.compute.amazonaws.com 4.125s
00:14 deploy:migrating
    ✔ 01 deploy@ec2-52-56-37-197.eu-west-2.compute.amazonaws.com 1.686s
...
The only thing left is to make Capistrano start Rails. Rails uses the puma web server by default. There’s a gem called capistrano-puma which we can include in our Rails application to make it easy to manage puma.
Let’s start by adding it to our Gemfile.
# Gemfile

...
  gem 'capistrano', '~> 3.10'
  gem 'capistrano-rails'
  gem 'capistrano-chruby'
  gem 'capistrano3-puma'
end
...
Then run bundle install again.
$ bundle install
...
Fetching capistrano3-puma 3.1.1
Installing capistrano3-puma 3.1.1
...
As with the other components, we must load capistrano-puma in our Capfile.
# Capfile

...
require "capistrano/rails/assets"
require "capistrano/rails/migrations"
# require "capistrano/passenger"

require 'capistrano/puma'
install_plugin Capistrano::Puma
...
Finally, upload the puma config to the shared directory on the server. We’ll just be using the default settings.
$ bundle exec cap production puma:config
00:00 puma:config
      Uploading /home/deploy/apps/shared/puma.rb 100.0%
Before we run deploy again to start the server, let’s set a dummy secret key base for the production environment. It’s important to stress that this should be set in an environment variable on the server, where it gets loaded by Rails.
Don’t forget to change yours if you end up using this after this tutorial. Open config/secrets.yml and change it to look like this.
production:
  secret_key_base: temporary_secret_key
  # TODO: Set in environment
  # secret_key_base: <%= ENV["SECRET_KEY_BASE"] %>
Now, run the deploy again, and you should see puma being started at the end.
$ bundle exec cap production deploy
...
00:17 puma:start
      using conf file /home/deploy/apps/shared/puma.rb
      01 /usr/local/bin/chruby-exec ruby-2.5.0 -- bundle exec puma -C /home/deploy/apps/shared/puma.rb --daemon
      01 Puma starting in single mode...
      01 * Version 3.11.0 (ruby 2.5.0-p0), codename: Love Song
      01 * Min threads: 0, max threads: 16
      01 * Environment: production
      01 * Daemonizing...
    ✔ 01 deploy@ec2-52-56-37-197.eu-west-2.compute.amazonaws.com 0.821s
All that is left is to configure nginx to pass any requests to puma. We’ll go back to our Ansible playbook for this.
Create a new file in the ansible directory, call it nginx_config.
# ansible/nginx_config

upstream app {
  server unix:///home/deploy/apps/shared/tmp/sockets/puma.sock fail_timeout=0;
}
server {
  listen 80;
  root /home/deploy/apps/current/public;
  try_files $uri/index.html $uri @app;

  location @app {
    proxy_pass http://app;
    proxy_set_header X-Forwarded-For $proxy_add_x_forwarded_for;
    proxy_set_header Host $http_host;
    proxy_redirect off;
  }
}
This is the simplest configuration we can use to make nginx listen on port 80 and forward all requests to our Rails application while still serving files from the public folder.
Now that we have our nginx config, we have to make sure it gets uploaded to the server in the correct location. Then, we must enable the config for nginx, and disable the default config. Here are some tasks that accomplish that.
# ansible/site.yml

...
  tasks:
    ...
    - name: Upload nginx config
      copy:
        src: nginx_config
        dest: /etc/nginx/sites-available/rails
      notify:
        - Restart nginx
    - name: Disable default nginx config
      file:
        path: /etc/nginx/sites-enabled/default
        state: absent
      notify:
        - Restart nginx
    - name: Enable nginx config
      file:
        src: /etc/nginx/sites-available/rails
        dest: /etc/nginx/sites-enabled/rails
        state: link
      notify:
        - Restart nginx
  handlers:
    - name: Restart nginx
      service: name=nginx state=restarted
We introduce a new concept here, handlers. They are just like regular tasks in Ansible, except they don’t get run unless they are called with a notify. This makes them perfect for restarting services, like we do here, because notify is only called when the task has changed. This avoids unecessary restarts.
Run the playbook again.
$ ansible-playbook -i ansible/production --private-key SemaphoreTutorial.pem ansible/site.yml
...
TASK [Upload nginx config] *****************************************************
changed: [rails]

TASK [Disable default nginx config] ********************************************
changed: [rails]

TASK [Enable nginx config] *****************************************************
changed: [rails]

RUNNING HANDLER [Restart nginx] ************************************************
changed: [rails]
...
Our server is now configured correctly, and our application deployed. This means that we should be able to access our Rails application. Replace the hostname with the hostname of your server.
Note that our front page is a 404, so hit up /posts to get the pages we generated with scaffolding. You should be able to create, edit and destroy posts, backed by the default sqlite database.
$ curl http://ec2-52-56-37-197.eu-west-2.compute.amazonaws.com/posts
<!DOCTYPE html>
<html>
  <head>
    <title>AnsibleTutorial</title>
...
If something does not work, check the nginx and puma logs. They should have the details you need to figure out what went wrong.
All that’s left now is to set up our continuous integration system to automatically run our tests and trigger the deploy for us if they pass.
Setting up Semaphore
We’ll be using Semaphore to set up our continuous integration. Go to their website and sign up (or log in if you have an account). You can also sign up with GitHub.
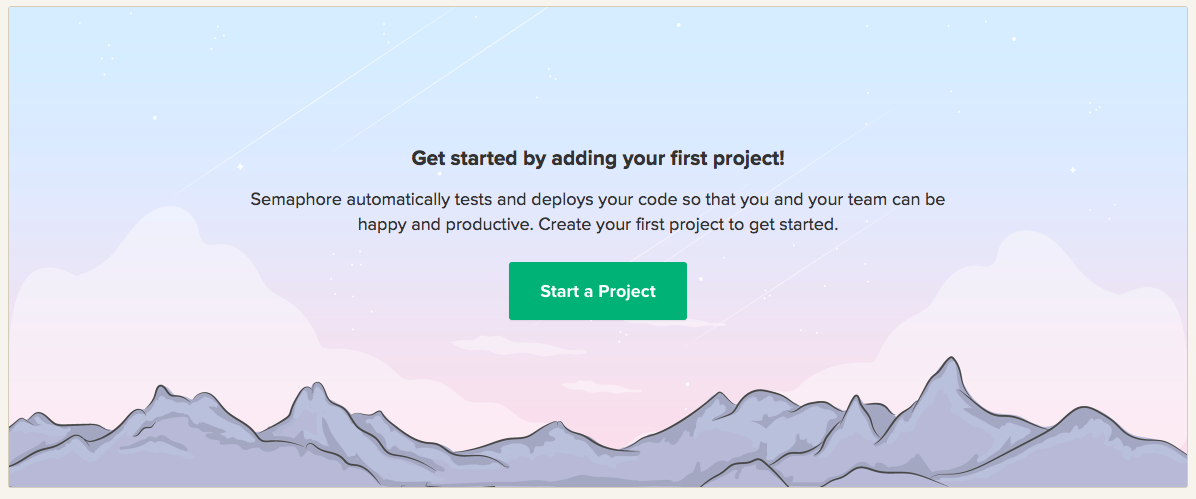
Once you’ve signed in, you’re presented with the option to start a project. Click the “Start a Project” button.
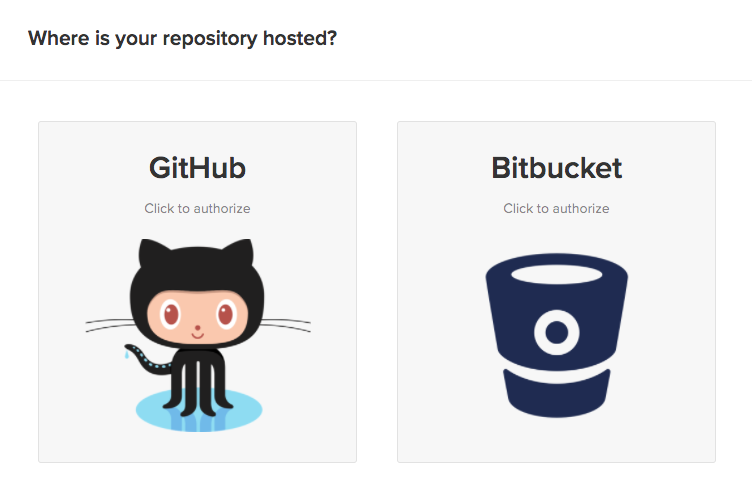
Next, you need to tell Semaphore where your code is hosted. In our case it’s GitHub, so click the GitHub option.
You’ll be asked if you want Semaphore to have access to your public repositories only, or both public and private repositories. This is up to you, but since our repository is public, you can choose that.
Once you’ve made a choice, you’ll be asked to authorize the Semaphore application on GitHub. Click the “Authorize” button and you should be redirected back to Semaphore where you are asked to choose a repository.
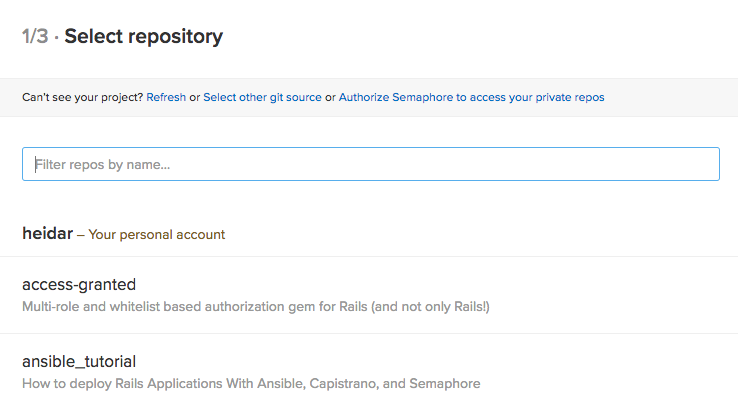
Pick the repository you used for this tutorial. Once you’ve chosen the repository, you’ll be asked for a branch. Unless you’ve created other branches, only master will be available – pick that by clicking on it.
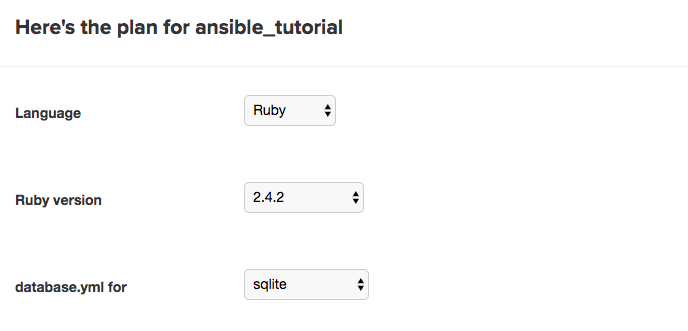
Semaphore will set up everything automatically after analyzing your project. You will be presented with a confirmation screen. You shouldn’t have to change anything on this page. Double-check that everything is correct and click the “Build With These Settings” button at the bottom.
Semaphore should now pull the latest code from your repository on the master branch and run the build and tests for it. You should see all the information about it on the page you are redirected to.
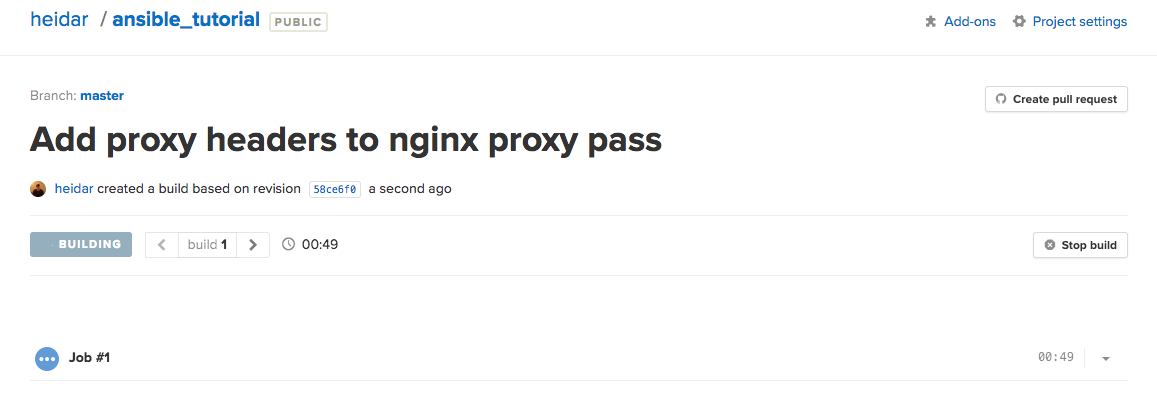
Wait for the build to finish to make sure everything is working correctly. All we have left is to do is tell Semaphore to deploy our app for us when builds successfully finish.
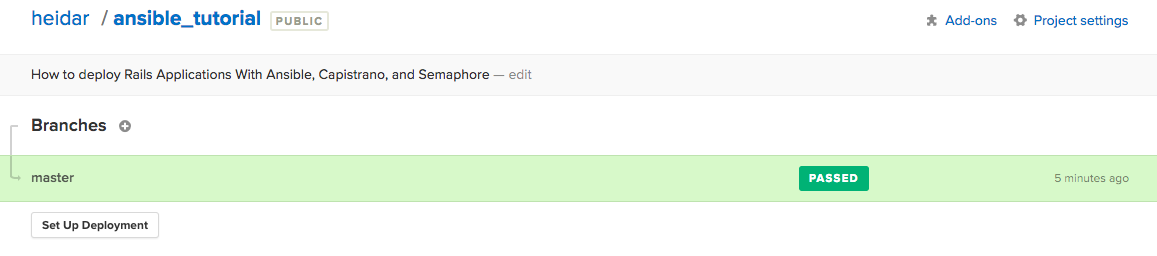
Go to the main page for your project in Semaphore by clicking the name of the project on the top of the page. You’ll see an overview of your project’s builds along with the option to setup deployment.
Click the “Set Up Deployment” button. You’ll be presented with a list of deployment methods. We’ve been using Capistrano, so pick that by clicking on it. Semaphore will then ask if you want “Automatic” or “Manual” deployments. Choose “Automatic”, since we want Semaphore to automatically deploy for us on successful builds. Finally, you’ll be asked which branches to use – select master.
Now, it’s time to enter the deploy commands. Semaphore provides us with a default that we need to slightly modify.
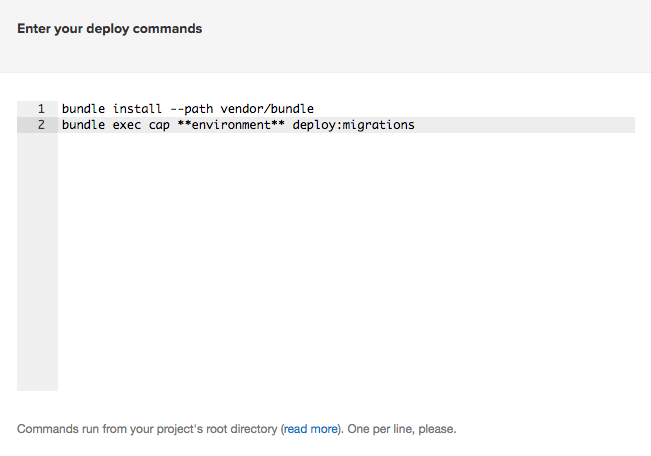
Change the second line to match these.
bundle install --path vendor/bundle
bundle exec cap production deploy
Then, click “Next Step”. You’ll be asked to paste in the private SSH key for deployment. This key cannot have a passphrase since it would prevent us from being able to do the automatic deploys. The best practice here is to create a separate SSH private key for Semaphore and paste that in.
Replace the email with your email and make sure you don’t save it to the default location or you’ll overwrite the existing key. In this tutorial, it’s saved at ~/.ssh/id_rsa_semaphore instead. Leave the passphrase blank.
$ ssh-keygen -t rsa -b 4096 -C "your_email@example.com"
Generating public/private rsa key pair.
Enter file in which to save the key (/Users/heidar/.ssh/id_rsa): /Users/heidar/.ssh/id_rsa_semaphore
Enter passphrase (empty for no passphrase):
Enter same passphrase again:
Your identification has been saved in /Users/heidar/.ssh/id_rsa_semaphore.
Your public key has been saved in /Users/heidar/.ssh/id_rsa_semaphore.pub.
We now need to add one more Ansible task to add the key to the deploy user, exactly the same as before. Get the key first.
$ cat ~/.ssh/id_rsa_semaphore.pub
ssh-rsa AAAAB3NzaC1yc2EAAAADAQABAAACAQDWKWupAspnLr5zhyMdzlvBjOglvyWJ39DAnHVHNM1a5zX+UY5m7IQKy5bd5hsZo1WrRSUfiGWz2706W6GGjtMObR9UUxpjWabnmOcjOfxg3RtL92bw0uPi9H49d+5sqoRnY6hPNvmUdGek9aZDAtO8iN2E7AocqeJyoGqBczRNZAnDoyqhsyHhIVq2dGHTJu4WU8DUl+uWth2UBc3Mx+hqrCw8ixOXeWSiDx6CMyKftQp6txKcfek82cJzLy0Scptx5txa5L9cF28vcqW/+055vQRz81WwHoi/mq/wQrz7ASOH0glFgu17ajX7GEEriX9rMnaaxaV4knztU50iUgbKywj9SXG7FWOWzwLAEizkU2U3mV80HwmrNJxufDb04GaYpW/+Fn2ov5ZTMUegs+BnkXek1r59BM8m60amr7GCNvdsaAlKcW5NRUtzOVTHs9e9iwl/371hF50nhxmsWZKkbMHuo7vBJaDNiSSd/nO25bhhEC1GiuqkJU5Puda5B1ygTpggapOZJvy0iWKZG4gE9UB9ht8wID9Kn5l7mr6camox66XT2RKyX6IRTug5xCh7oROuI0VRWOhgCCwUXenT2Ne/qBrHV41C+q5jXtZxz6cocei2/asOMrSzvAve039zHiObwkfPIjkmVxqovwgWJTDf0azHA01S3tv1y4/Mlw== heidarbn@gmail.com
Then create the task.
# ansible/site.yml

...
  tasks:
    ...
    - name: Add Semaphore SSH key to server for deploy user                                                                                                                             authorized_key:
        user: deploy
        key: "ssh-rsa AAAAB3NzaC1yc2EAAAADAQABAAACAQDWKWupAspnLr5zhyMdzlvBjOglvyWJ39DAnHVHNM1a5zX+UY5m7IQKy5bd5hsZo1WrRSUfiGWz2706W6GGjtMObR9UUxpjWabnmOcjOfxg3RtL92bw0uPi9H49d+5sqoRnY6hPNvmUdGek9aZDAtO8iN2E7AocqeJyoGqBczRNZAnDoyqhsyHhIVq2dGHTJu4WU8DUl+uWth2UBc3Mx+hqrCw8ixOXeWSiDx6CMyKftQp6txKcfek82cJzLy0Scptx5txa5L9cF28vcqW/+055vQRz81WwHoi/mq/wQrz7ASOH0glFgu17ajX7GEEriX9rMnaaxaV4knztU50iUgbKywj9SXG7FWOWzwLAEizkU2U3mV80HwmrNJxufDb04GaYpW/+Fn2ov5ZTMUegs+BnkXek1r59BM8m60amr7GCNvdsaAlKcW5NRUtzOVTHs9e9iwl/371hF50nhxmsWZKkbMHuo7vBJaDNiSSd/nO25bhhEC1GiuqkJU5Puda5B1ygTpggapOZJvy0iWKZG4gE9UB9ht8wID9Kn5l7mr6camox66XT2RKyX6IRTug5xCh7oROuI0VRWOhgCCwUXenT2Ne/qBrHV41C+q5jXtZxz6cocei2/asOMrSzvAve039zHiObwkfPIjkmVxqovwgWJTDf0azHA01S3tv1y4/Mlw== heidarbn@gmail.com"
Make sure the key is all on one line or it’ll not work. Now, run the playbook.
$ ansible-playbook -i ansible/production --private-key SemaphoreTutorial.pem ansible/site.yml
...
TASK [Add Semaphore SSH key to server for deploy user] *************************
changed: [rails]
...
For everything to work correctly, we’ll also need to add the public key to our GitHub repository. Navigate to your GitHub repository’s page and from the tabs on top, click “Settings”. On the menu on the left, choose “Deploy keys”. You should already have a key there from Semaphore, created automatically earlier, that one is for a different purpose. Click “Add deploy key” and give it a name, then paste in the public key we copied earlier.
We can now finish the setup on the Semaphore website. Copy the private key we made.
$ cat ~/.ssh/id_rsa_semaphore
...
Then, paste it into the input on the Semaphore website from earlier and click “Next Step”. You’ll be asked to name your server and put in your server URL. In this tutorial, it’s named “Ansible Tutorial” and put in the URL for this tutorial’s server (http://ec2-52-56-37-197.eu-west-2.compute.amazonaws.com), but you can use the default if you want. Then click “Create Server”.
Let’s see this in action. Go back to the Rails application and edit config/routes.rb.
# config/routes.rb

Rails.application.routes.draw do
  root to: 'posts#index'
  resources :posts
  # For details on the DSL available within this file, see http://guides.rubyonrails.org/routing.html
end
This will make the posts index our front page. Add this to git, commit it, and push it to GitHub.
$ git add .
$ git commit -m 'Set root path'
[master 11a2aef] Set root route
 1 file changed, 1 insertion(+)
$ git push origin master
Counting objects: 12, done.
Delta compression using up to 4 threads.
Compressing objects: 100% (12/12), done.
Writing objects: 100% (12/12), 1.63 KiB | 1.63 MiB/s, done.
Total 12 (delta 9), reused 0 (delta 0)
remote: Resolving deltas: 100% (9/9), completed with 6 local objects.
To github.com:heidar/ansible_tutorial.git
   58ce6f0..11a2aef  master -> master
Go back to your project’s main page on Semaphore, and you should see the build finish and the deploy being triggered. The build will say “Deployed” instead of the usual “Passed” when a deploy has been successful.
Test it out by going to your server’s URL in your browser. The front page should show the posts index now. If it doesn’t, check the build logs on Semaphore – they should have all the output from Capistrano which will help you see what went wrong.
Conclusion
You should now know how to go create a Rails application, create a server on AWS EC2, provision it with Ansible, deploy the Rails application to it with Capistrano, and set up Semaphore to automatically build and deploy your Rails application. That’s quite a bit!
Feel free to leave comments if you get stuck and need any help. If you see any mistakes or obvious improvements, please let us know in the comments as well.
P.S. Would you like to learn how to build sustainable Rails apps and ship more often? We’ve recently published an ebook covering just that — “Rails Testing Handbook”. Learn more and download a free copy.