Introduction
As APIs become more and more ubiquitous, it becomes increasingly important than ever that your application successfully delivers production quality APIs to your users in a fast and efficient manner. Node.js and LoopBack are here to help you do just that.
LoopBack is a highly-extensible, open-source Node.js framework that enables you to create dynamic end-to-end REST APIs with little or no coding.
By the end of this article, you’ll learn how to:
- Install the LoopBack framework,
- Create a custom API endpoint using the
slccommand-line tool, and - Test your custom endpoint with
mocha,chaiandsupertest.
Prerequisites
We will be using the latest LTS version of Node.js, which at the time of writing, is v6.6.0.
- Node.js – download at nodejs.org or install via Node Version Manager, and
- npm – v.3.10.3 included with your Node.js installation.
Project Setup
We’ll get started by installing the strongloop package. This package is essential for working with the LoopBack framework. It includes:
- The StrongLoop command-line tool,
slc, for creating LoopBack applications and for running and managing Node applications, - The LoopBack framework, including loopback, loopback-datasource-juggler modules, and numerous other related StrongLoop modules, along with modules that they require,
- StrongLoop Arc, the unified graphical tool suite for the API lifecycle, including tools for building, profiling and monitoring Node applications,
- LoopBack Angular command line tools, and
- Various other tools, including Yeoman, the LoopBack Yeoman generators to create and scaffold LoopBack applications, and Grunt — the JavaScript task runner.
npm install -g strongloop
Now, let’s use the newly installed slc command-line tool to initialize our LoopBack application.
slc loopback getting-started-node-loopback
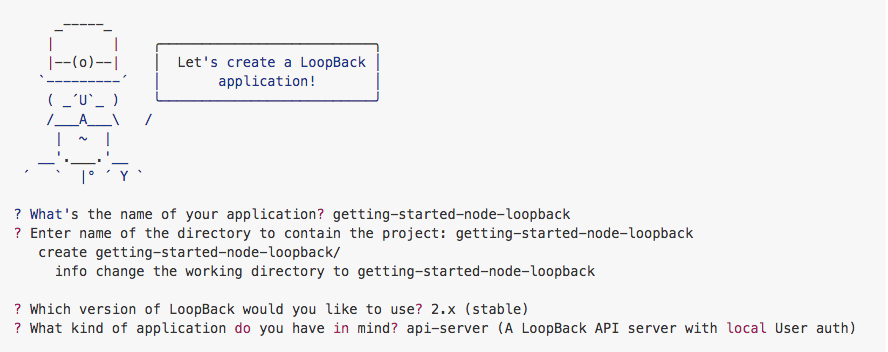
We’re creating a new LoopBack application called getting-started-node-loopback. You’ll be greeted by the ever-friendly Yeoman, who will ask you a few questions about the application.
For our example, the defaults are fine. This will create a new directory called getting-started-node-loopback, create a skeleton for our API server, and install the necessary npm packages.
Finally, we’ll install a few additional packages that we’ll need for testing.
npm install --save-dev mocha chai supertest
Did you know that at this point, we already have a fully functioning API as well as an API explorer? That’s the simplicity and power of LoopBack! Let’s take a look.
From the application directory run:
node server/server.js
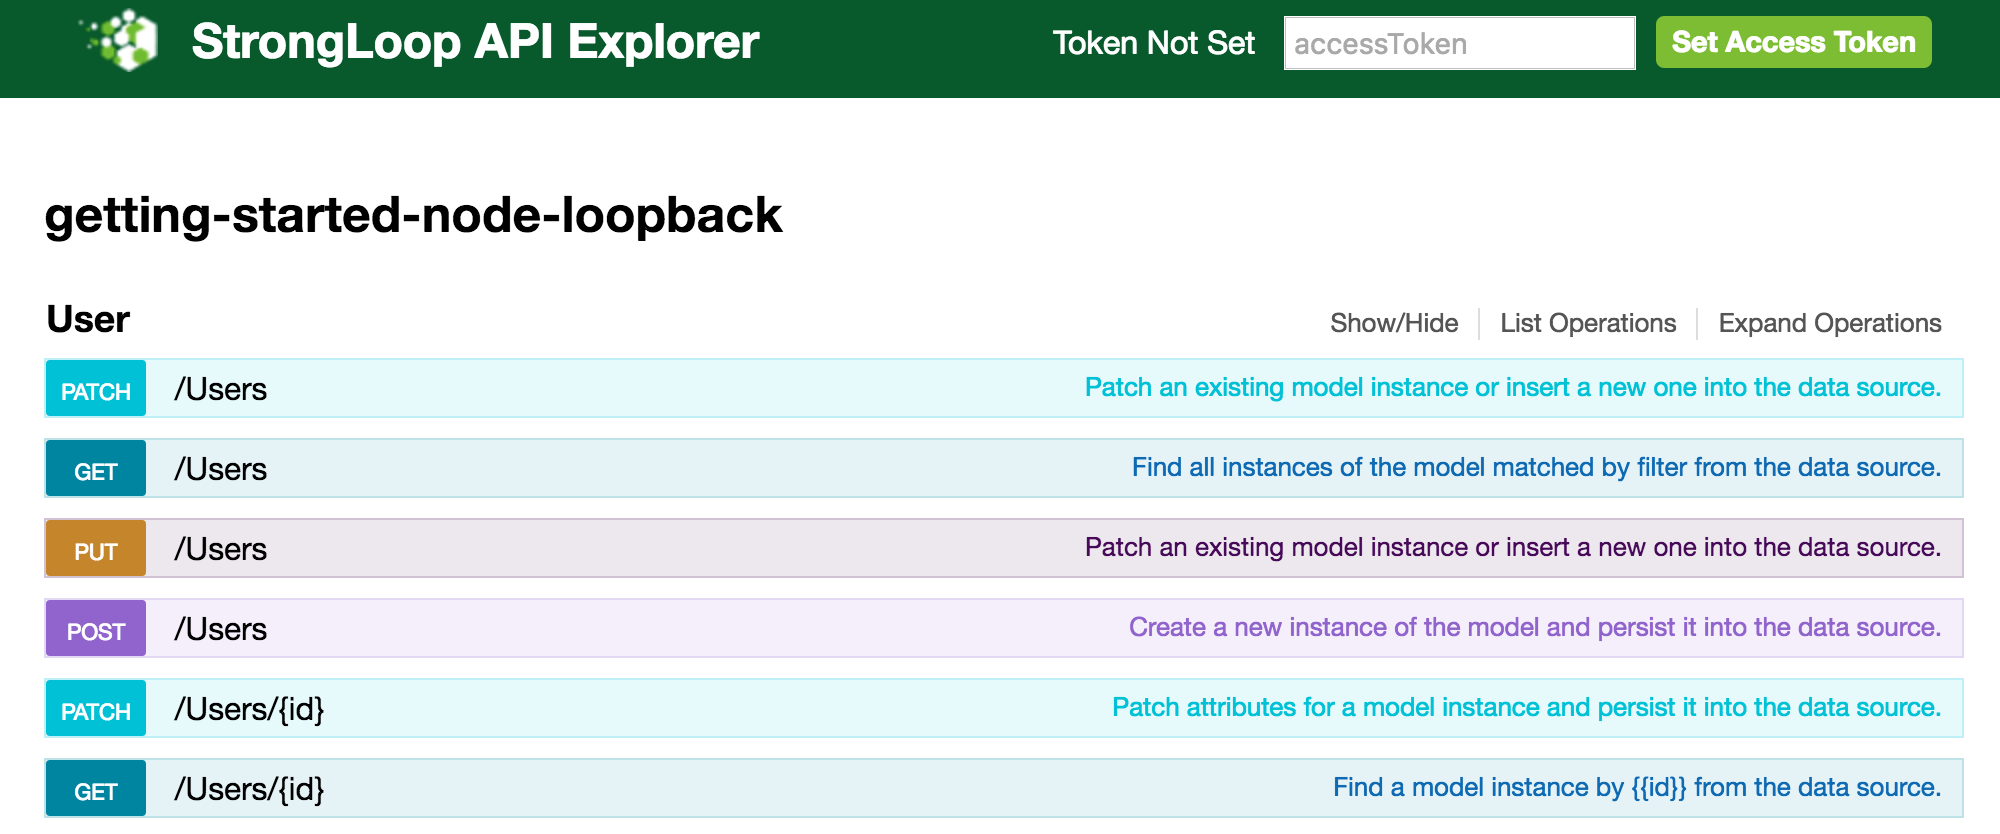
Browse to http://localhost:3000/explorer and you’ll see the built-in API explorer based upon the popular Swagger framework and the standard LoopBack user model with no less than 28 predefined methods — all without writing a single line of code.
However, we’re not stopping there. It’s time to create our own endpoint.
Creating Tests
Wait, we’re creating our tests before even writing a single line of code for our endpoint? That’s right. That’s Test-driven Development.
We’re going to create our tests, watch them fail and then create our endpoint so that our tests pass. TDD relies on a very short development lifecycle where code is written only to pass specific test cases. We’re not going to talk too much about TDD right now, but you can check out this article about TDD with Node.js writen by Raja Sekar if you would like to learn more about it.
Let’s create our test directory and a single file that we’ll use for our endpoint tests.
For our endpoint, we’re going to create some fictional clients of a business.
mkdir test
cd test
touch client.test.js
Open the client.test.js file and add this code:
'use strict';

var expect = require('chai').expect;
var supertest = require('supertest');
var api = supertest('http://localhost:3000/api');

describe('Client', function() {
  it('should get all clients', function(done) {
    api.get('/clients')
      .expect('Content-Type', /json/)
      .expect(200)
      .end(function(err, res) {
        if (err) {
          return done(err);
        }
        var clients = res.body;

        expect(clients.length).to.be.above(1);
        done();
      });
  });

  it('should get a single client', function(done) {
    api.get('/clients/findOne')
      .expect('Content-Type', /json/)
      .expect(200)
      .end(function(err, res) {
        if (err) {
          return done(err);
        }
        var client = res.body;

        expect(Array.isArray(client)).to.be.false;
        done();
      });
  });
});
Here, we are adding two mostly standard tests using the popular mocha, chai and supertest modules. One of the tests checks that the clients endpoint returns an array of clients and the second checks for a single client from /clients/findOne. The findOne method in LoopBack is the same as the standard find method, except it is limited to one record.
Of course, as we’ve said before, these won’t pass at the moment since we have yet to create the clients endpoint.
If you run the tests, you’ll get something like this:
$ ./node_modules/mocha/bin/mocha test/client.test.js

  Client
    1) should get all clients
    2) should get a single client

  0 passing (67ms)
  2 failing

  1) Client should get all clients:
     Error: expected 200 "OK", got 404 "Not Found"
      at Test._assertStatus (node_modules/supertest/lib/test.js:250:12)
      at Test._assertFunction (node_modules/supertest/lib/test.js:265:11)
      at Test.assert (node_modules/supertest/lib/test.js:153:18)
      at assert (node_modules/supertest/lib/test.js:131:12)
      at node_modules/supertest/lib/test.js:128:5
      at Test.Request.callback (node_modules/superagent/lib/node/index.js:603:3)
      at node_modules/superagent/lib/node/index.js:767:18
      at Stream.<anonymous> (node_modules/superagent/lib/node/parsers/json.js:16:7)
      at Unzip.<anonymous> (node_modules/superagent/lib/node/utils.js:108:12)
      at endReadableNT (_stream_readable.js:921:12)

  2) Client should get a single client:
     Error: expected 200 "OK", got 404 "Not Found"
      at Test._assertStatus (node_modules/supertest/lib/test.js:250:12)
      at Test._assertFunction (node_modules/supertest/lib/test.js:265:11)
      at Test.assert (node_modules/supertest/lib/test.js:153:18)
      at assert (node_modules/supertest/lib/test.js:131:12)
      at node_modules/supertest/lib/test.js:128:5
      at Test.Request.callback (node_modules/superagent/lib/node/index.js:603:3)
      at node_modules/superagent/lib/node/index.js:767:18
      at Stream.<anonymous> (node_modules/superagent/lib/node/parsers/json.js:16:7)
      at Unzip.<anonymous> (node_modules/superagent/lib/node/utils.js:108:12)
      at endReadableNT (_stream_readable.js:921:12)
Exactly what we expected. In TDD, it’s sometimes a good thing to see a failed test, but it means we still have some work to do. Now, onto creating our endpoint and making those tests pass.
Creating the Model
We’ll again use the StrongLoop CLI, this time to create our model representing our business clients. LoopBack defines a model as something that represents data in backend systems such as databases, and by default has both Node and REST APIs.
As we’re more interested in the REST API for this example, our model will be exposed as our /clients endpoint.
$ slc loopback:model
? Enter the model name: client
? Select the data-source to attach client to: db (memory)
? Select model's base class PersistedModel
? Expose client via the REST API? Yes
? Custom plural form (used to build REST URL):
? Common model or server only? common
You’ll again be prompted by slc to answer some questions. Enter the model name as client and accept the defaults for the rest. If you are interesting in learning more about the model generator, you can read more about it in the LoopBack documentation.
You may have noticed that we’re using the in-memory database for our example. Clearly, this isn’t acceptable for production use, but thankfully LoopBack also provides a number of connectors for popular SQL and NoSQL databases, including MySQL, PostgreSQL, Microsoft SQL Server, Oracle, and MongoDB among others. If you can’t find a connector for your database of choice there, then check GitHub as there are also many community contributed connectors for additional data stores.
After completing the above steps, slc will ask if you want to add some properties to the model. Say yes and add two required properties, one string called name and one boolean called active.
While we’re only using a few for our example, there are quite a number of additional interesting options for properties in LoopBack models. You can again consult the LoopBack documentation for further detail.
When you are done, hit enter again to exit the CLI.
Let's add some client properties now.

Enter an empty property name when done.
? Property name: name
   invoke   loopback:property
? Property type: string
? Required? Yes
? Default value[leave blank for none]:

Let's add another client property.
Enter an empty property name when done.
? Property name: active
   invoke   loopback:property
? Property type: boolean
? Required? Yes
? Default value[leave blank for none]:

Let's add another client property.
Enter an empty property name when done.
? Property name:
If you were to try to run the tests again, you’d notice that they still fail, albeit the first test fails with a different error:
Uncaught AssertionError: expected 0 to be above 1
That’s because we haven’t added any clients to our client database yet. Let’s add a client with curl.
curl -X POST --header "Content-Type: application/json" --header "Accept: application/json" -d "
  {
    \"name\":\"Bob\",
    \"active\":true
  }" http://localhost:3000/api/clients
LoopBack will send back a response such as:
{"name":"Bob","active":true,"id":1}
Now, let’s try running our tests again:
$ ./node_modules/mocha/bin/mocha test/client.test.js

  Client
    1) should get all clients
    ✓ should get a single client

  1 passing (40ms)
  1 failing

  1) Client should get all clients:
     Uncaught AssertionError: expected 1 to be above 1
      at Test.<anonymous> (test/client.test.js:18:38)
      at Test.assert (node_modules/supertest/lib/test.js:161:6)
      at assert (node_modules/supertest/lib/test.js:131:12)
      at node_modules/supertest/lib/test.js:128:5
      at Test.Request.callback (node_modules/superagent/lib/node/index.js:591:12)
      at node_modules/superagent/lib/node/index.js:767:18
      at IncomingMessage.<anonymous> (node_modules/superagent/lib/node/parsers/json.js:16:7)
      at endReadableNT (_stream_readable.js:921:12)
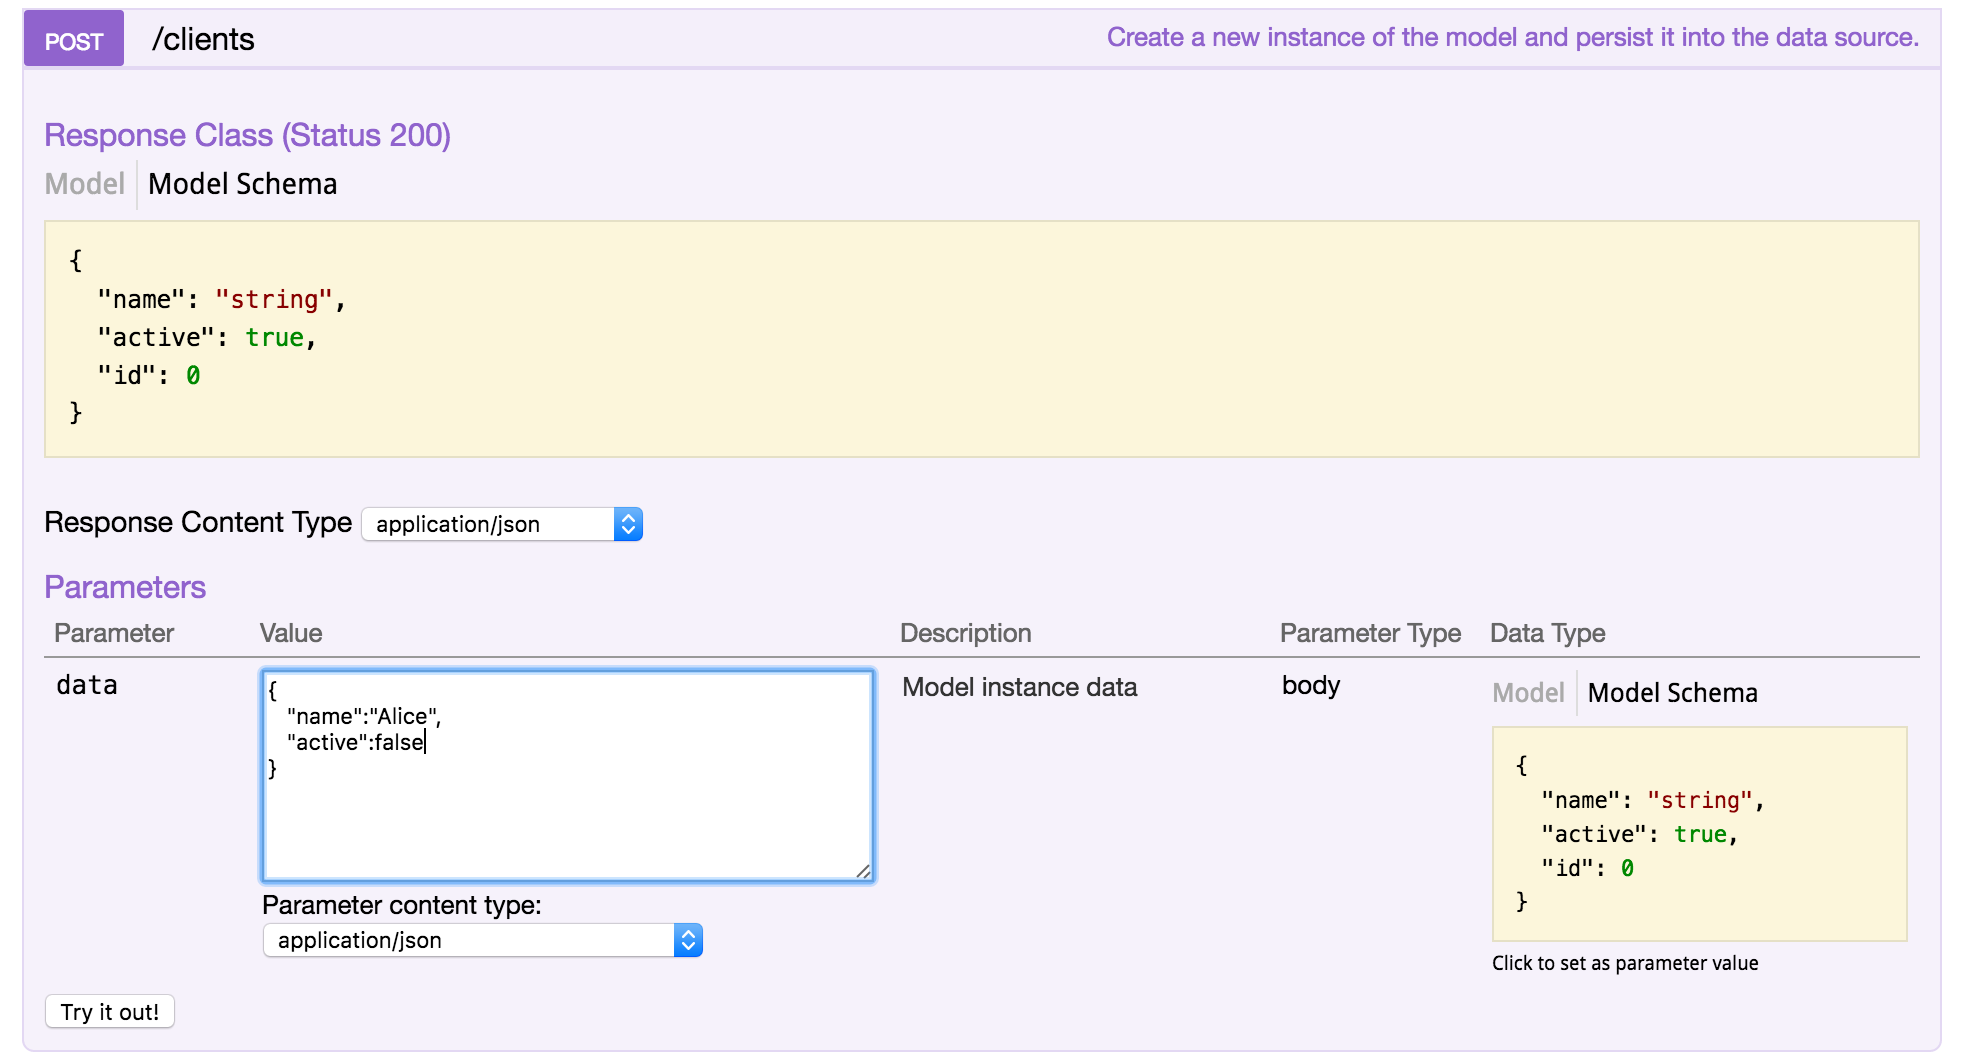
Well, we got our first test to pass. Now, onto our second test. That test expects more than one client to be returned from the /clients endpoint. Let’s add one more client to our database, this time with the LoopBack Explorer.
Head to http://localhost:3000/explorer/#!/client/client_create and paste some JSON into the data text field and click on the “Try it out!” button.
{
  "name":"Alice",
  "active":false
}
This will add another new client to our database, and send back a response similar to the following:
{
  "name": "Alice",
  "active": false,
  "id": 2
}
You’ll notice that both times we created a new client LoopBack automatically added an id property for us. Since we didn’t specify an ID, the framework adds an id property to the model and lets the database engine generate the ID.
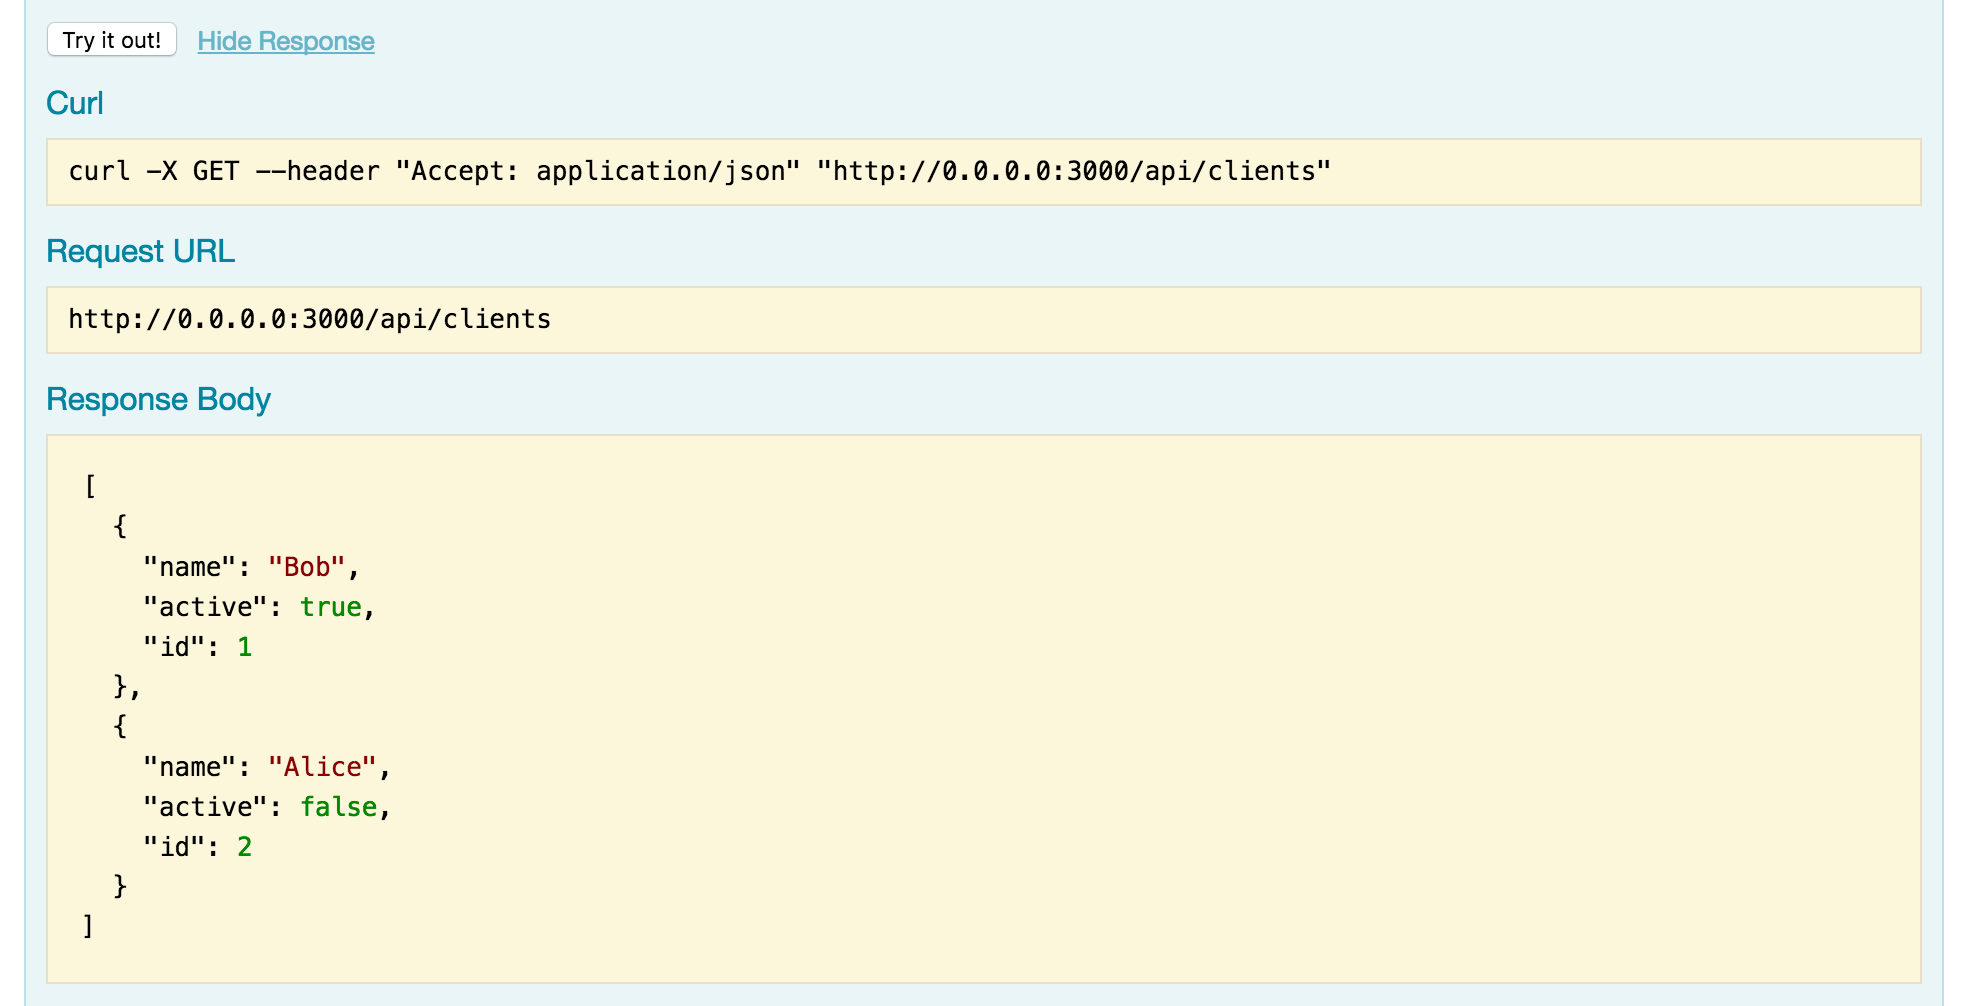
Let’s double check that our newly added clients are in the database by using the explorer again. This time, head to http://localhost:3000/explorer/#!/client/client_find and click on the “Try it out!” button. You’ll see that our clients are indeed in our database.
Now, if you run our tests again, you’ll see that they both pass!
$ ./node_modules/mocha/bin/mocha test/client.test.js

  Client
    ✓ should get all clients
    ✓ should get a single client

  2 passing (33ms)
That’s LoopBack and TDD in action.
Conclusion
You’ve seen how easy it is to get a production-ready API setup with Node.js using the LoopBack framework — and we didn’t even write any code. Of course, there’s much more to LoopBack than what we covered here including abundant filtering options, robust authentication and integrations with AngularJS, iOS and Android.
For your next API project, think about using Node.js, LoopBack, TTD, and Semaphore. If you have any questions and comments, feel free to leave them in the section below.


