Introduction
Phoenix lends itself to rapid and productive workflows when building Elixir web services, and the Mix tool provides extensible automation of repeated tasks such as compiling code and running tests. However, containerization can be helpful when we want to build and run a release along with its supporting infrastructure.
In this tutorial, we’ll learn the basics of running a Phoenix release with a sidecar PostgreSQL container using Docker and Docker Compose, followed by building a custom Mix task to make the containerization fit the typical Elixir workflow better.
Goals
By the end of this tutorial, we will:
- Build a Docker container that runs a Phoenix release,
- Create an orchestrated multi-container setup with Docker Compose, and
- Create a custom Mix task that automates our use of Docker and makes containerization much more convenient.
Prerequisites
For this tutorial, you will need:
- A basic understanding of Docker,
- Familiarity with Elixir’s Mix tool,
- Docker and Docker Compose installed on your workstation,
- Elixir and Phoenix installed on your workstation, and
- A local copy of the hello_semaphore repo.
Describing the hello_semaphore Project
The project we’ll be using for this tutorial is a very basic Phoenix project that is mostly copied straight out of the Phoenix Guides. In addition to the stock index page, it serves up a /users page that allows us to create, edit, and retrieve users that are stored in PostgreSQL. You can read a walk-through for this in the Ecto Models Guide. The project also uses exrm to create releases.
While this tutorial is based heavily on the hello_semaphore project, it will not provide any detailed explanations of how various parts of the code work, other than to describe the Docker-related and Mix-related items.
NOTE: You are strongly discouraged from forking this project as a kick-off point for subsequent projects, as it contains various bits of committed code that typically should not be committed into source control.These bits were included to make for a more expedient tutorial. Unless you know exactly what bits of the hello_semaphore repository should be removed to make it safe for public consumption of your own project, it’s strongly advised that you start your next project from scratch, and use this one as a reference as needed.
Building the Phoenix Release
From the root of the hello_semaphore project, run:
MIX_ENV=prod mix compile
MIX_ENV=prod mix release
This will compile the project and all of its dependencies, then invoke exrm to bundle them up in a valid release structure in the rel directory of the project. We can test out our release by running:
PORT=8888 rel/hello_semaphore/bin/hello-semaphore foreground
We should see the application start up and, most likely, complain about failing to connect to PostgreSQL. This is expected, and means our release is, for the most part, working so far. We’ll fix up the DB connection issue in a bit.
Building a Container to Run a Phoenix Release
In the root of the hello_semaphore project there is a Dockerfile with the following contents:
1   FROM ubuntu
2   RUN apt-get update && \
3       apt-get install -y libssl1.0.0 postgresql-client && \
4       apt-get autoclean
5   RUN mkdir -p /app
6   ARG VERSION=0.0.1
7   COPY rel/hello_semaphore/releases/${VERSION}/hello_semaphore.tar.gz
8     /app/hello_semaphore.tar.gz
9   COPY scripts/wait-for-postgres.sh /app/wait-for-postgres.sh
10  WORKDIR /app
11  RUN tar xvzf hello_semaphore.tar.gz
12  RUN locale-gen en_US.UTF-8
13  ENV LANG en_US.UTF-8
14  ENV LANGUAGE en_US.UTF-8
15  ENV LC_ALL en_US.UTF-8
16  ENV PORT 8888
17  CMD ["/app/bin/hello_semaphore", "foreground"]
While there’s nothing very special about this Dockerfile, there are some specific steps we need to take to ensure that our Phoenix release runs properly. We need to be able to select the appropriate release at build time, ship output to stdout/stderr, and run the release in such a way that the container won’t exit prematurely. Here’s a walk-through of the file:
- Line 3:
libsslis required for a Phoenix release to run somewhere other than our workstation, and thepostgresql-clientpackage provides thepsqlcommand used by Ecto’s Postgres adapter, - Line 6: This is a build argument, with a default value of
0.0.1. It’s passed in during the Docker build process, and we’re going to use this to allow thedocker buildcommands to pull in the appropriate version of our Phoenix release, - Line 7: exrm bundles releases up into a ready-to-ship tar/gzip archive, which we copy into our container. Note that we interpolate our build arg
VERSIONinto the path for the archive file, - Line 9: The startup script we add to the container will make more sense when we discuss Docker Compose and its role in our runtime,
- Line 13-15: These commands make Elixir stop throwing warnings about the container’s locale at runtime,
- Line 16: Our project’s prod config (
config/prod.exs) relies on an environment variable,$PORT, to know what port Phoenix should bind. This provides that environment variable and its value, and - Line 17: We need to run our release in
foregroundmode for a couple of reasons:- It ships our logs to
stdoutandstderr, which makes it much easier to see what’s happening inside our containers, - More importantly, it prevents our Phoenix container from exiting immediately after a successful start of our Elixir application.
- It ships our logs to
Now that we have our Dockerfile in place, we can build the image. From the root of the project, run:
sudo docker build -t hello_semaphore .
Once the image is built, it can be run with :
sudo docker run -p 8888:8888 hello_semaphore
We explicitly call out the port mapping here to prevent Docker choosing a random host port for us.
At this point, the container should crash because there is no database available. This is expected in this phase, because we haven’t yet started up a database. Let’s take care of that next.
Running a PostgreSQL Container
While we could certainly run an instance of PostgreSQL on the workstation, outside of Docker, we can gain some benefits by running it in a container alongside our Phoenix container. In particular, a containerized database server can be treated as a part of the application’s ecosystem via Docker Compose, instead of having to be made accessible from within the application container, and all of the requisite setup of the DB can be rolled into the project’s repository as needed. We’ll only tackle the connection convenience via Docker Compose, but you could certainly include an optimized PostgreSQL configuration file in your own project’s repository if the need should arise.
There are a few options for running our database server in a container, but a couple of them aren’t very favorable. I’ll explain why as we go:
- Install Postgres into our Phoenix container
- Pros
- Everything is in one place, so connectivity is not an issue.
- Cons
- Everything is, quite literally, in one place, which causes pain points in getting the monolith image to build properly and run successfully,
- This is an anti-pattern in the world of containers, where each container should ideally be responsible for running a single process,
- Moving into an container orchestration platform, commonly referred to as a Platform as a Service or PaaS, we’ll be restricted from scaling the application and database tiers independently, and
- In most enterprise environments, various tiers ,e.g. application vs. database, need to reside on segregated network segments, which is impossible when we lump things together.
- Manually spin up a separate container that just runs Postgres
- Pros
- Avoids all of the cons of the first option.
- Cons
- Unless we want to get familiar with Docker’s legacy linking mechanisms or be very diligent with port mappings defined at the command line, we’ll likely run into problems getting our containers to talk to one another,
- We take on the responsibility of checking whether or not our containers are being started in the right order, and
- Avoiding these cons would require script writing.
- Define a multi-container composition using Docker Compose
- Pros
- Avoids all of the cons of the first and the second option,
- Provides plenty of conveniences for manipulating containers that make up the composition, and
- Handles inter-container concerns for us
- Cons
- In some environments, insufficient for production deployments.
Let’s continue with the third option. We’ll get started by building the config file for our composition, creatively named docker-compose.yml:
1  version: '2'
2  services:
3    web:
4      build:
5        context: .
6        args:
7          VERSION: "${VERSION}"
8      ports:
9        - "8888:8888"
10     depends_on:
11       - postgres
12     entrypoint: ./wait-for-postgres.sh postgres /app/bin/hello_semaphore
                     foreground
13
14   postgres:
15     image: postgres
16     volumes:
17       - ./data:/var/lib/postgresql/data
The basic idea behind a Docker Compose configuration is “a set of related services and how they should be run in relation to one another.” Let’s walk through this configuration to understand each part:
- Line 1: This is the version of the Docker Compose API to be used, not the version of our application,
- Line 3: We’re calling our Phoenix application the
webservice, - Line 4: Starts the build settings section,
- Line 5: Sets the build context. When working with Docker, this is the path that contains the Dockerfile and the files that are to be inserted into the image,
- Line 6-7: the
argssection tellsdocker-composeto pass the specified build args to thedocker buildcommand when we build the containers,- One useful feature of Docker Compose’s tooling is that it can substitute in environment variables from the current session as needed, hence the
${VERSION}value for ourVERSIONbuild args, - We’ll make use of this feature at build time later on, in this section of the tutorial,
- One useful feature of Docker Compose’s tooling is that it can substitute in environment variables from the current session as needed, hence the
- Line 8-9: Sets the
host:containerport mappings, just like we did with our manualdocker run -p...call earlier, - Line 10-11: States that we depend on another service, named
postgres. This ensures that Docker Compose will start the services in the correct order — in this case,postgresfirst andwebsecond, - Line 12: Here we explicitly state that the Phoenix container should start by way of a starter script called
wait-for-postgres.sh. This script simply polls for a “ready-to-use” Postgres connection once per second, and when it finds that Postgres is ready it will start our Phoenix application, - Line 14: Starts defining the
postgresservice, - Line 15: Instead of building our own PostgreSQL image, we can just pull the publicly-available image, and
- Line 16-17: Sets up a local directory that we’ll bind mount inside the
postgresservice’s container, so that we don’t lose all of our data every time the container shuts down,- The syntax here is important, particularly the leading
.character. Without this, Docker Compose will assume that we’ve provided some special definition of a volume calleddata,that may reside anywhere, and will complain that such a defition was not actually provided.
- The syntax here is important, particularly the leading
As mentioned earlier, Docker Compose makes multi-image builds easier than they would be with the vanilla Docker engine. We can build our local images with:
sudo docker-compose build
Running this will throw a warning, stating that the ${VERSION} environment variable is unset and that an empty string will be substituted in its place. This is a bit of an inconvenience, as the blank string it uses will actually override the default value of 0.0.1 in the Dockerfile. The default value is still worth having in place for situations where the image is being built without using Docker Compose, but it doesn’t help here. For now, we can work around it by specifying the version number of our release at build time:
sudo -E VERSION=0.0.1 docker-compose build
Note: The -E argument to sudo is important, otherwise our environment variables will not carry over to the sudo command, leaving us in the same situation as before with an empty string substituted in by default.
Notice that the postgres image wasn’t pulled, but it will be when we run the whole setup with:
sudo docker-compose up
This will pull any needed images, start the services in the specified order (as indicated by the depends_on line in docker-compose.yml), and start dumping the stdout/stderr streams from all containers to the terminal. The output from the containers will also be prepended by the container’s short name – <service name>_<container number>.
To run the whole thing in the background, we can use docker-compose start instead of of up. This will background all of the containers, and we will have to run docker logs <container name OR container ID> to see what is happening in the containers.
Trying It Out
Now is a good time to make sure things are working as expected.
For start, we should see the output from the web_1 container stating that our database was created, migrations were run, and that the HelloSemaphore.Endpoint is running.
Next, there should be a new local directory in the root of the hello_semaphore project called data, and this directory should contain a number of PostgreSQL database files. Note: Looking in the data directory will require sudo, as the directory is not owned by the local user that’s running the Docker commands.
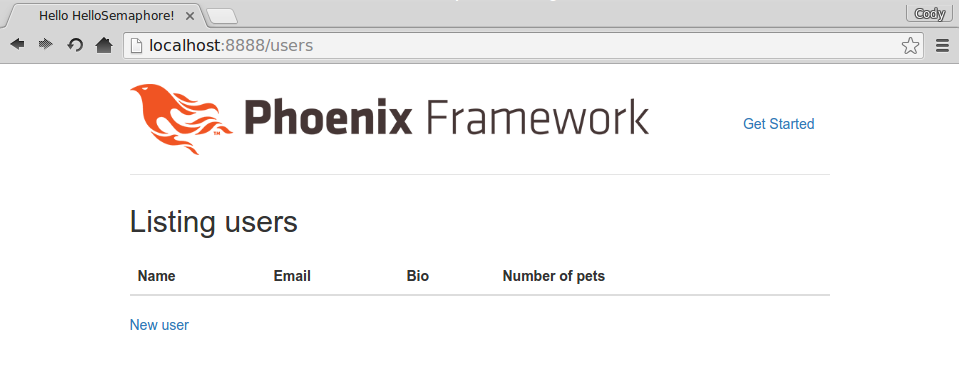
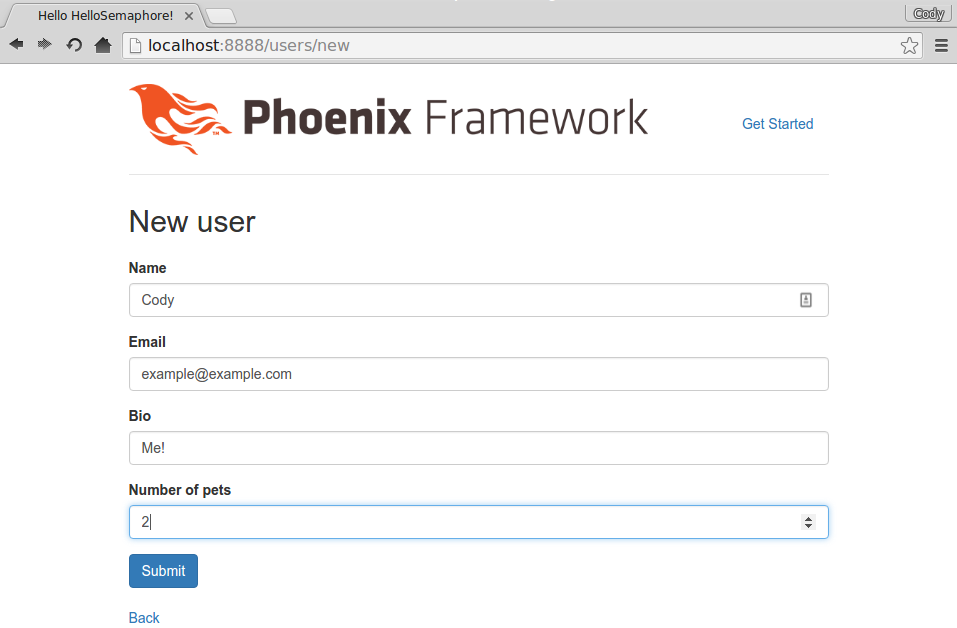
Lastly, we should be able to visit our new Phoenix page and create a user at http://localhost:8888/users:
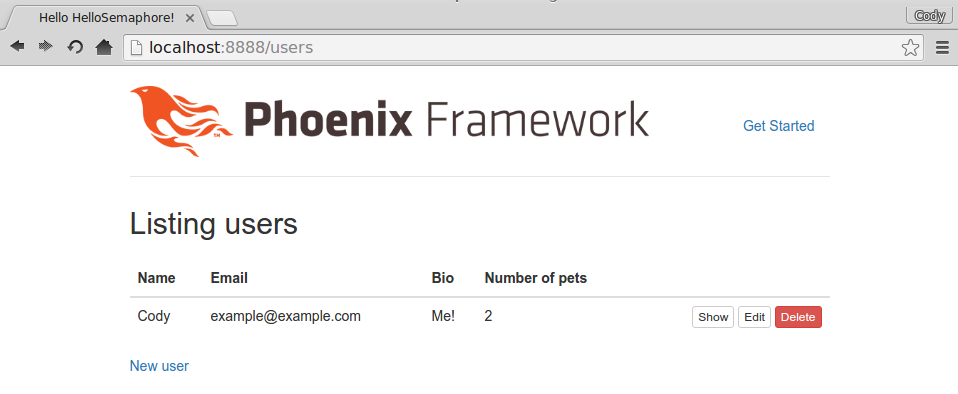
This activity should generate some log output from the web_1 container to show that Phoenix sees what we’re doing:
web_1 | 05:19:04.851
  request_id=off2ho046c4br77pteg91hkk0aof2q9d [info] GET /users
web_1 | 05:19:04.853
  request_id=off2ho046c4br77pteg91hkk0aof2q9d [info] Sent 200 in 1ms
web_1 | 05:21:10.192
  request_id=dm5ifmjq3pl40put9jv495nn73g1jeqr [info] GET /users/new
web_1 | 05:21:10.195
  request_id=dm5ifmjq3pl40put9jv495nn73g1jeqr [info] Sent 200 in 2ms
web_1 | 05:21:54.390
  request_id=jj0qint2b6781vk97qdd0oa1i5radkvb [info] POST /users
web_1 | 05:21:54.394
  request_id=jj0qint2b6781vk97qdd0oa1i5radkvb [info] Sent 302 in 3ms
web_1 | 05:21:54.398
  request_id=hlagc9g2cgo2bgpa2om2gdeob5tu1hvp [info] GET /users
web_1 | 05:21:54.400
  request_id=hlagc9g2cgo2bgpa2om2gdeob5tu1hvp [info] Sent 200 in 1ms
Following this, we should be able to stop and restart the services with:
sudo docker-compose down
sudo docker-compose up
Now, we should be able to revisit the same URL and see our newly-created user still present in the database. If not, there should be some indicator as to what went wrong in the log output of either one or both of the containers.
Since everything is working, it’s time to move on and create a custom Mix task.
Creating a Custom Mix Task
Docker Compose definitely does all the heavy lifting of running our services for us. However, we still have a development workflow that we’re going to get back to, and it would be helpful to bundle together some common commands into single commands that fit the normal Elixir workflow. To be more specific, a Mix task will automate certain Docker-specific tasks and reduce repetitive typing.
Creating a custom Mix task isn’t very complex, but it’s usually helpful to have the documentation open as we start looking at what is needed.
Looking in the lib/mix/tasks directory of the hello_semaphore project, there is a single file named compose.ex:
1   defmodule Mix.Tasks.Compose do
2     use Mix.Task
3
4     @shortdoc "Run Docker Compose to start up an orchestrated multi-container
5       runtime of this project. Options: up, down, release, build"
6
7     def run(args) do
8       case Mix.shell.cmd("docker-compose version", [quiet: true]) do
9         0 ->
10          compose(args)
11        _err -> Mix.shell.error "docker-compose executable not found.
12                  Installation page: https://docs.docker.com/compose/install"
13      end
14    end
15
16    def compose(["up"]) do
17      Mix.shell.cmd("sudo docker-compose up")
18    end
19
20    def compose(["down"]) do
21      Mix.shell.cmd("sudo docker-compose down")
22    end
23
24    def compose(["release", env]) do
25      System.put_env("MIX_ENV", env)
26      Mix.shell.cmd "mix compile"
27      Mix.shell.cmd "mix release"
28      Mix.shell.cmd "mix compose build"
29    end
30
31    def compose(["build"]) do
32      version = Keyword.fetch!(Mix.Project.config, :version)
33      Mix.shell.info "Version: #{version}"
34      Mix.shell.cmd "sudo -E VERSION=#{version} docker-compose build"
35    end
36
37  end
At a high level, this module is essentially a way to get Mix to recognize a new task named compose and use that to make a handful of relevant shell commands that are bundled as appropriate. Let’s step through this and discuss the relevant parts:
- Line 1: Mix tasks are always defined under the
Mix.Tasksnamespace. Normally it’s advised that custom tasks be further namespaced to match the project that provides them, for example,mix hello_semaphore.composeinstead ofmix compose, but for the sake of this tutorial it’s been made a “top-level” task for simplicity, - Line 4: The
@shortdocattribute is how we help users understand what our task does, and is required to make our task show up in the output ofmix help, - Line 7: The
runfunction is the entry point of any mix task, and receives a list ofStringarguments, - Line 8-12: Shell out and attempt to run
docker-compose version. If it succeeds it passes theargslist off to the appropriate definition of thecomposefunction. Otherwise, it will throw an error and explain that thedocker-composeexecutable is required and let the user know where they can go for installation steps, - Line 16-22: Small functions for
upanddowncalls that shell out and calldocker-compose, prepending the command withsudoso the user doesn’t have to remember to do so, - Line 24: This definition of the
composefunction actually expects that two arguments have been passed to the Mix task – the string “release”, and an environment name, - Line 25: Here we set the
MIX_ENVenvironment variable to the value of the environment name (e.g. prod, test, or dev) that is passed to the task. This will cause all subsequent mix task shell commands in this session to operate against the specified environment - Line 26-28: Bundled
mixanddocker-composeshell commands that will compile the project, build anexrmrelease, and then callsmix compose buildto invoke this same task with the “build” argument passed, - Line 31: Our final definition for the
composefunction, which will build our service containers with the appropriate build args set, - Line 32-33: Fetch the project’s current version number (
0.0.1at the moment) and output it tostdoutfor the user, and - Line 34: Using our fetched version number, call
docker-compose buildwith the version set as an environment variable, to mimic the manualdocker-compose buildcall we made above. Note: We’re not setting this environment variable withSystem.put_envthis time because it tends to behave inconsistently across shells.
Time to try it out:
mix compose release prod
mix compose up
There will likely be a bunch of files compiled, followed by a pause while exrm builds the release. Afterward, we should see the expected container output as described earlier.
What if we want to bump the project’s version number? This is accomplished with a single file edit, now that we’ve built our Mix task. First let’s shut everything down. From another terminal, run:
mix compose down
All that’s needed is an update to the version string in our project’s mix.exs from version: "0.0.1" to version: "0.0.2". We’ll re-run the release command. There is no need to remember to specify it as a --build-arg argument to docker-build, or setting it as an environment variable manually before building the services with docker-compose — mix handles it all with:
mix compose release prod
mix compose up
This should output the new version number from mix.exs, and inspecting the container manually should confirm that we have indeed used the new release instead of the old one as demonstrated here:
[shoe : hello_semaphore ]➜  docker exec -i -t hellosemaphore_web_1 /bin/bash
root@d91e0f019f96:/app# ls releases/
0.0.2  RELEASES  start_erl.data
exit
[shoe : hello_semaphore ]➜
Conclusion
In the course of this tutorial, we have:
- Manually built and run a Docker image containing a Phoenix release,
- Defined and manually run a Docker Compose configuration containing a Phoenix release and its associated PostgreSQL database in separate but orchestrated containers, and
- Defined a custom Mix task that automates compiling, releasing,containerizing, running Phoenix release, and database setup.
Now that we’ve learned how to reliably run our Elixir/Phoenix release in a Docker container and coordinate it with a supporting PostgreSQL container using Docker Compose with our custom Mix task, we’re in a strong position to expand on our setup and shorten the feedback loop when testing out new Elixir code releases. If you have any question or comments, feel free to leave them below.
P.S. Want to continuously deliver your applications made with Docker? Check out Semaphore’s Docker support.
Read next: