Large-scale JavaScript projects are likely to have multiple frontends and backends that interact and share libraries and interfaces among them. This means that there is a need for effective collaboration amongst the different teams working on these applications.
Nx is a tool used at Google to scale multiple applications used by different developer teams within a single monorepo. In this post, we’ll learn about Nx with a practical example of building a JavaScript Monorepo. You can learn more about Nx from its source documentation here. You can also try out the example project in this tutorial here.
Why do you need a Monorepo for your JavaScript application?
A full-stack JavaScript project at scale can have multiple frontends running on different frameworks. Each frontend could interact with different backend applications and each backend application might further need to interact with the others. However, each independent application may have a ton of similarities because they all belong to the same JavaScript ecosystem.
In these cases, monorepos become a great way to simplify sharing code, tests and interfaces between various applications. Monorepos have a common code base or git repository that manages the different applications. They help strengthen collaboration amongst different teams since everyone has more visibility of the project, as it is a single large codebase rather than multiple fragmented codebases.
Tech giants like Microsoft and Facebook also use monorepos for many of their JavaScript projects, so it’s a proven approach
What is Nx?
A monorepo is merely an approach to developing and deploying large-scale projects. However, to use monorepos effectively, you need the right tooling to manage them.
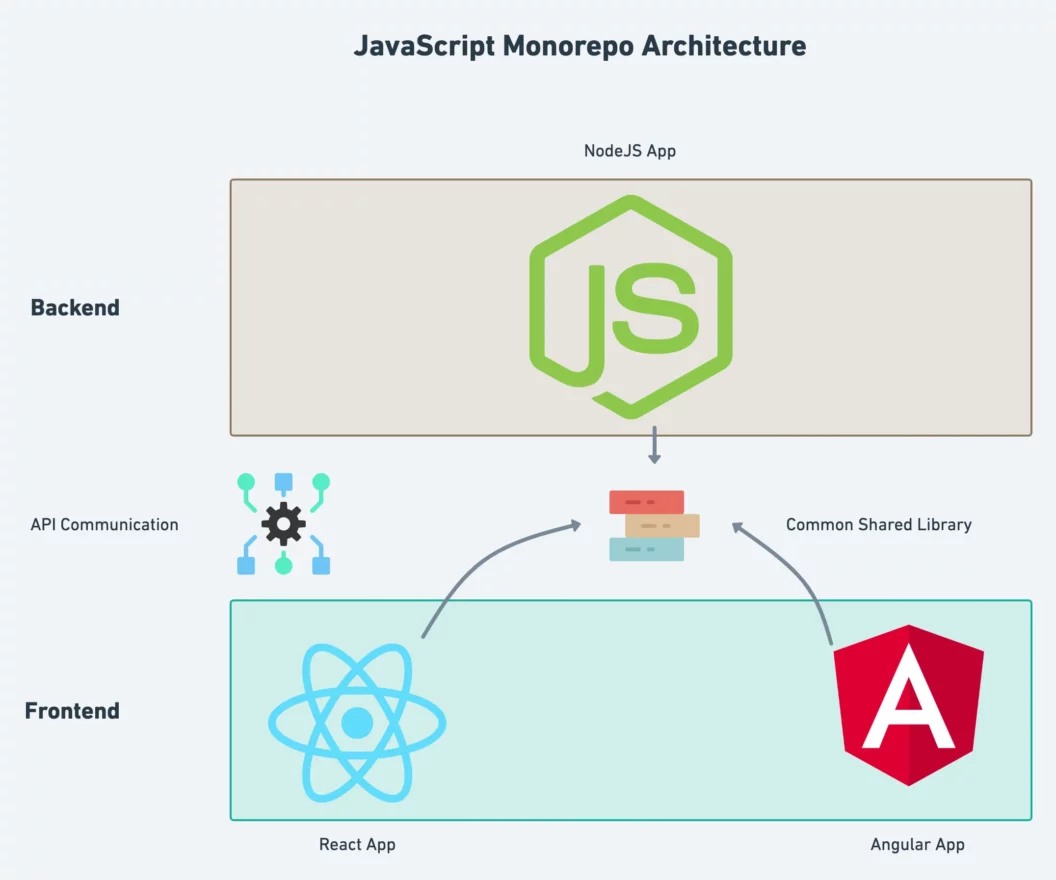
Nx is a tool that assists in testing, building and deploying large JavaScript apps at scale. Let’s say you need to scale a JavaScript project that has two separate frontends running on ReactJS and Angular. You also have a JavaScript backend on NodeJS or NestJs that needs to communicate with these two frontends. You need to share libraries and interfaces between these three applications–let’s take a look at how Nx can help us do that.
Creating an Nx Workspace
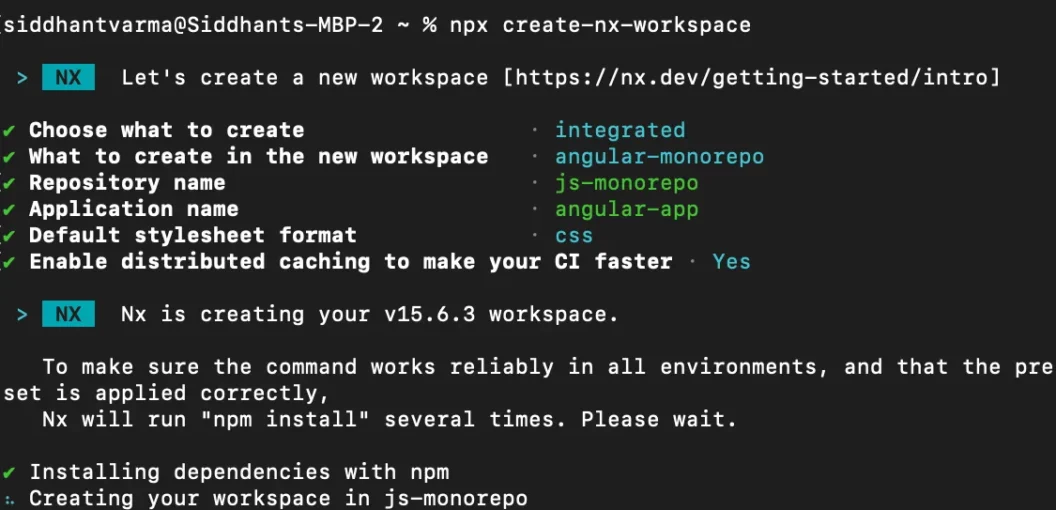
An Nx project in its bare bones is termed a workspace. You don’t need to install Nx separately in order to create an Nx project, you can do it directly using npx, which comes by default when you install NodeJS and NPM. So, let’s dive right into it and create a new Nx workspace using the following command:
npx create-nx-workspaceOnce you run the command, you’ll be prompted to download the Nx pkg (if not already installed) and then you get to start specifying some common details about your workspace. We’ll choose the integrated workspace option. Also, we’ll use CSS as the default stylesheet.
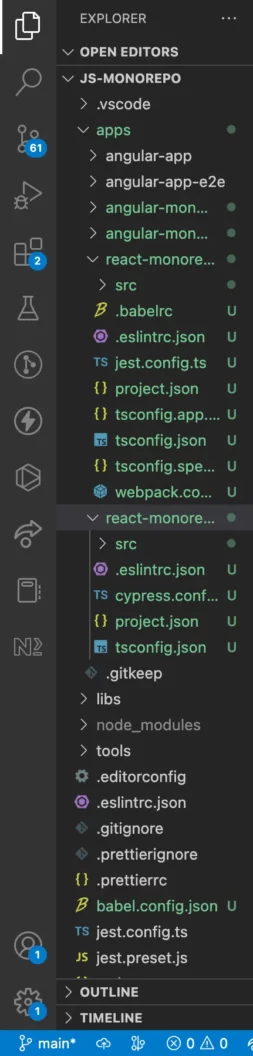
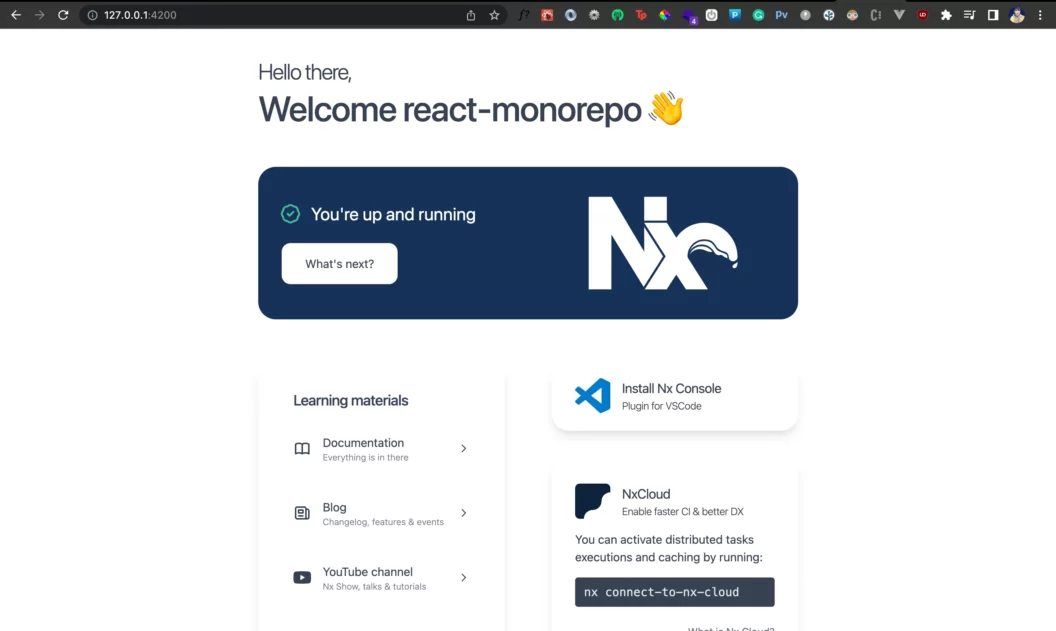
You should now have a new Nx workspace created. Sweet! Let’s take a quick peek inside the boilerplate project we have currently:
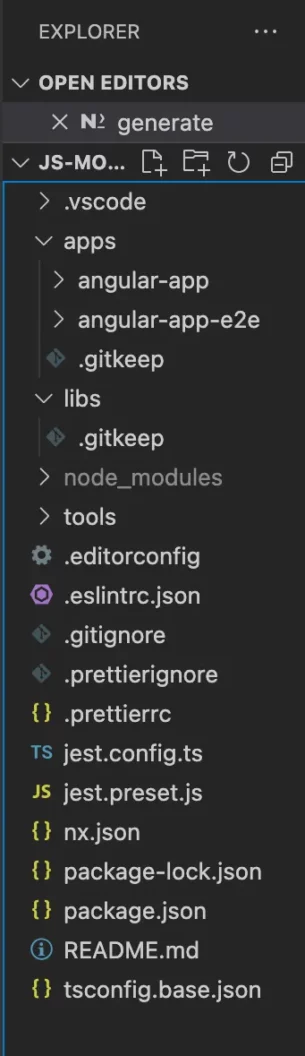
Notice that the project itself comes pre-configured with Jest and ESLint. You can find the relevant config files (jest.config.ts and .eslintrc.json) in the root directory.
Further, there is a package.json file at the root of the project. Since we’re working with a monorepo, we’ll have a single dependency management for all of our applications inside our Nx workspace. There is also an nx.json file which specifies the config of your Nx workspace.
There are two important directories in the workspace – the apps and the libs directories. The apps directory will store all the various applications of your project. If you expand the apps directory, you’ll find an angular project with end-to-end testing enabled. If we add more angular or react projects in our workspace, those projects will go inside this apps directory.
The libs directory will store all the code that you wish to share amongst different applications in your monorepo. If you’re using TypeScript, the libs directory is a good place to put some commonly shared interfaces. You can also put some common UI elements here.
The Nx Console
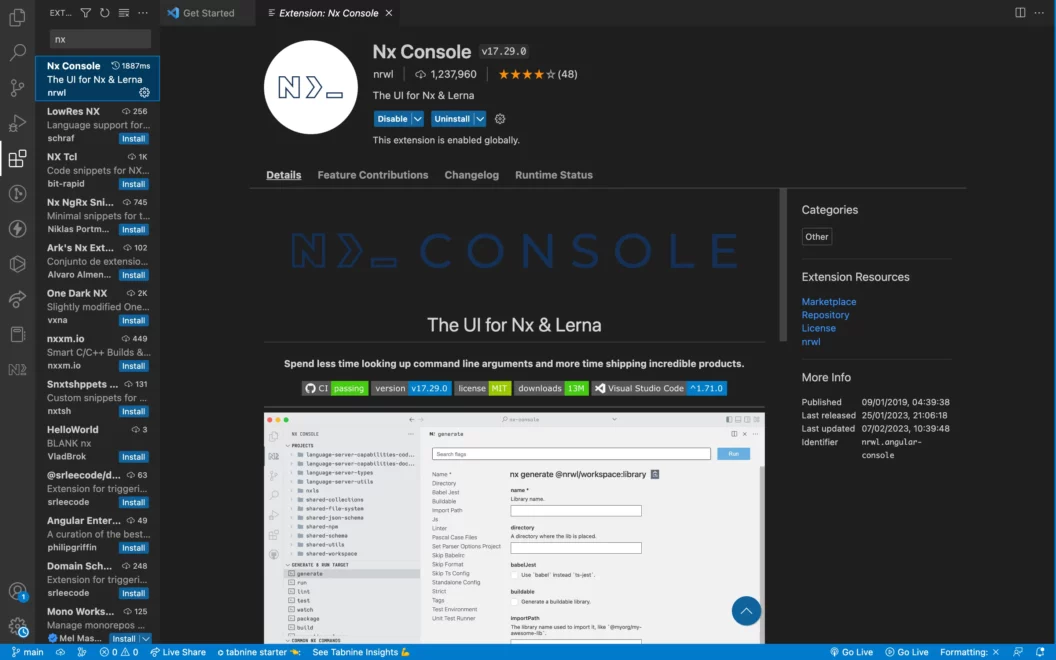
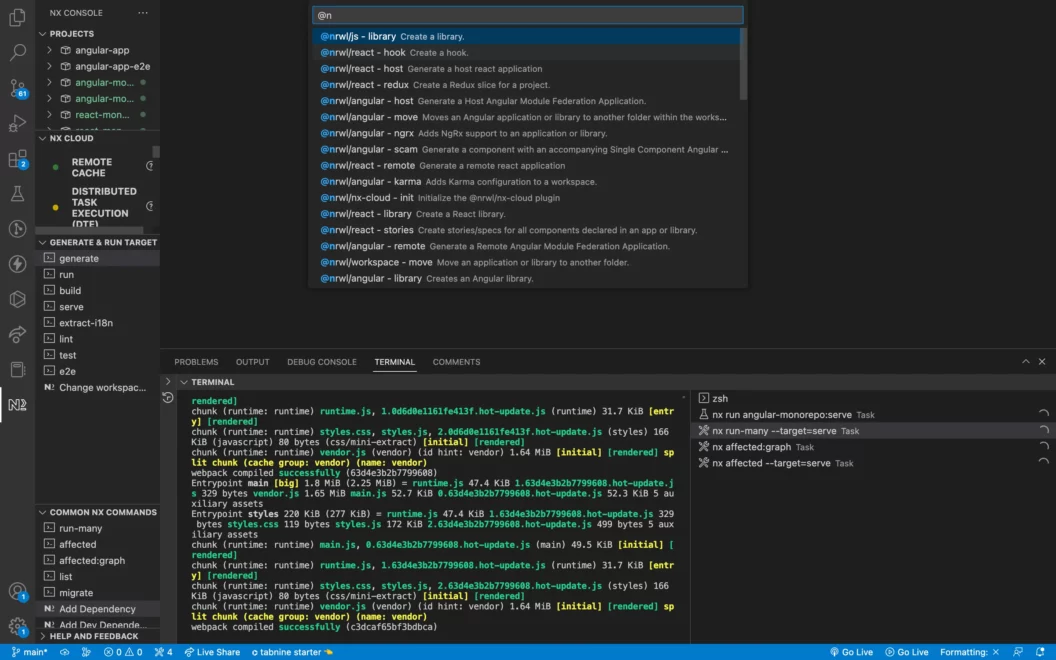
We can use a powerful VS Code extension called Nx console that helps generate Nx commands easily. You can find the extension here. Let’s go ahead and install this:
Adding Angular to the Nx Workspace
Let’s now add a new Angular app to our Nx workspace. We can do this directly using the Nx console, so you don’t have to remember any specific commands as such. Head over to the Nx console and select the generate option from the “GENERATE & RUN TARGET” section. That should drop a bunch of commands. You can then select the “Create an Angular application” command:
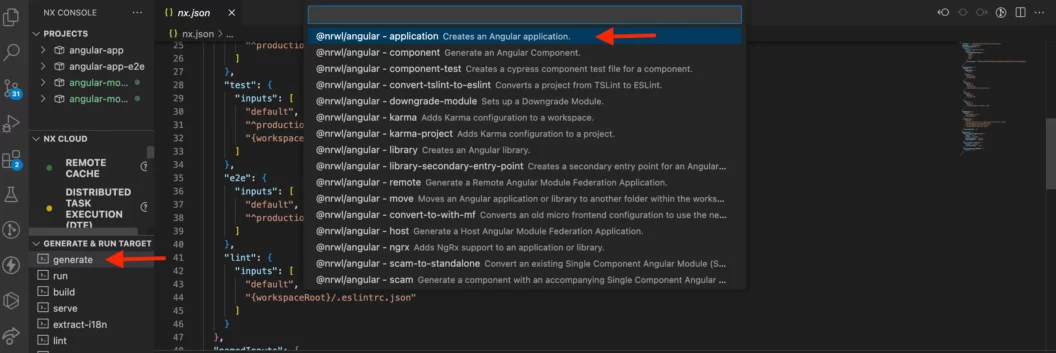
Once you do that, you should get a form specifying some options for your Angular project. As you start selecting these options, you can see the actual command that is generated on the fly.
Let’s give our Angular application a name and set css as the default style:
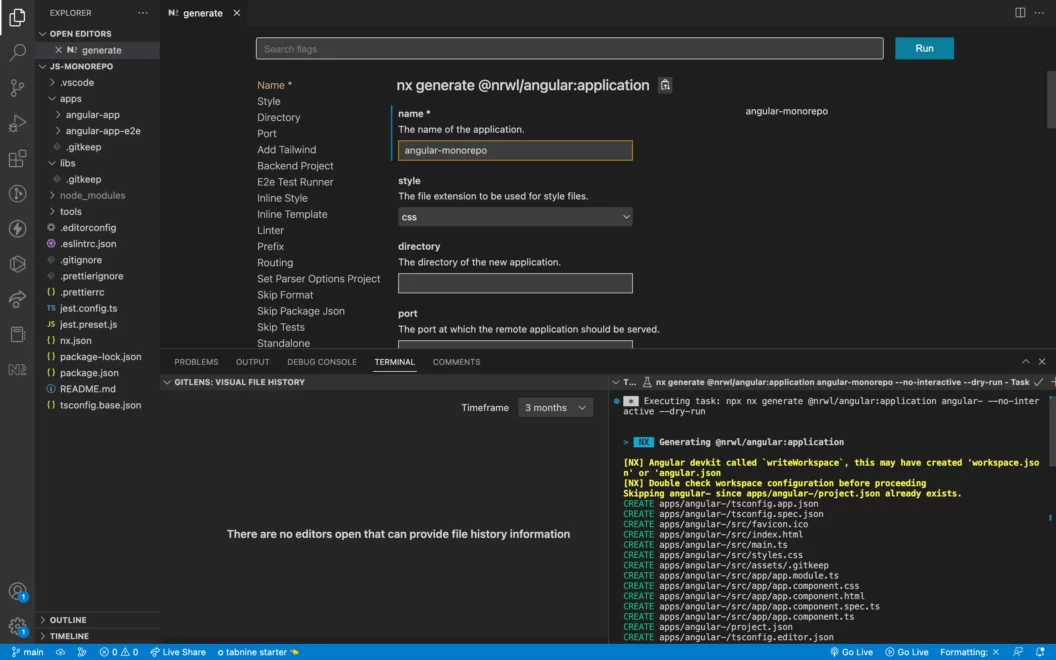
I’ve also added TailwindCSS to be configured by default. If you use TailwindCSS, this can save you quite a bit of time later, as it does a lot of configuration for you.
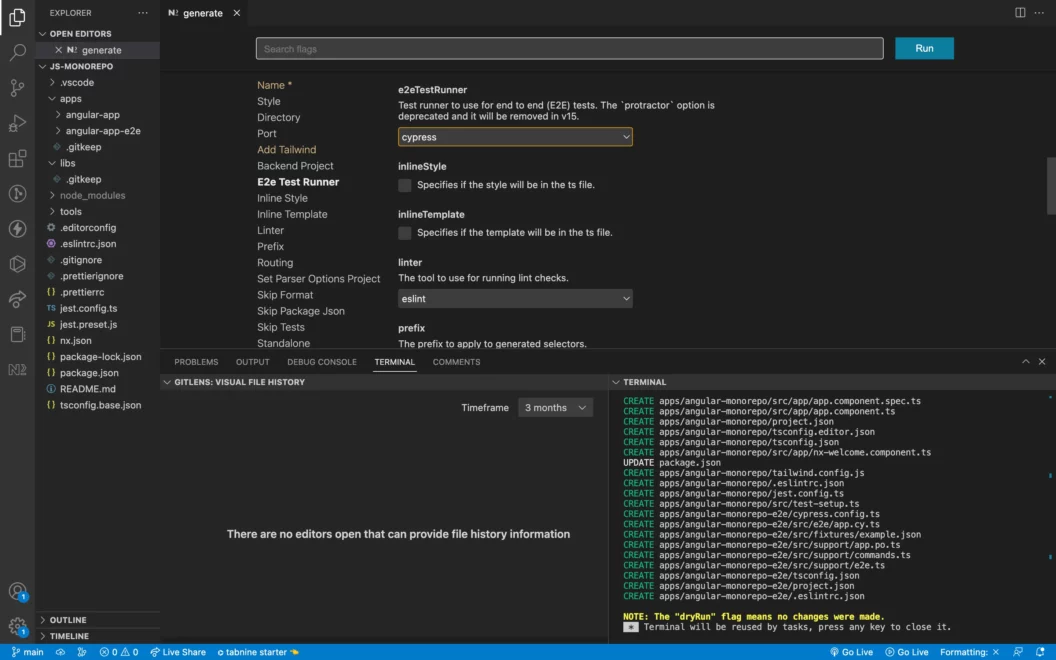
Adding Test tools and ESLint
In the same workflow, we can configure Cypress and Jest to be added to our Angular application. Under the e2eTestRunnersection, choose Cypress from the dropdown menu. You can also add ESLint to the project in the linter section.
Next, scroll down to the unitTestRunner section. Select Jest from the dropdown menu:
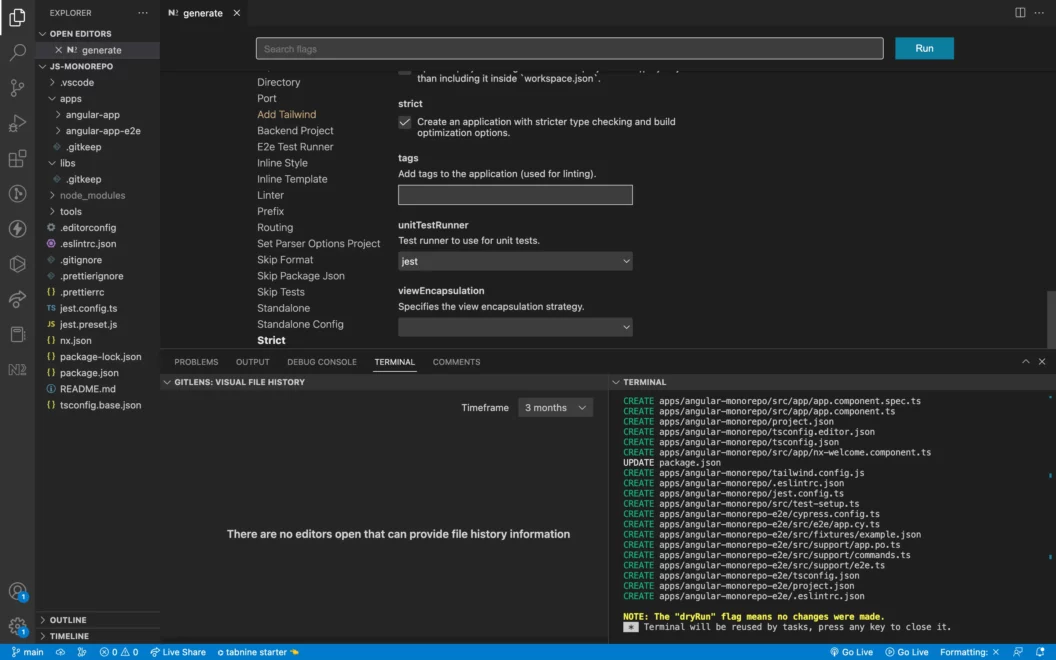
And that’s it! If you hit the Run button, Nx should automatically generate an Angular project configured with Jest, Cypress and ESLint. Under the hood, in this case, it ran the following command:
npx nx generate @nrwl/angular:application angular-monorepo --addTailwind --no-interactive Adding React to the Nx Workspace
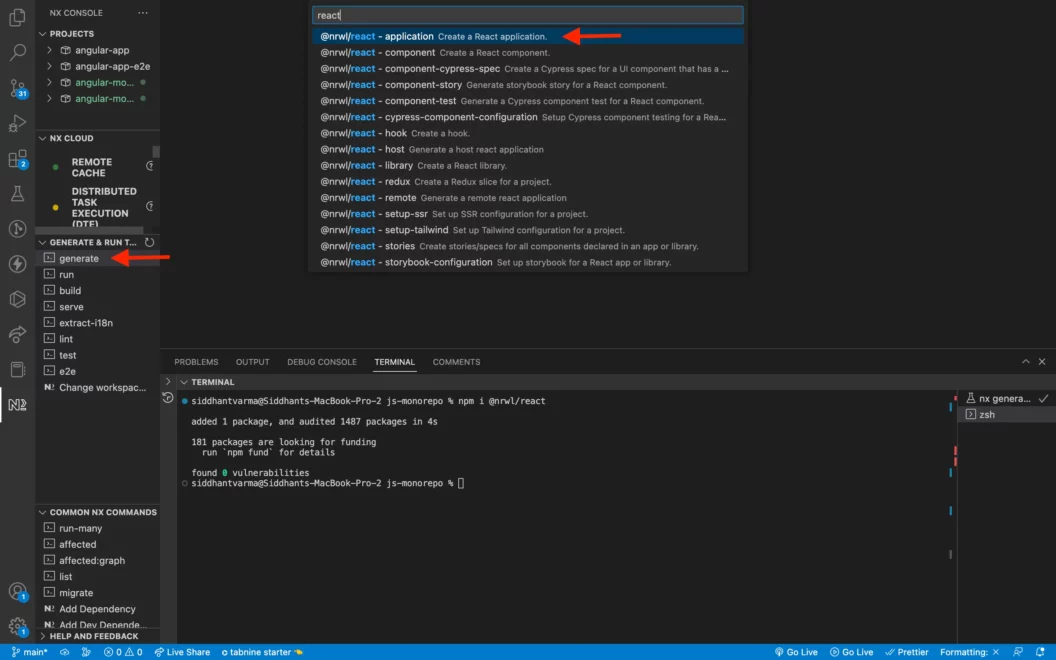
Now that we’ve added an Angular application to our monorepo workspace, let’s add another frontend to our monorepo. This time, we’ll add a React application to our Nx Workspace. In order to have React support inside your Nx console, you’ll need to install the @nrwl/react library.
Run the following command inside the root of your project:
npm i @nrwl/reactNotice that this library is installed in the node_modules folder under the root directory of your Nx workspace. This is where all your libraries will live. Now, we can go back to the Nx console and see a list of commands available to generate a React project:
Once you do that, the next steps should be very similar to what we did in the previous section for generating an Angular application. For our React application, we’ll also choose to “Generate application with routes” in the Routing section of the Nx generate config.

Once you click run, Nx should run the following command to generate a React application inside your Nx workspace:
npx nx generate @nrwl/react:application react-monorepo --routing --no-interactiveAnd now we should have a React project generated inside the apps directory:
Adding a Backend application to the Nx Workspace
Similar to the previous section, we can also add a NodeJS application to our Nx workspace. First, we’ll add the @nrwl/node dependency to the project:
npm i @nrwl/nodeNow, we can create a new NodeJS application by running:
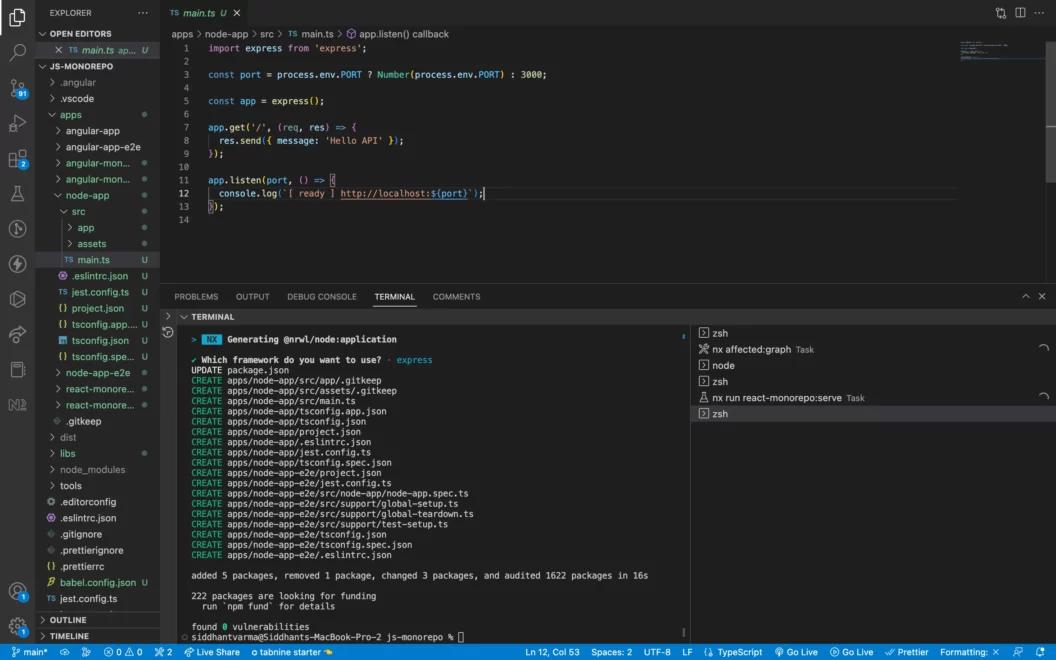
nx g @nrwl/node:app node-appI chose Express as the default framework with Node for this, but you can also choose NestJS or Fastify. Nx provides support for all the popular NodeJS frameworks.
You should now have a NodeJS with Express project inside your Nx workspace:
Awesome! Now that we have all our applications generated in our monorepo, let’s try running them.
Running Nx Projects Locally
Head over to the Nx console, chose the run command and then select the individual projects you want to run:

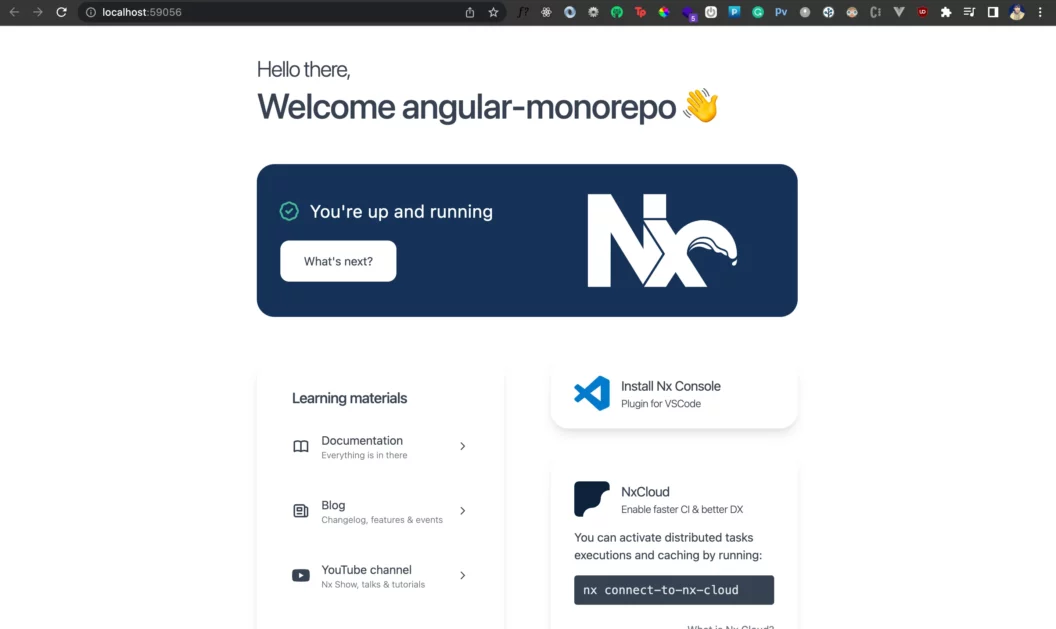
Once you run each of these individual commands, Nx should kickstart the two frontend projects for you, here’s what the Angular project should look like:
Similarly, you should also have your React Project up and running:
In the same way, we can also run the NodeJS project locally.
Sharing Libraries with Nx
One of the most interesting features of Nx for developing a monorepo is sharing libraries. In fact, abstraction becomes even more important in a monorepo because you can share libraries and interfaces between multiple apps in the same codebase.
Creating a Shared Library
Let’s see how we can use Nx to generate and consume a shared library between all three applications inside our project. We can create boilerplate for a new library in the Nx console.
Once you do that, you should get a similar form to create a new library. For brevity, we’ll just create a vanilla Typescript library. However, you can also create framework-specific libraries. Nx also provides support for adding and specifying tags to your libraries. Tags give special meaning to a library and can be used to indicate its purpose and scope.
Once you run the command, Nx will actually run the command shown below to create a new library called utils inside the libs directory:
npx nx generate @nrwl/js:library utils --no-interactiveIf you expand the src folder, you’ll notice there’s a utils.ts file inside the lib directory. This is where we can write the code for our library.
I’m going to go ahead and create a simple variable that we’ll then export:
const name='fuzzy';

export default{
  name
}
Then, I’ll update the entry point of our library called index.ts inside the src directory:
import utils from './lib/utils';

export default utils;
Since the entry point file is what actually gets exported, I simply import the library here and export it as default.
Using the Shared Library
Our newly-generated shared library called utils can be used by both frontend applications. However, in order to do that, we need to make a change in the tsconfig.json file of both projects.
Under the compilerOptions , we need to specify a paths property where all our custom paths relative to the root directory will live. Any applications using this relative path must have this specified in their tsconfig.json files. Inside the tsconfig.json of both the React and Angular app, add the following paths property:
{
  "compilerOptions": {
    ...
    "paths": {
      "@js-monorepo/utils": ["libs/utils/src/index.ts"]
    }
  },
  ...
}
Now, you can simply import the library using the @ declarative followed by the name of the project and then the library name. Let’s use it inside our Angular application. Inside the apps/angular-monorepo/src/app/app.component.ts file, we can import the library and use the name exported variable from it, as shown below:
import { Component } from '@angular/core';
import utils from '@js-monorepo/utils';

@Component({
  selector: 'js-monorepo-root',
  templateUrl: './app.component.html',
  styleUrls: ['./app.component.css'],
})
export class AppComponent {
  title = utils.name;
}
It’s just like using a regular node module dependency in a JavaScript application.
I’ve also updated the app.component.html file as shown below:
<h1>Nx Angular Monorepo</h1>
Welcome {{title}}
Great! Let’s do the same for our React app inside the apps/react-monorepo/src/app/app.tsx file:
// eslint-disable-next-line @typescript-eslint/no-unused-vars
import styles from './app.module.css';
import utils from '@js-monorepo/utils';

import { Route, Routes, Link } from 'react-router-dom';

const name=utils.name

export function App() {
  return (
    <>
      <h1>Nx React Monorepo</h1>
      Welcome {name}
      <div />

      {/* START: routes */}
      {/* These routes and navigation have been generated for you */}
      {/* Feel free to move and update them to fit your needs */}
      <br />
      <hr />
      <br />
      <div role="navigation">
        <ul>
          <li>
            <Link to="/">Home</Link>
          </li>
          <li>
            <Link to="/page-2">Page 2</Link>
          </li>
        </ul>
      </div>
      <Routes>
        <Route
          path="/"
          element={
            <div>
              This is the generated root route.{' '}
              <Link to="/page-2">Click here for page 2.</Link>
            </div>
          }
        />
        <Route
          path="/page-2"
          element={
            <div>
              <Link to="/">Click here to go back to root page.</Link>
            </div>
          }
        />
      </Routes>
      {/* END: routes */}
    </>
  );
}

export default App;
Awesome! Let’s go ahead and see how our applications look now:
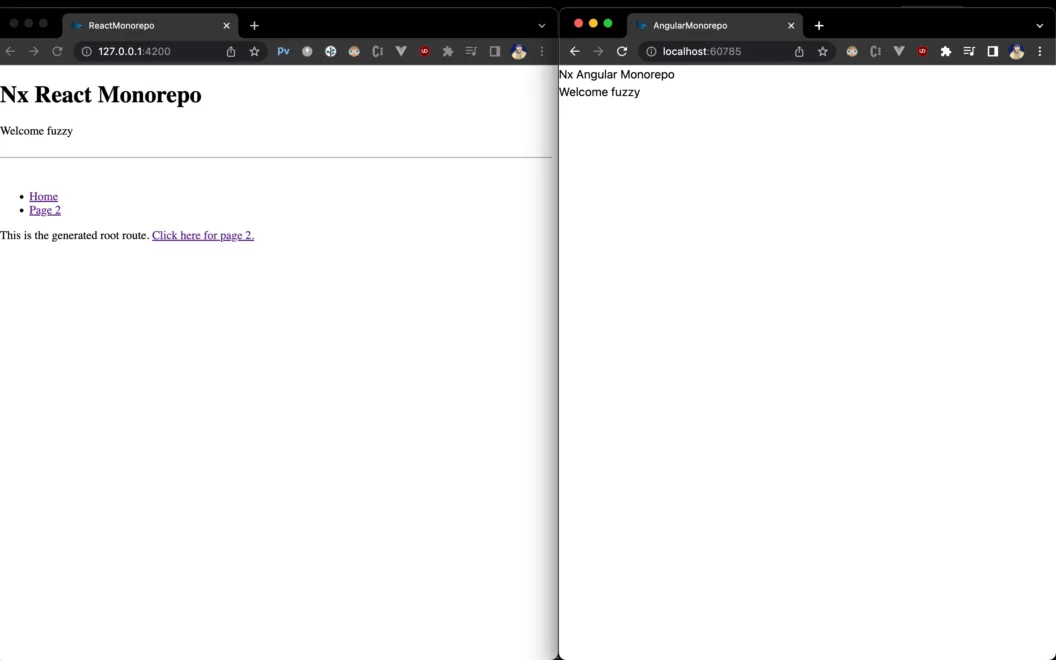
As you can see, both our apps are able to consume the shared library. We can do the same for our NodeJS application. Remember to update the tsconfig.json there as well by appending the shared lib “paths” to the “compilerOptions“. Then, update the apps/node-app/src/main.ts file as shown below:
import express from 'express';
import utils from '@js-monorepo/utils';

const port = process.env.PORT ? Number(process.env.PORT) : 3000;

const app = express();

app.get('/', (req, res) => {
  res.send({ message: 'Hello NodeJS API' + " " + utils.name });
});

app.listen(port, () => {
  console.log(`[ ready ] http://localhost:${port}`);
});
And now you’ve used the same shared library in your backend application:

How Nx optimizes application builds
We’ve seen that monorepos can be extremely useful, but building and testing an entire monorepo can be slow and have performance implications. Therefore your monorepo tool needs to optimize the build process so you can test and generate builds faster.
Luckily, Nx automatically detects changes in your code and helps to test and build all your apps in isolation. This means that if only one of your application’s source code changes, Nx will only rebuild that application. Let’s see how we can build our entire monorepo using Nx now.
Head back to the Nx console, choose the build option and select the build all command. Alternatively, you can also run the build command directly:
npx nx run-many --target=buildOnce you do that, you should see Nx building all your applications one by one.
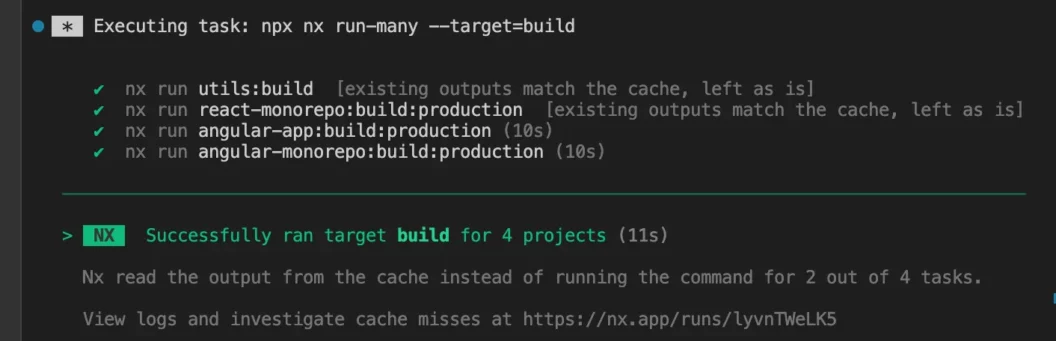
At the time of running this build, I had already built the library, so you can see that Nx skipped rebuilding it since nothing changed in that project.
Conclusion
Nx is a great tool for scaling JavaScript monorepos with multiple frontends and backends. You can extend the idea of shared libraries and further share common typescript interfaces between your applications. For instance, you could share the API schema between your backend and frontend. Until next time!