If you use Bazel to build your monorepos, at some point you’d need a CI/CD solution like Semaphore that supports monorepos out of the box. So in this roundup, I’ll walk you through how you can setup and run your Bazel builds on Semaphore.
What Is Semaphore?
First, let’s understand briefly what Semaphore is and why it’s useful.
Semaphore in a Nutshell
Semaphore is a CI/CD solution that lets you automate building, testing and deploying your projects. It defines your objective as a workflow that you can independently setup and execute by running a bunch of commands on the cloud.
Semaphore Is Intuitive
Semaphore provides an intuitive way to configure your CI/CD pipeline. It gives you a drag and drop interface that comes in handy for developers who’re not comfortable with writing custom configurations or YAML files for their projects. This removes technical barriers for developers to adopting CI/CD for their projects.
Semaphore Is Feature Packed
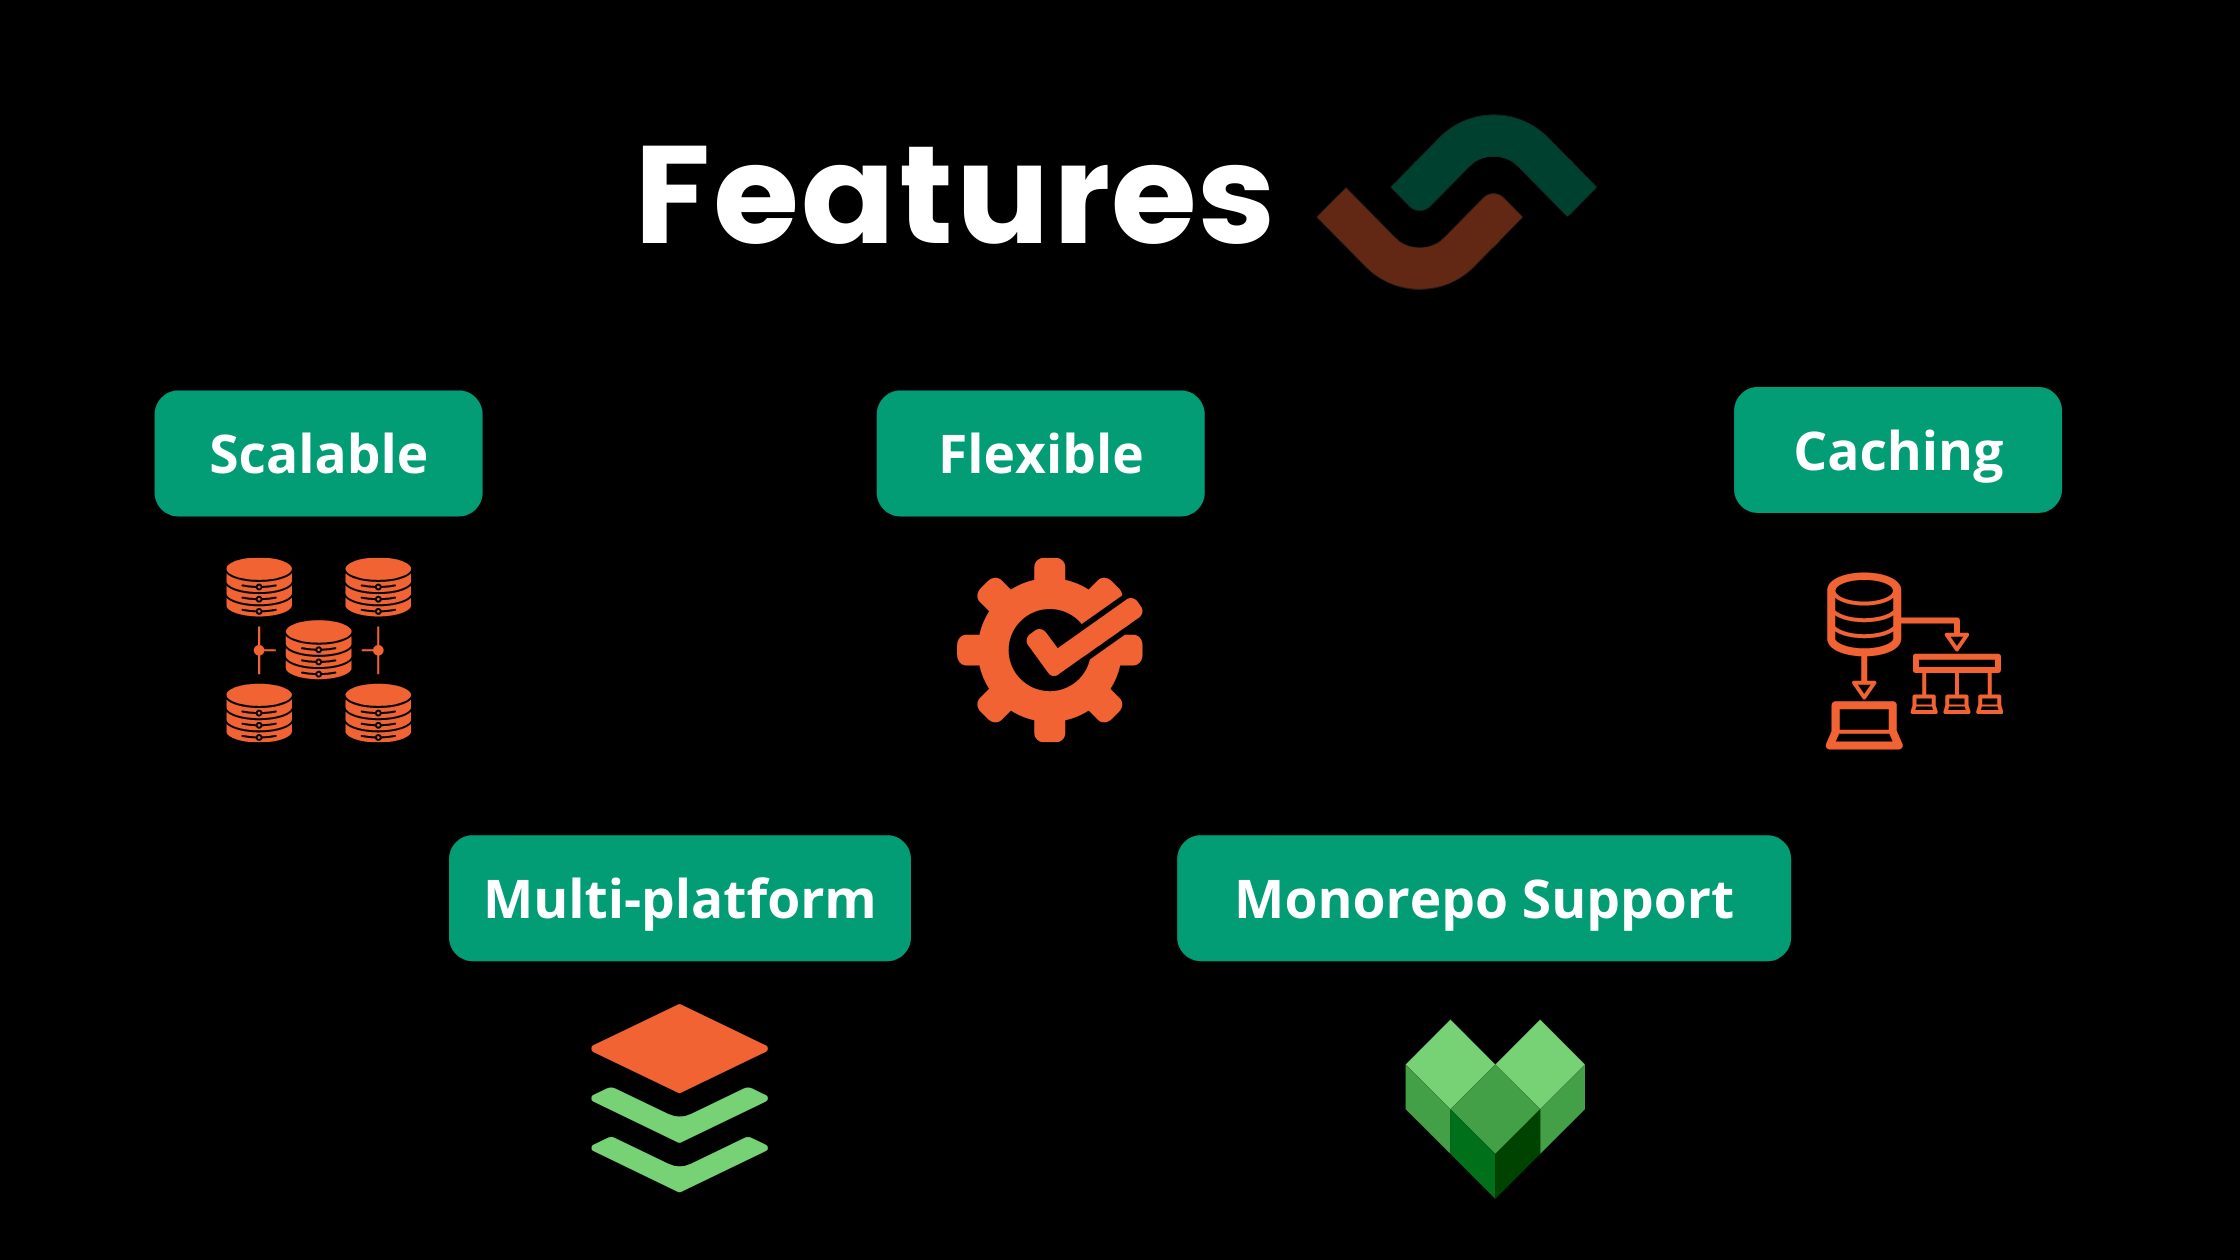
Semaphore comes with features that make it great for small as well as large projects.
For instance, if you’re a startup with a small and growing project, you can create a single pipleline to run your builds in a sequential fashion. But if you’re building at scale, you can still use Semaphore to run multi-stage CI piplelines in parallel.
It also supports a large variety of tech stack, so it doesn’t matter if you’re deploying a NodeJS server or running integration tests for your Android build. It also supports caching and monorepos out of the box.
Interestingly, Semaphore has also pointed out how it helps you minimize the cost of developer productivity. You can check it out here.
What Is Bazel?
Now that you have an idea of what Semaphore is and how it can be helpful, let’s understand what’s Bazel and how it fits into the picture. Bazel is a popular open-source build tool that allows developers to build and compile large monorepo projects efficiently.
Highlights of Bazel
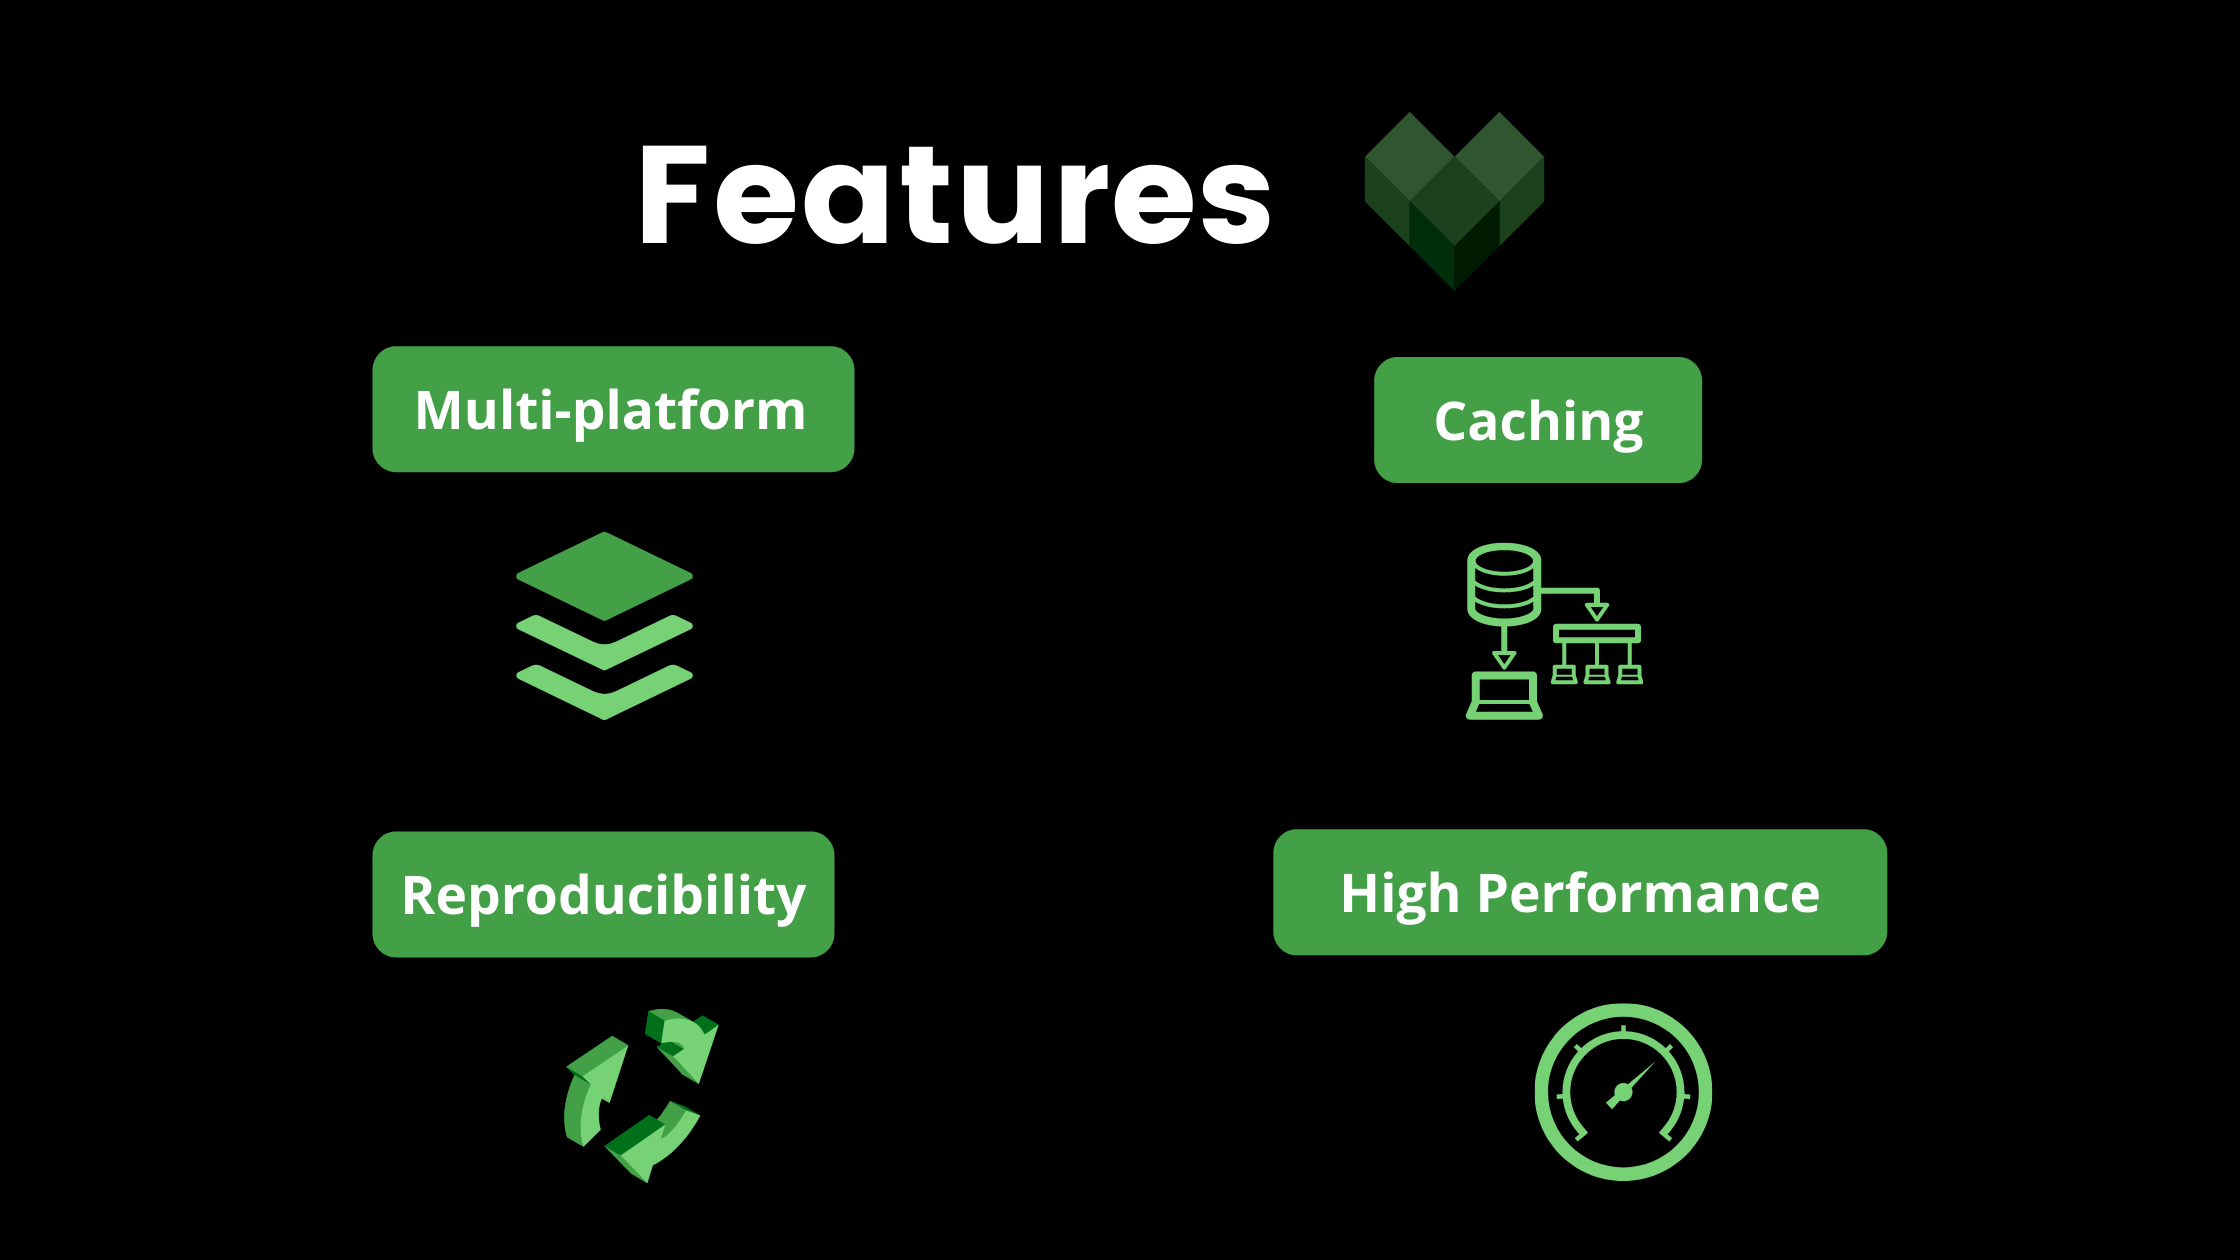
Some key features of Bazel includes reproducibility, high performant build process and support for multi-language dependencies.
It’s reproducibility allows developers to easily debug their build processes. It allows you to generate concurrent builds in parallel and uses a caching mechanism to intelligently compare what has changed in your code.
This makes your build process high performant at scale, because you’re only rebuilding code that has changed.
How Bazel Works
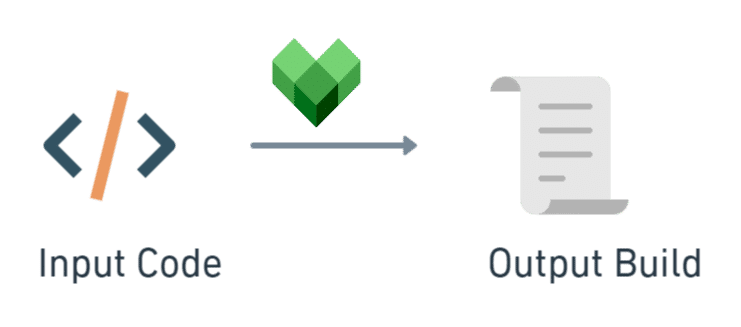
At it’s simplest, Bazel takes a set of inputs, ie your code. Then, it produces some outputs, ie a build file.
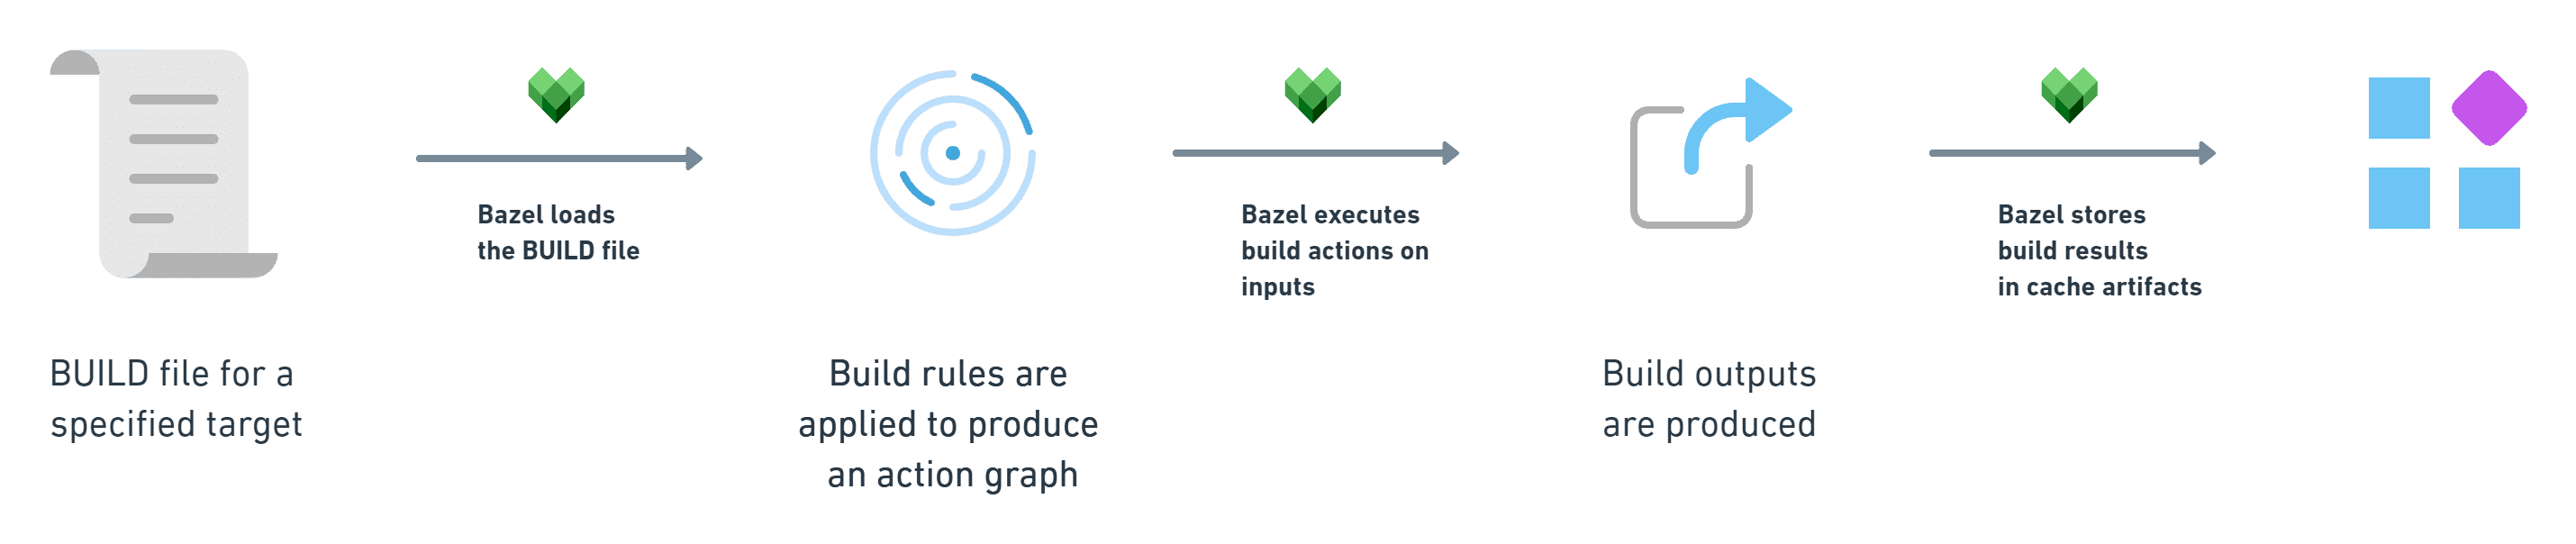
However, under the hood Bazel follows four simple steps:
- First, you inform Bazel about the settings or rules of your build via a BUILD file.
- Then, Bazel loads this file at runtime and uses these specified rules to produce build actions.
- Next, Bazel executes these build actions based on the inputs you specified for your build process to produce build outputs.
- Lastly, Bazel stores the results of this process in cache artifacts for speeding up your future builds.
If you wish to dive deeper into what Bazel is, how it works and how you can build a JavaScript monorepo with it, I have a full fledged guide on it here. However, there we build our Bazel project on our own local machines.
In this tutorial we’ll take that project and use our CI/CD provider Semaphore to run this build on the cloud instead.
Essentials of Semaphore
First, we need to understand some essentials of Semaphore. We know that Semaphore helps us manage, build, test and deploy our workflows. But first, let’s understand what a workflow exactly means.
What Is a Workflow?
A workflow represents one or more tasks that you wish to perform. Further, it comprises of all the steps you’ll need to execute to accomplish that task.
For instance, you need to run some unit tests for your application. Or maybe you need to deploy your code on a staging environment.
Or maybe you need to do both, one after the other in a sequential fashion. All of these represent a workflow for your project.
Each workflow can be broken down into three chief components – Pipeline, Blocks and Promotions. Let’s see what each of these mean.
Pipeline
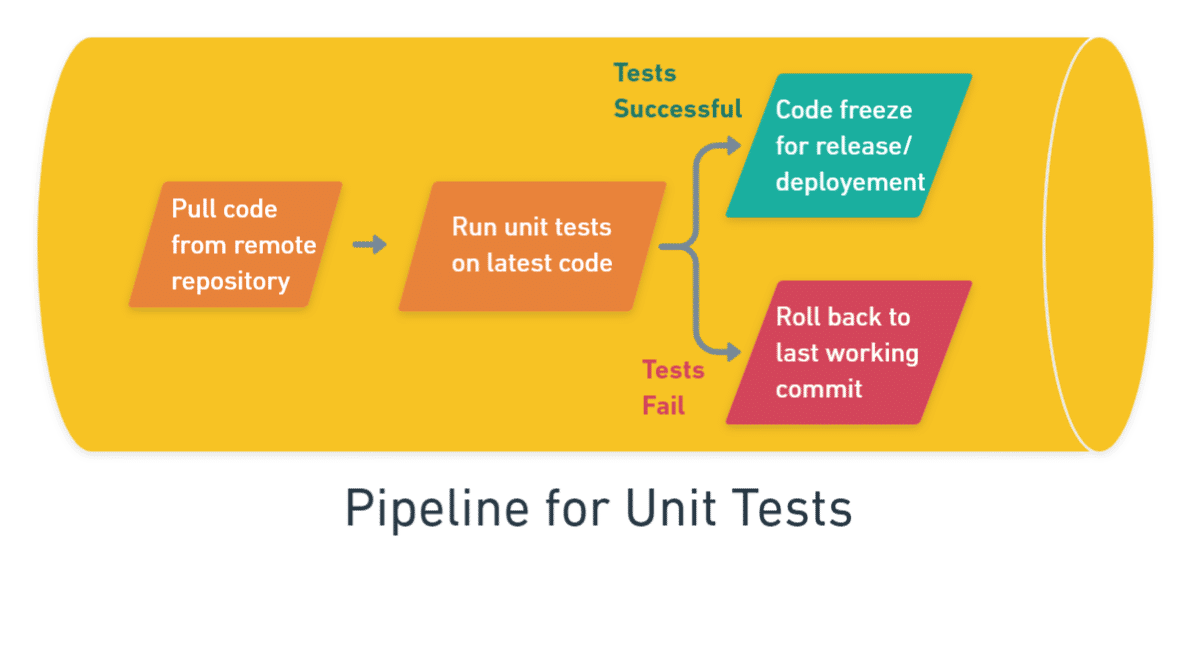
A pipeline defines a series of steps you’d need to perform in order to execute a workflow in it’s entirety, or a part of the workflow.
Let’s take the case where you want to run unit tests for your application. In order to run your unit tests, you’ll need to pull your latest code from Github, execute a command that runs the tests, perform a code freeze if your tests are successful or roll back to another version or commit if your tests fail.
In order to complete these set of subtasks, you define a pipeline that encompasses all these steps.
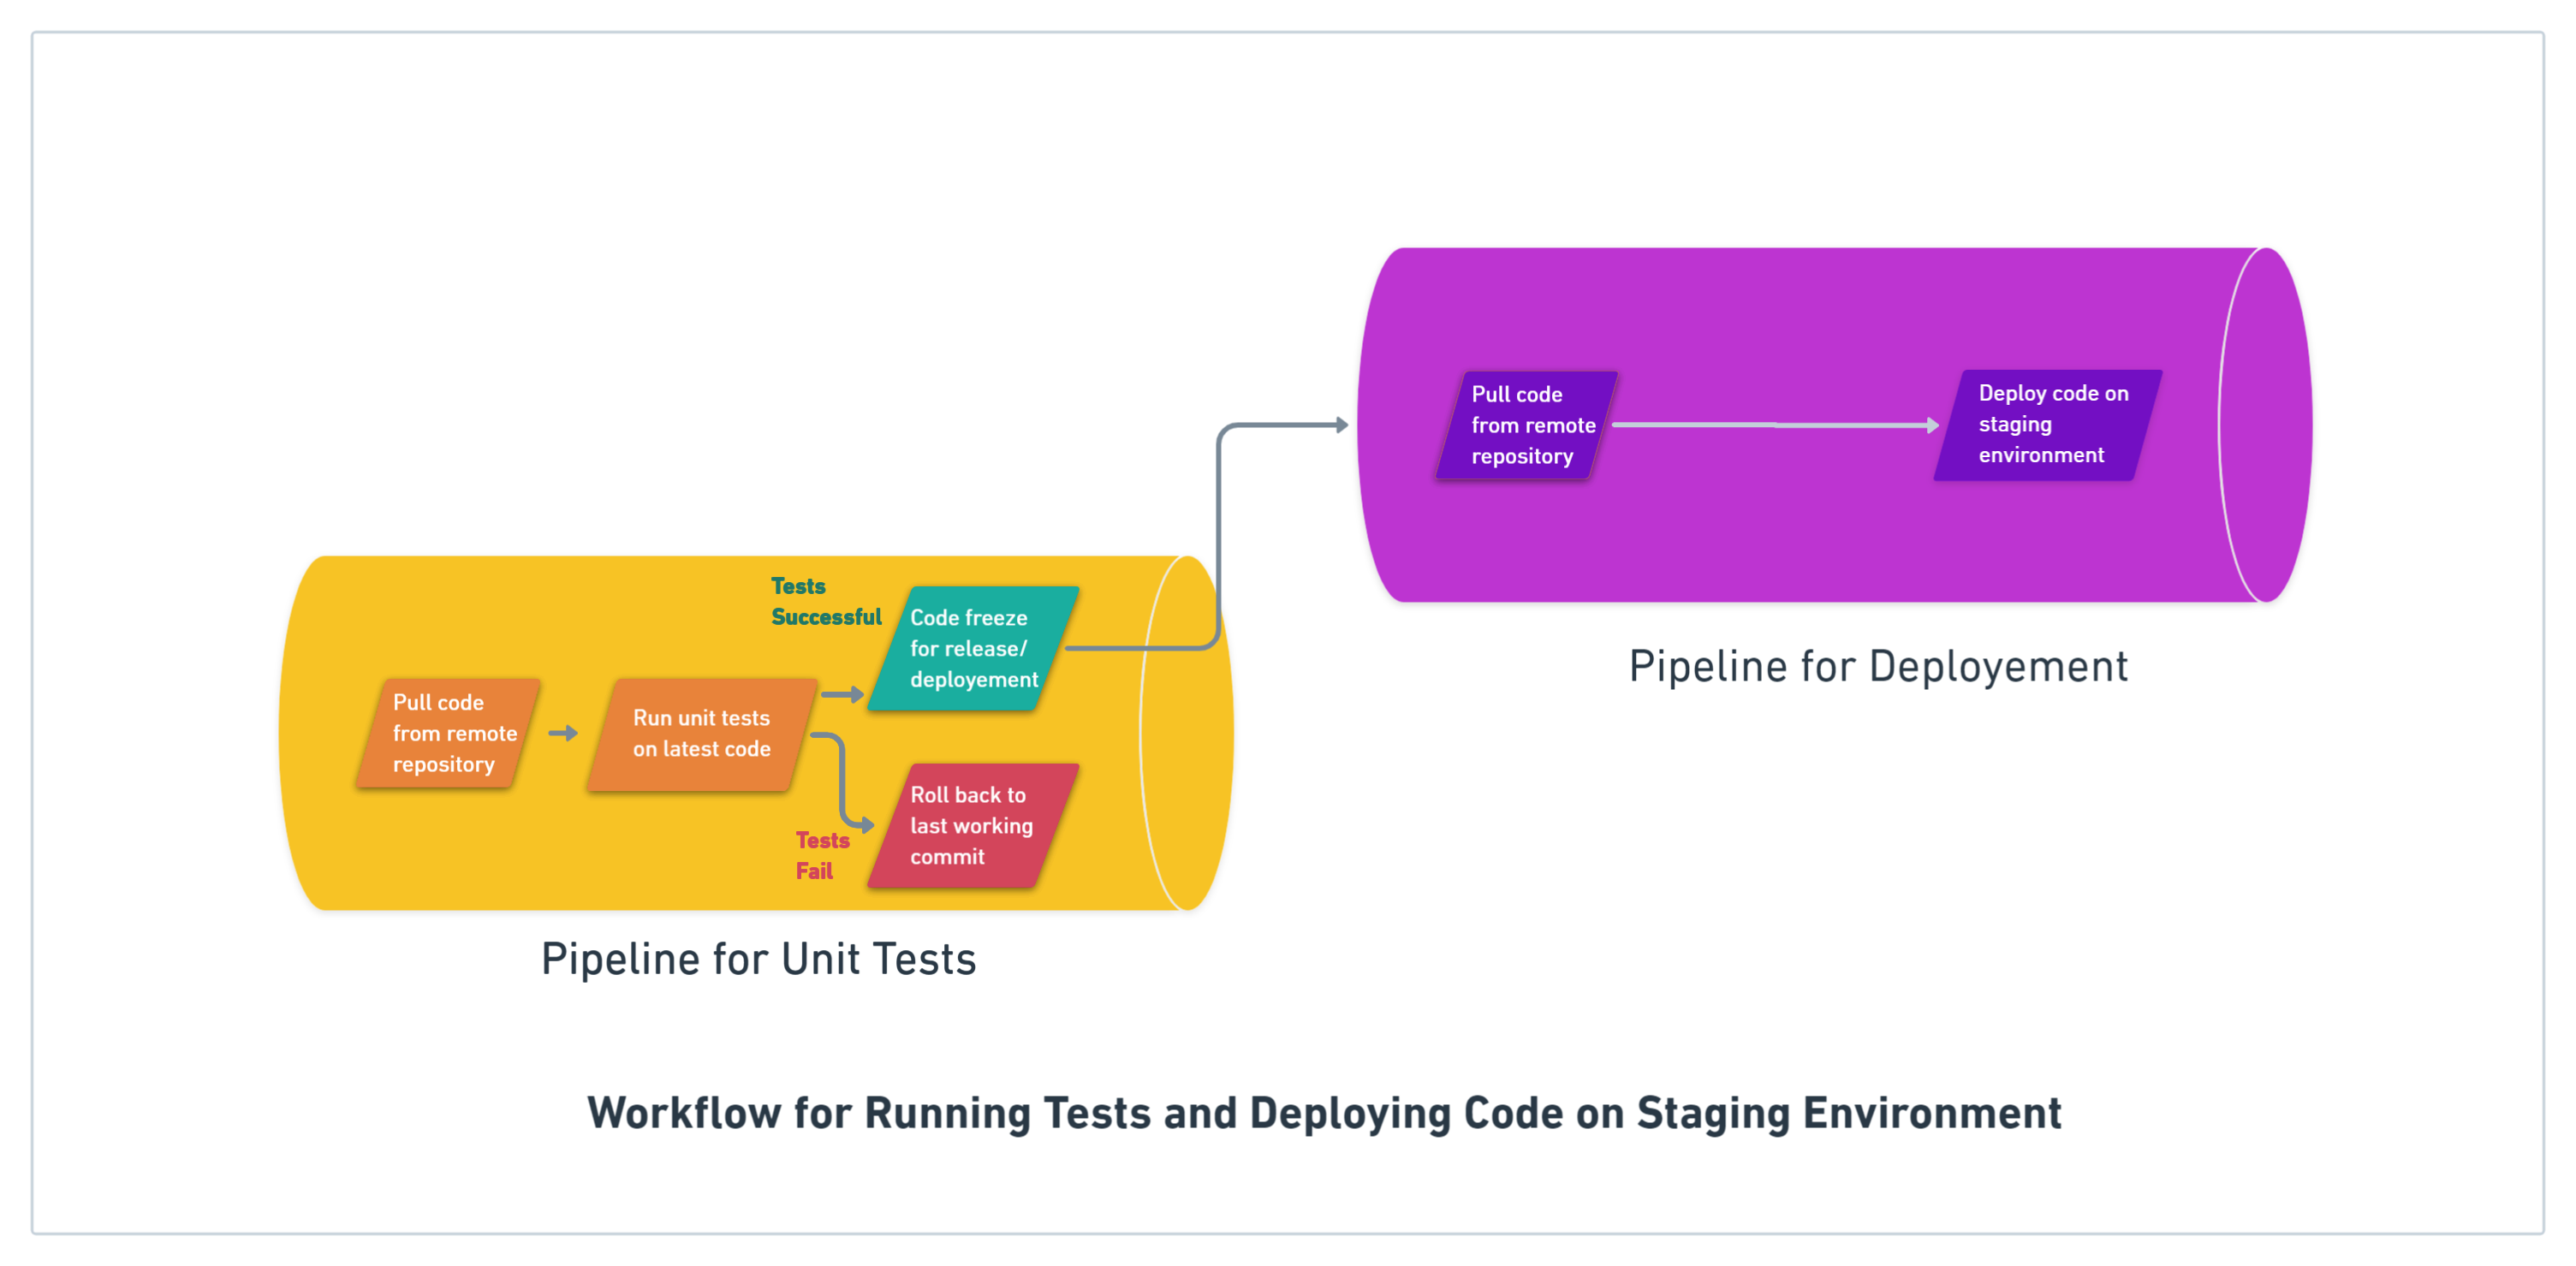
Now let’s say you need to deploy your code to a staging environment. Again, you’ll create a pipeline that will include all the steps that will lead to successfully deploying your code to a staging environment.
In both the above cases, your workflow has a single pipeline. But take the case where you need to do both, in a sequential fashion.
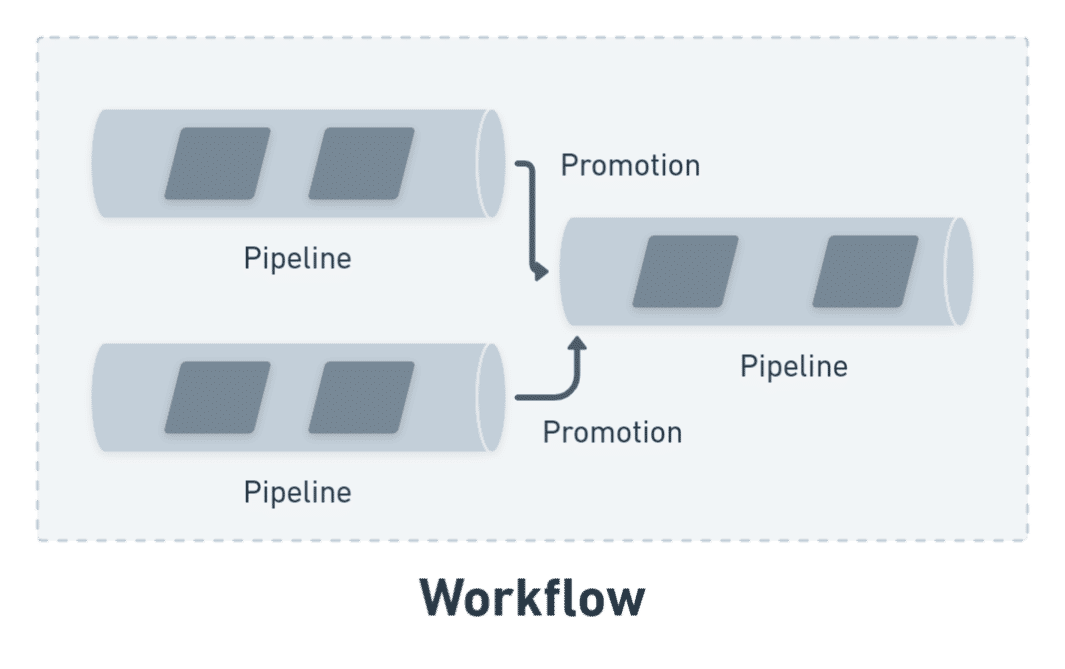
So now if your tests are successful, you also need to deploy your code to a staging environment. In this case, your workflow will now have two pipelines, one that takes care of your tests, and the other that takes care of your deployment.
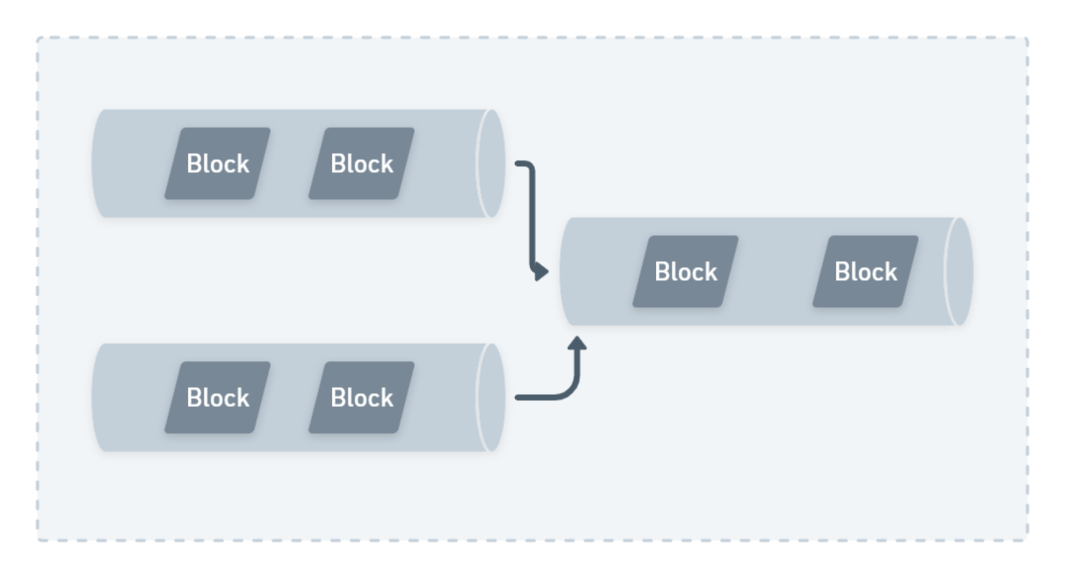
Blocks
Each step or subtask in a pipeline is referred to as a block in Semaphore. So essentially when you run a pipeline, you’ll be running your individual blocks. Usually in a pipeline, blocks run one after the other, in a sequential fashion.
There may be scenarios where blocks run in parallel. For instance, you could have a block that checks the version of your testing dependencies against a list of recent versions. You could run that block in parallel to running unit tests, since these blocks don’t depend on each other.
Promotions
Promotions in Semaphore are special blocks that connect different pipelines together. For instance you could use promotions to distribute a single build across different deployment environments. This could either be done inside a single pipeline or via multiple pipelines.
We previously discussed the example of a workflow where we have two pipelines – one for running unit tests and the other for deploying our code to a staging environment. These pipelines can be connected together via promotions.
Job and Tasks
A job or task simply represents one or more commands that need to be executed in a block. For instance, here’s a simple command to install your project’s dependencies via npm:
npm install The relevant block for the above job could be Installing Dependencies for your Project.
Configurations
Everything in your workflow, your pipelines, your blocks, promotions and jobs are defined by a special configuration file written in YAML.
Your configurations basically govern how your workflow will look, what pipelines it will have, any promotions you should setup, etc. It also dictates what each individual block does and lists all the jobs that need to run for executing that block.
We’ll look at some additional configurations like prologue, environment variables etc as we configure our Bazel build on Semaphore.
Setting up Semaphore
Enough theory, let’s get to the topic in hand now! First, we’ll need to setup Semaphore for our use.
Create an Account/Login
Head over to Semaphore and click Sign up with Github. If you’re an existing user like me, click on Login.
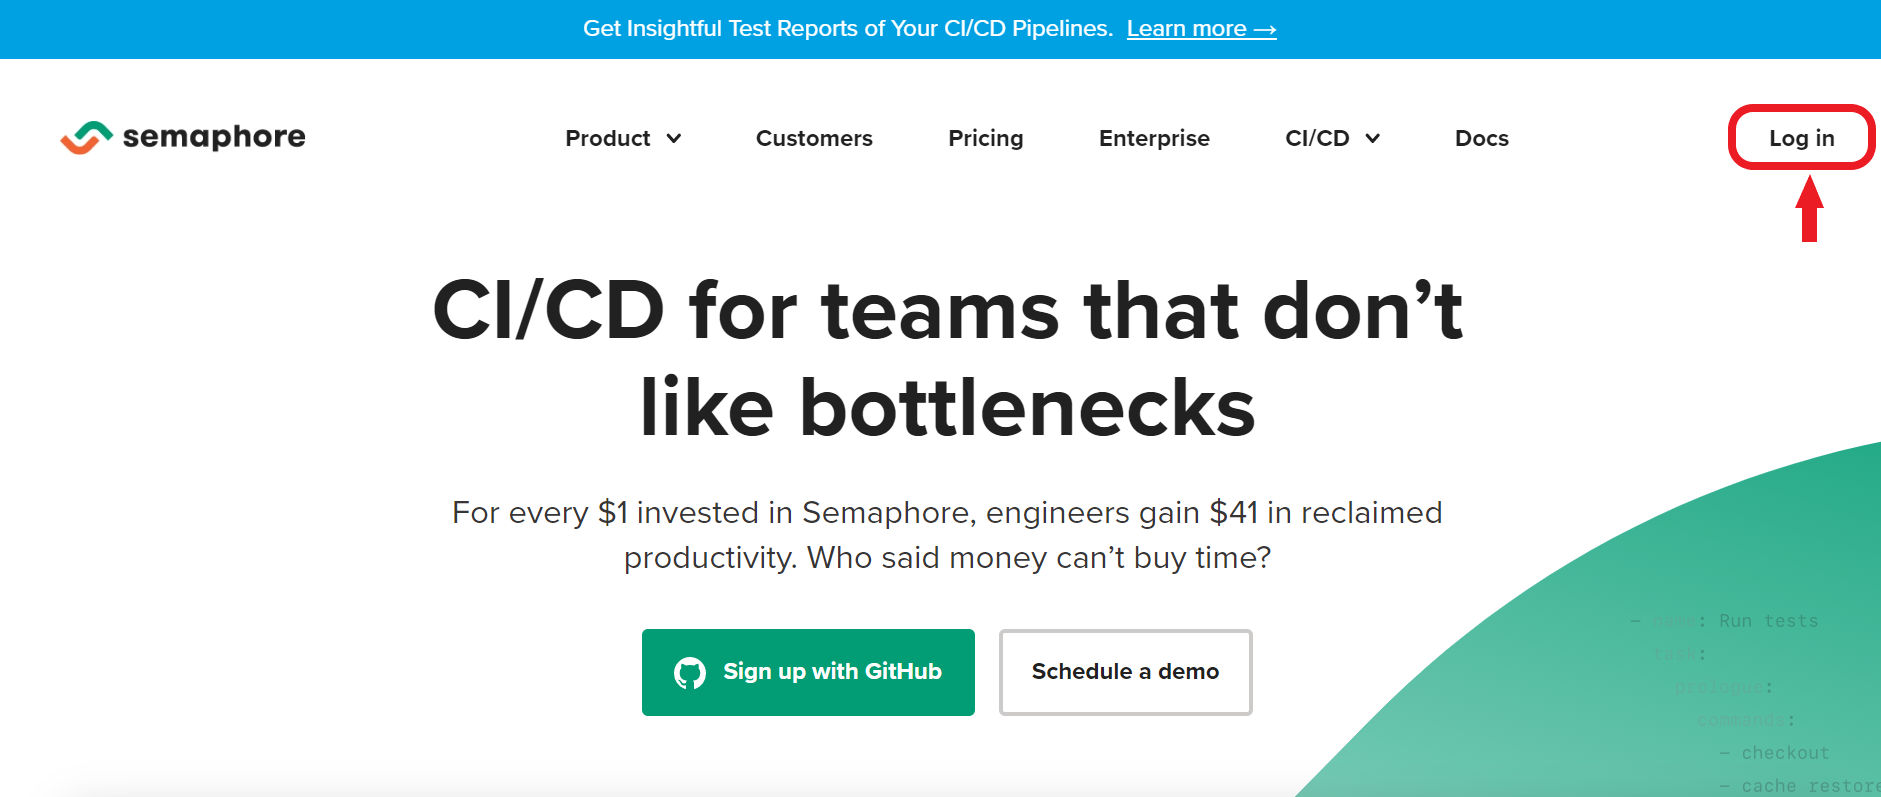
You’ll land on a Login with Github page so you’ll need to do that next.

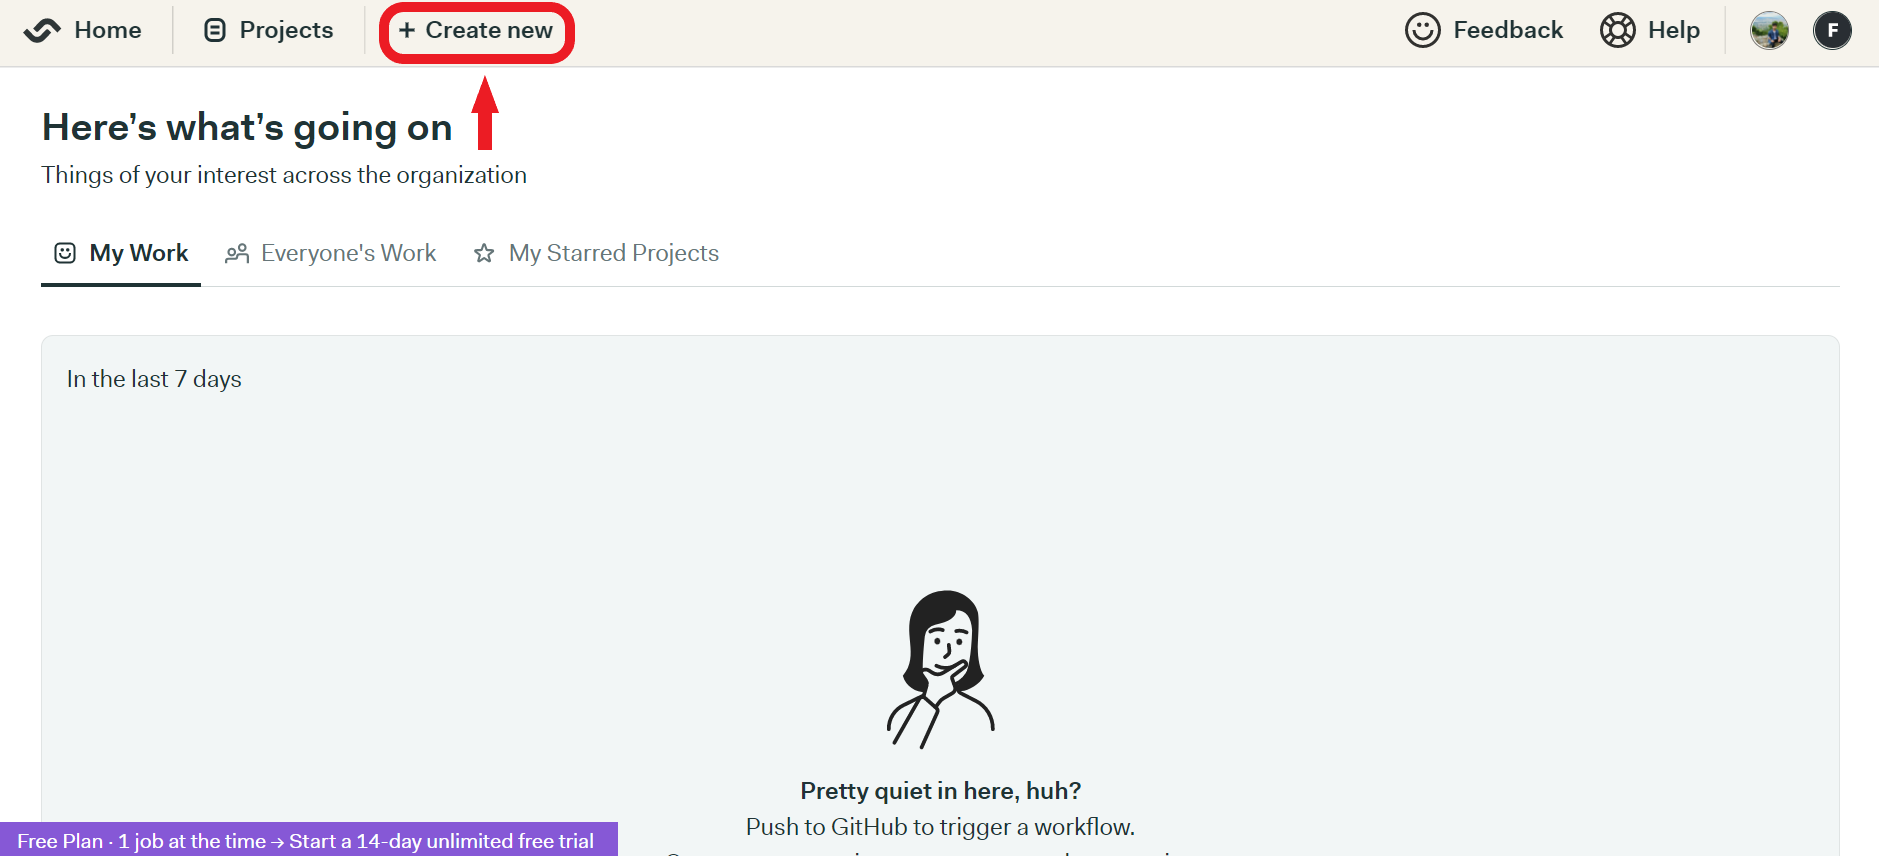
Once you’re inside Semaphore, if you’re a new user, you’ll need to create a new organization to start building some projects.

Next, you need to create a new Semaphore project.
Create a New Semaphore Project
You’ll land on your Semaphore Dashboard, where you’ll need to create a new project.
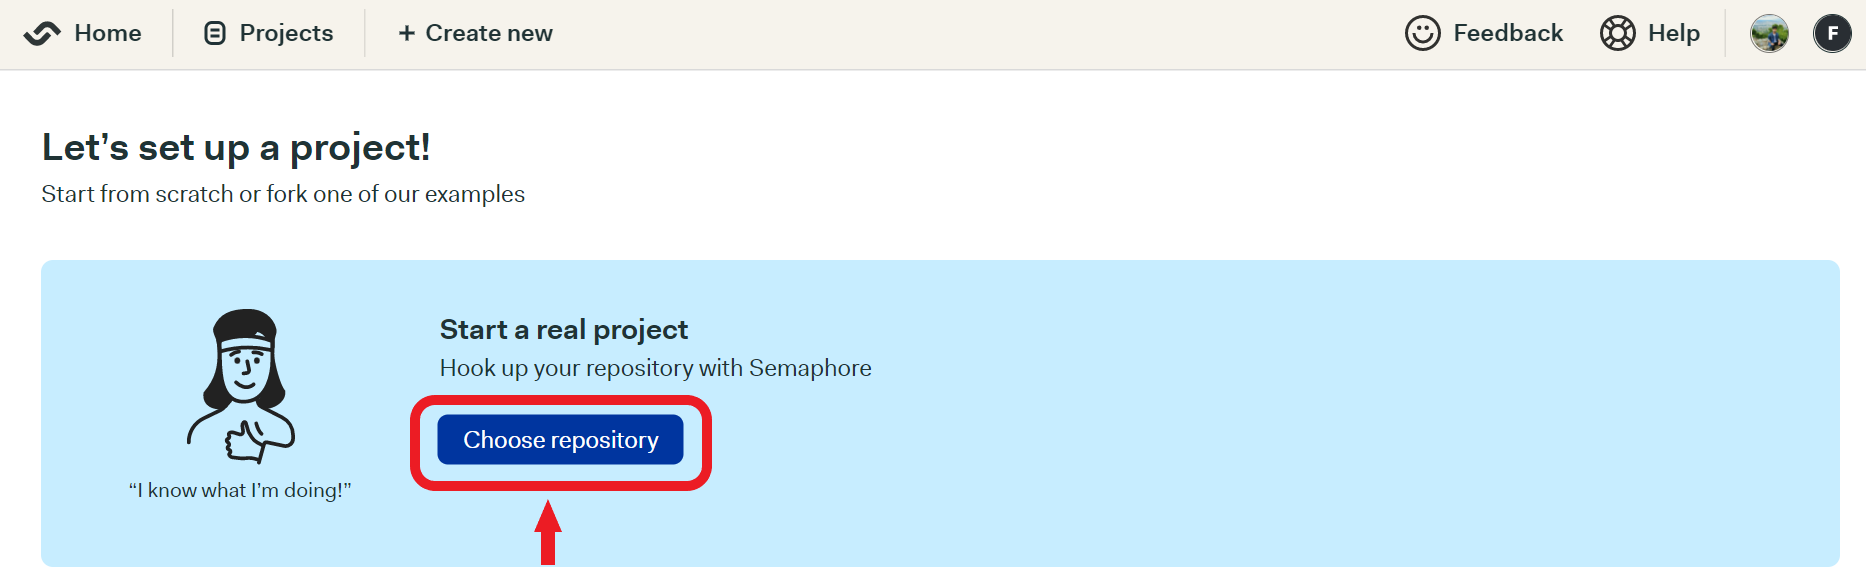
Connect Bazel Project with Semaphore
Now, you’ll need to connect your monorepo project’s Github repository with your Semaphore project.
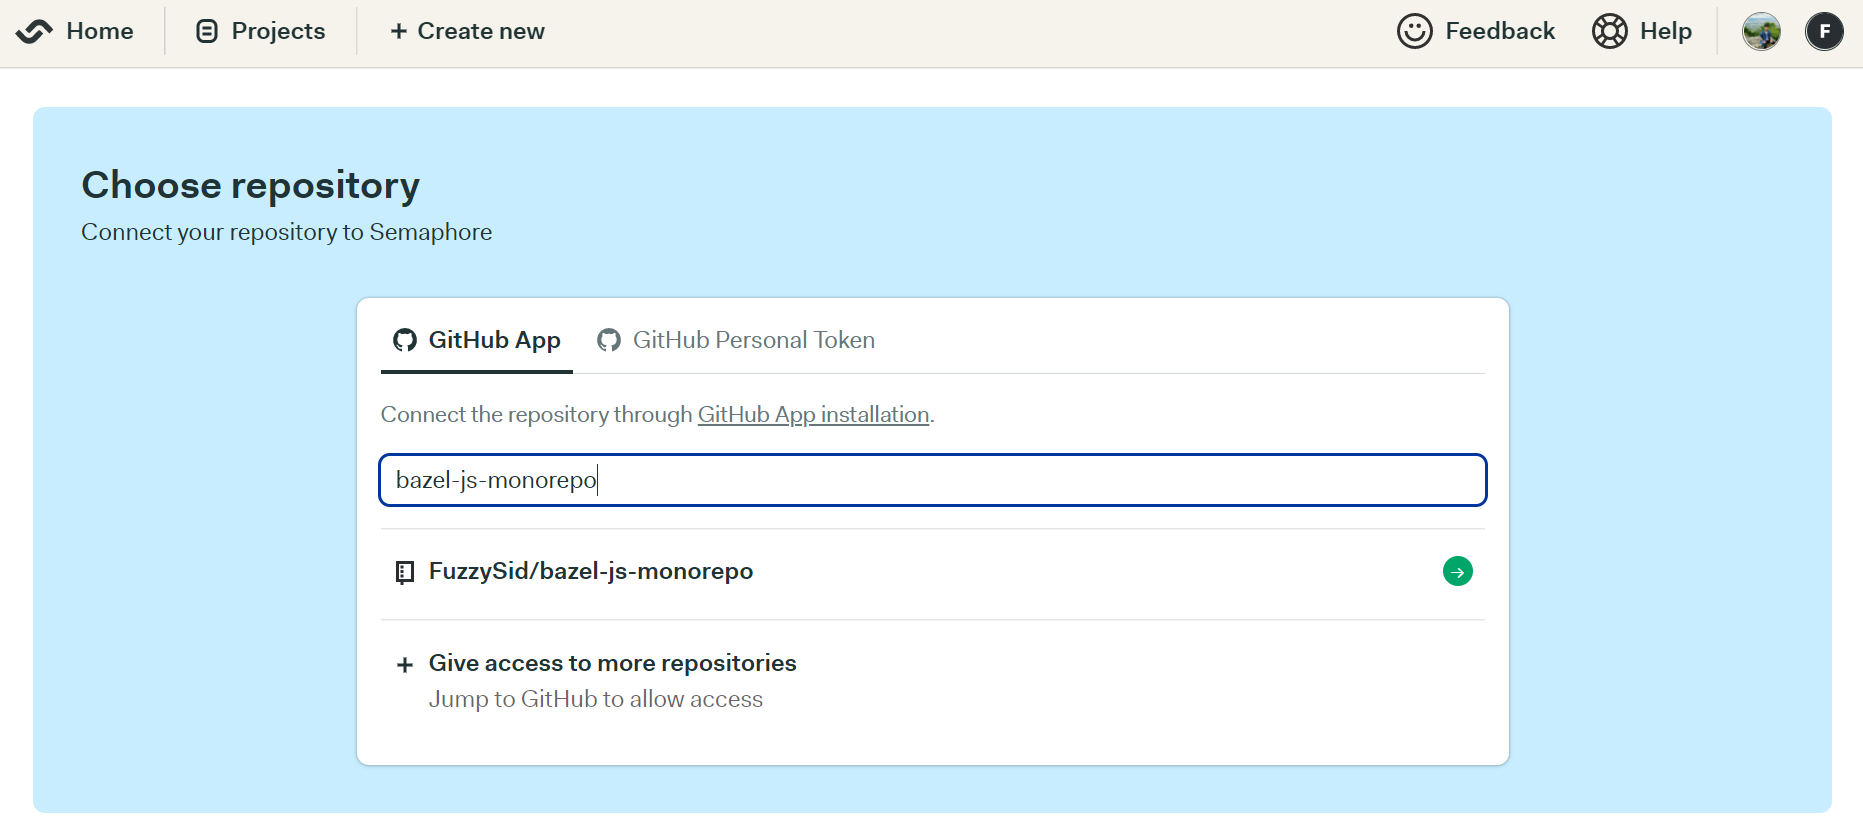
I assume that you already have a Bazel monorepo sitting somewhere in your Github, but if you don’t, feel free to fork this one for this tutorial. If you want to learn and understand how we built this JavaScript monorepo project with Bazel, you can read about that here.
As a next step, select the repository that you just forked and click Choose.
At this point, you’re done with the initial setup. If you head back to your Semaphore dashboard, you should see your newly created project on Semaphore:

Create a Bazel Build Workflow on Semaphore
Now that you have a project, click on Edit Workflow. Our workflow will have a single pipeline with multiple blocks that will run in a sequential fashion. Here’s how our workflow will look like by the end:

First, we need to setup our environment variables.
Configure environment variables
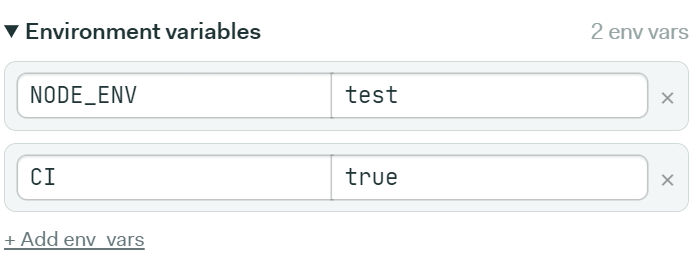
In most CI/CD pipelines, you have to setup your environment variables that you locally use via a .ENV file. These may have the base URL you’re using for your REST APIs, any API secret keys etc. For our workflow, we need to setup some simple environment variables that pertain to a NodeJS runtime environment.
On the right panel of your workflow builder, scroll down to the Environment variables section. Next, add the following environment variables as shown:
Now let’s create blocks of our pipeline that would execute our workflow.
Create Blocks in Semaphore
Semaphore would have already created a block for you to begin with, but we’ll go ahead and remove it since we want a clean slate to begin with.
Setup Bazel Block
We’ll first create a block that will install Bazel. Let’s name this block Setup Bazel. You can do so by editing the Name of the Block field on the right side.

Next, we’ll specify the job this block will perform. Our job will install Bazel and also print it’s version just to ensure we successfully installed Bazel. On the right panel, if you scroll down you’ll see a section named Jobs.
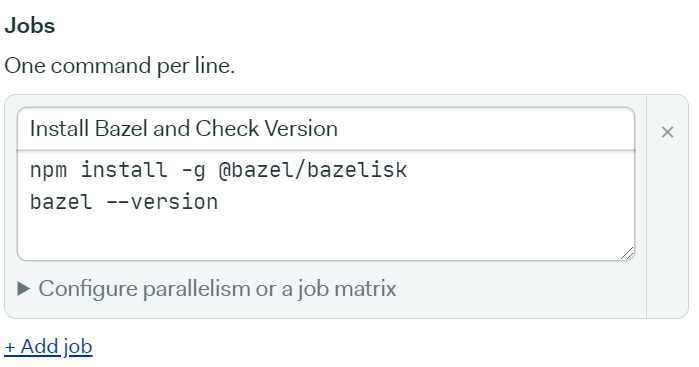
We’ll name this job Install Bazel and Check Version. This job will run two commands sequentially:
npm install -g @bazel/bazelist
bazel --version
The first command installs Bazel on the cloud globally. The second command checks the version of the Bazel that has been installed.
Install Dependencies Block
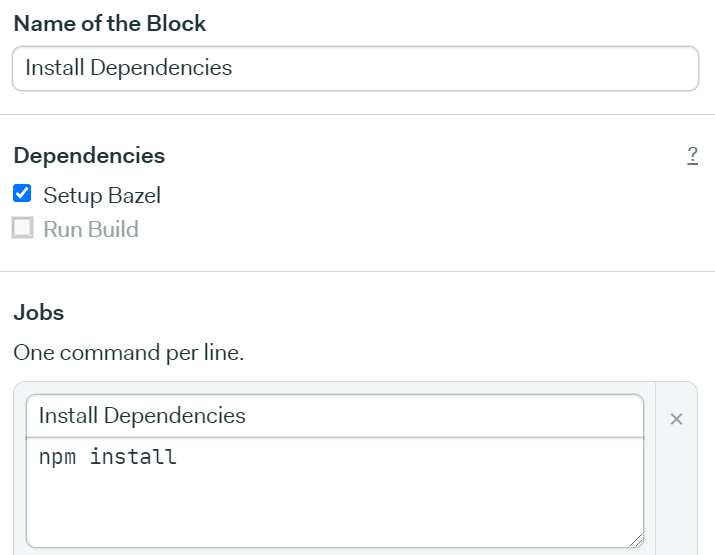
Next, we need to install some other JavaScript dependencies for our project via npm. We’ll name this block Install Dependencies. It will have one job, that we’ll also name Install Dependencies that would simply execute the following command:
npm installHere’s how the block and it’s job should look like:
Almost there! Let’s move to our final block where we’ll build our monorepo via Bazel.
Build Bazel Block
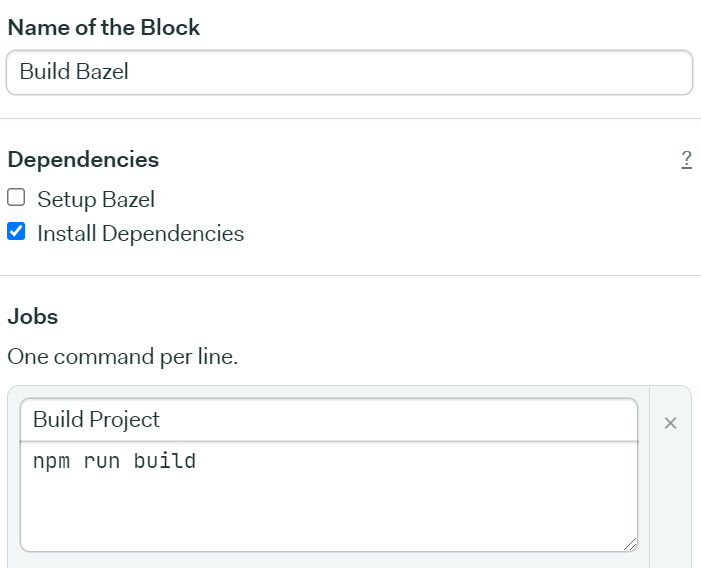
Finally, our last block will run our build command that would tells Bazel to build our monorepo. Let’s name our block Build Bazel which will execute a single job called Build Project that runs the following command:
npm run buildHere’s how the block and it’s job should look like:
Add Prologue
Prologue in Semaphore simply represents a set of commands you want to run before you execute each block. Since all our blocks depend upon a NodeJS environment, we need to ensure that we have that up and running.
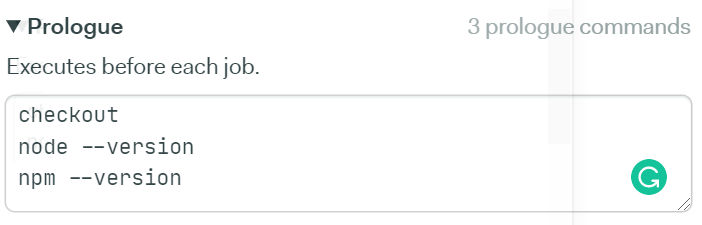
Scroll down to the Prologue section. Then, add the following commands:
checkout
node --version
npm --version
The first command moves to the directory where our project is present and pulls up the latest code from the repository. Then, we simply check the version of node and npm installed to ensure that our NodeJS environment is up and running. In case any of these commands fail, our block will not execute at all.
It’ll also be easier to detect the bottlenecks in our workflow, since we’d know that our prologue commands are failing. Here’s how the Prologue section of your workflow builder should look like:
Translating Workflow to a Configuration File
Up until this point, we have used Semaphore’s visual workflow builder to create our workflow, blocks and list our jobs. Under the hood, Semaphore translates these configurations in a semaphore.yml file.
Right above your workflow, you’ll be able to see that you can also edit these configurations by directly modifying your semaphore.yml file:
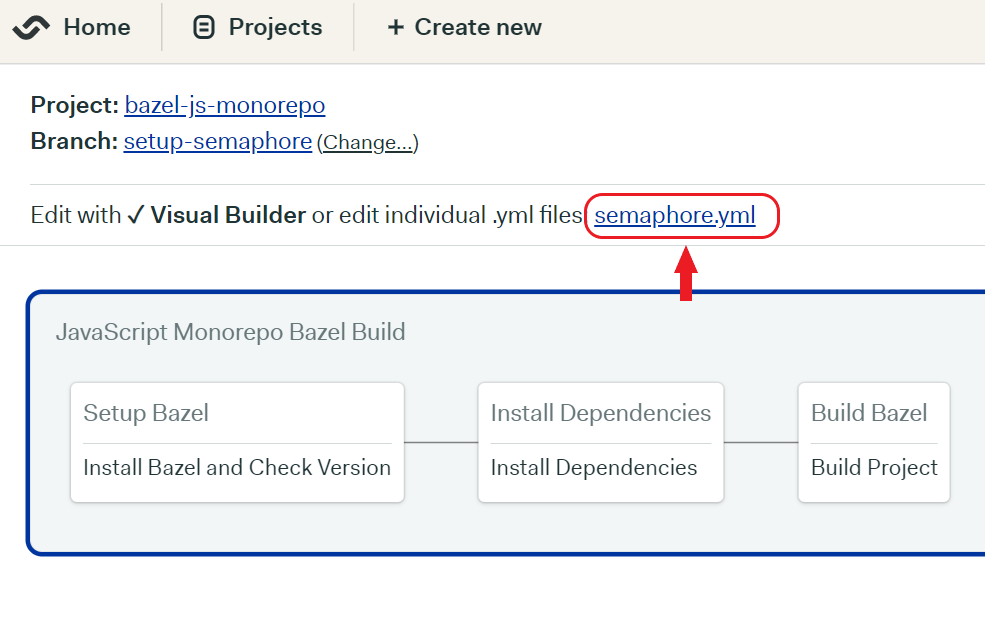
Click on the file and you’ll see how Semaphore has translated the workflow builder into it’s relevant configurations. If you’re familiar with building CI pipelines this way, you can directly write your configurations inside this file. In that case, Semaphore will do the opposite, that is generate the workflow builder for you based on your semaphore.yml file.
Ensure that your semaphore.yml file has the following configuration as well:
version: v1.0
name: JavaScript Monorepo Bazel Build
agent:
  machine:
    type: e1-standard-2
    os_image: ubuntu1804
...
In the above we simply specify the name of our workflow and the configurations of our remote server that would run our Bazel build on the cloud.
Running Our Workflow
Now that we’re done with building our workflow, let’s run it so Semaphore can actually help us run a Bazel build on the cloud.
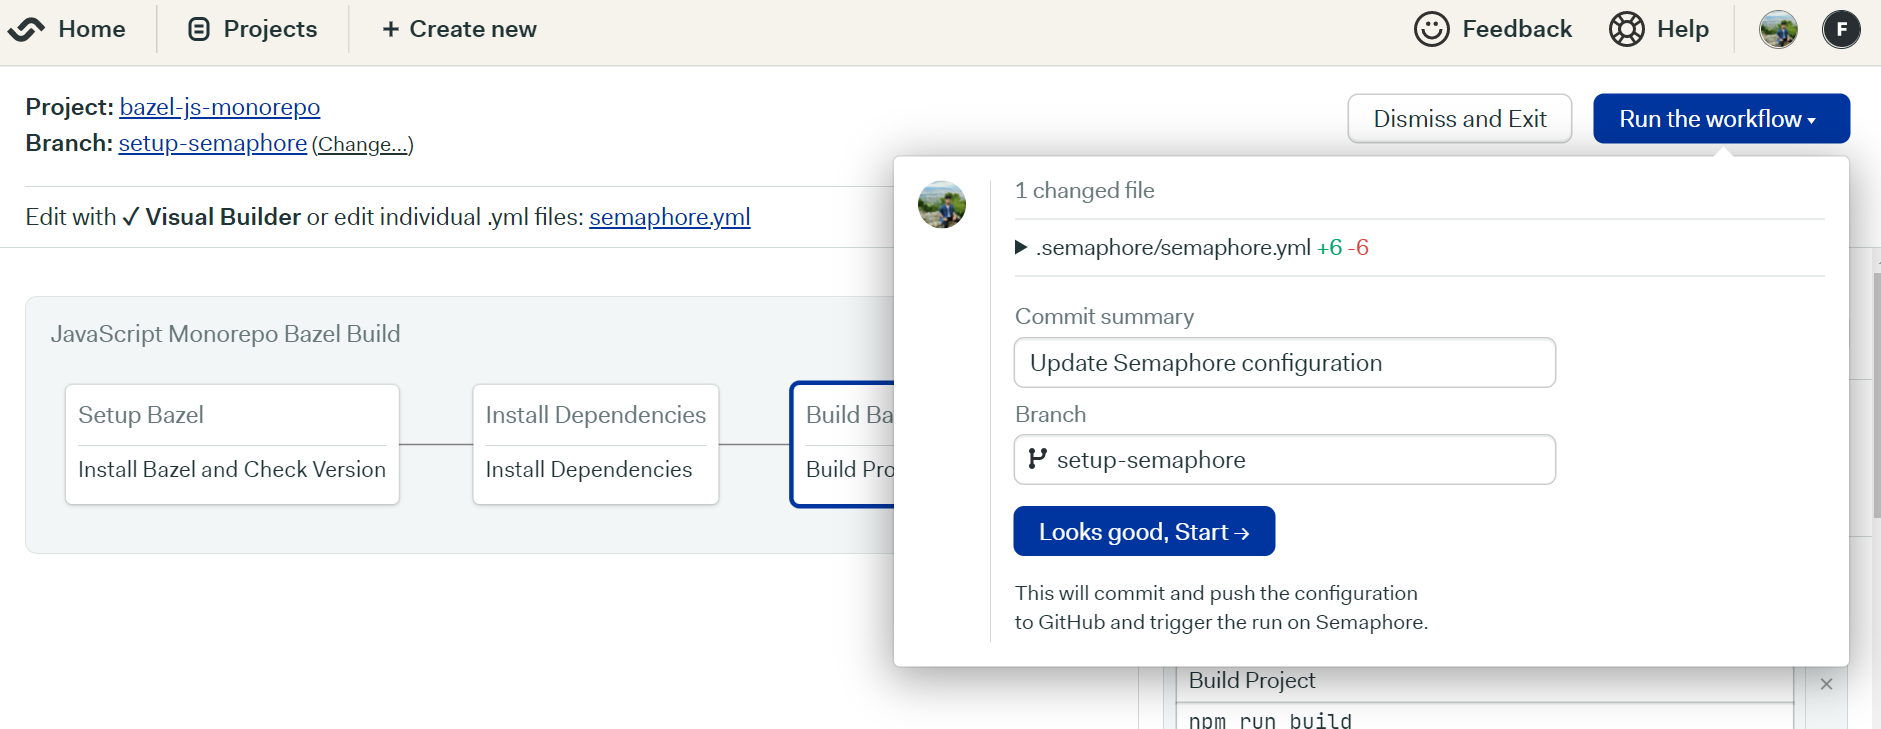
On the right corner, you need to click the Run the workflow button. Semaphore will create a new commit pertaining to your workflow’s configurational changes. It will then push that commit to a separate branch called setup-semaphopre.
Let’s run the workflow now.
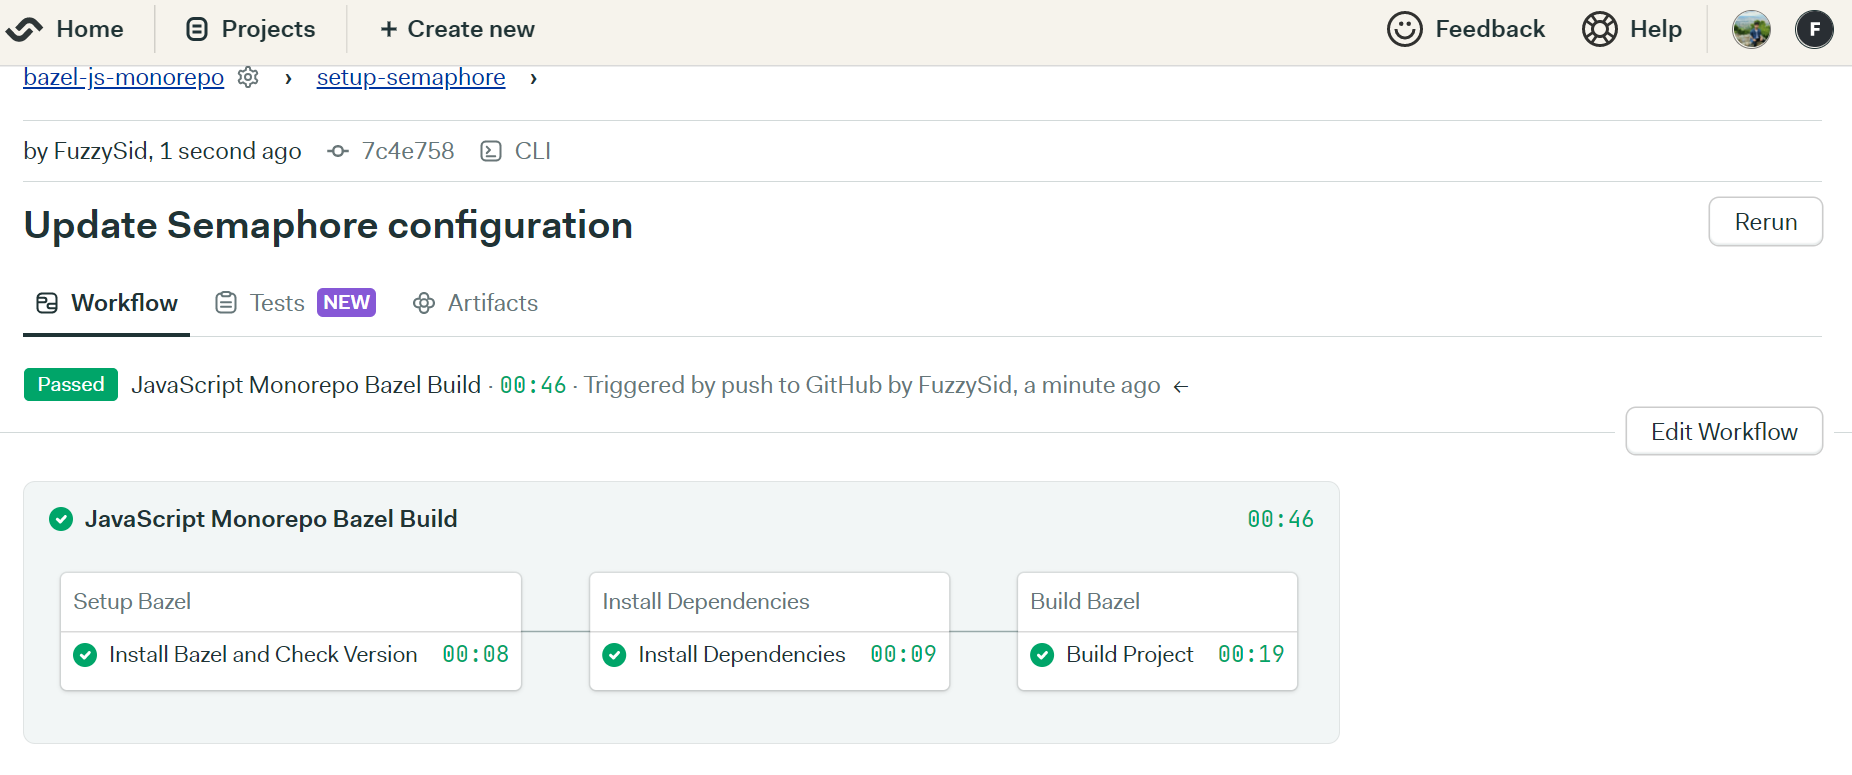
Now you’ll be back to your project’s page, where you’ll see each block being executed by Semaphore. If you’ve followed me until this point, all your blocks should run with flying colors!
You can click on each individual block to also monitor the logs. Let’s do that for our Setup Bazel block:
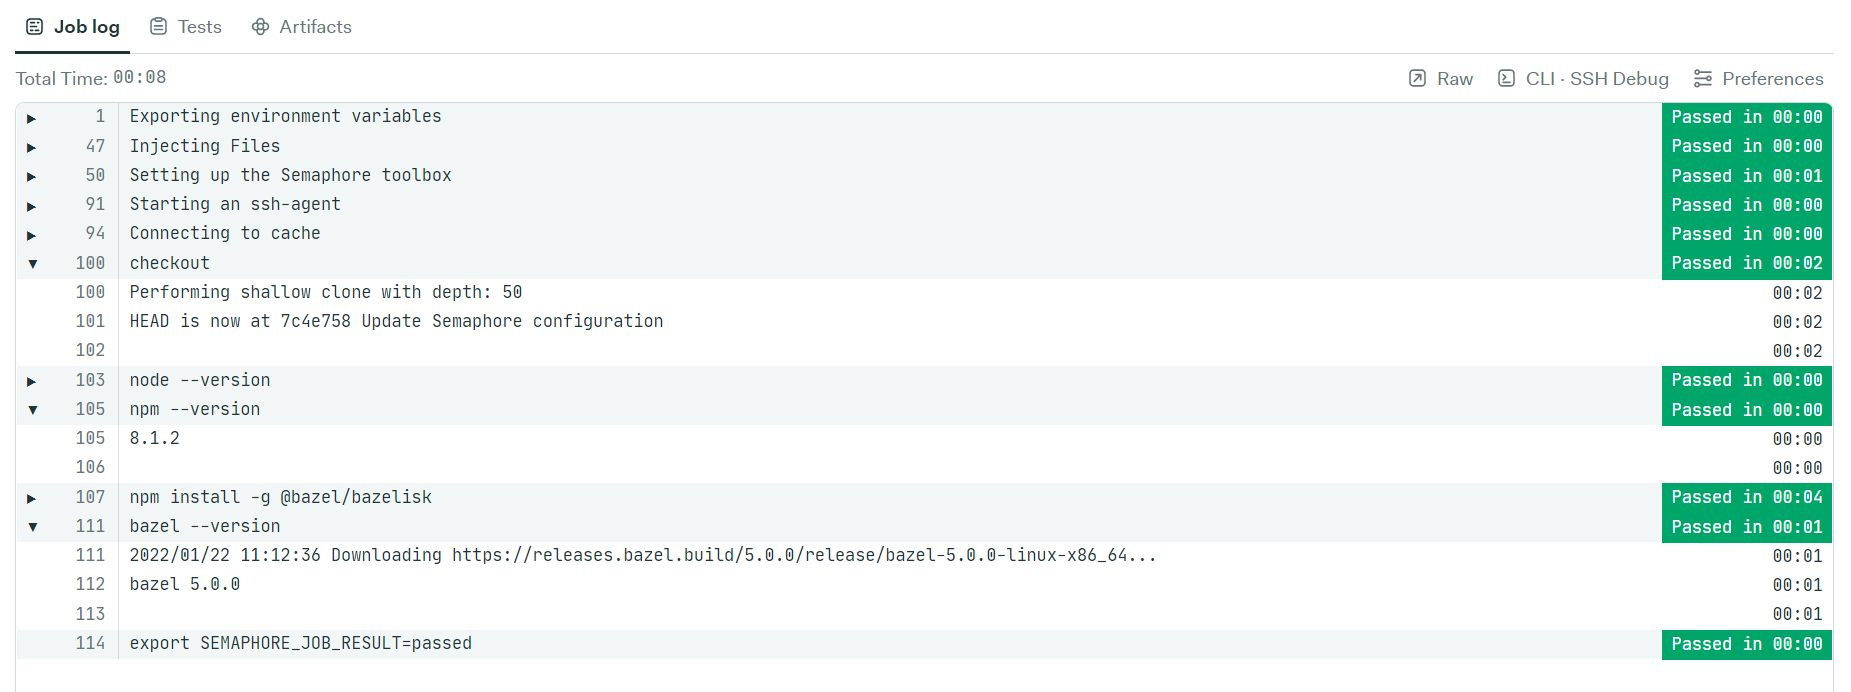
Notice how we get back the version of Bazel and npm on the job log console. In case you run into an error, these logs will help you detect bottlenecks in your workflow so you can fix issues in your process.
Lastly, if you visit your repository, you should see a new branch setup-semaphore with some commits:
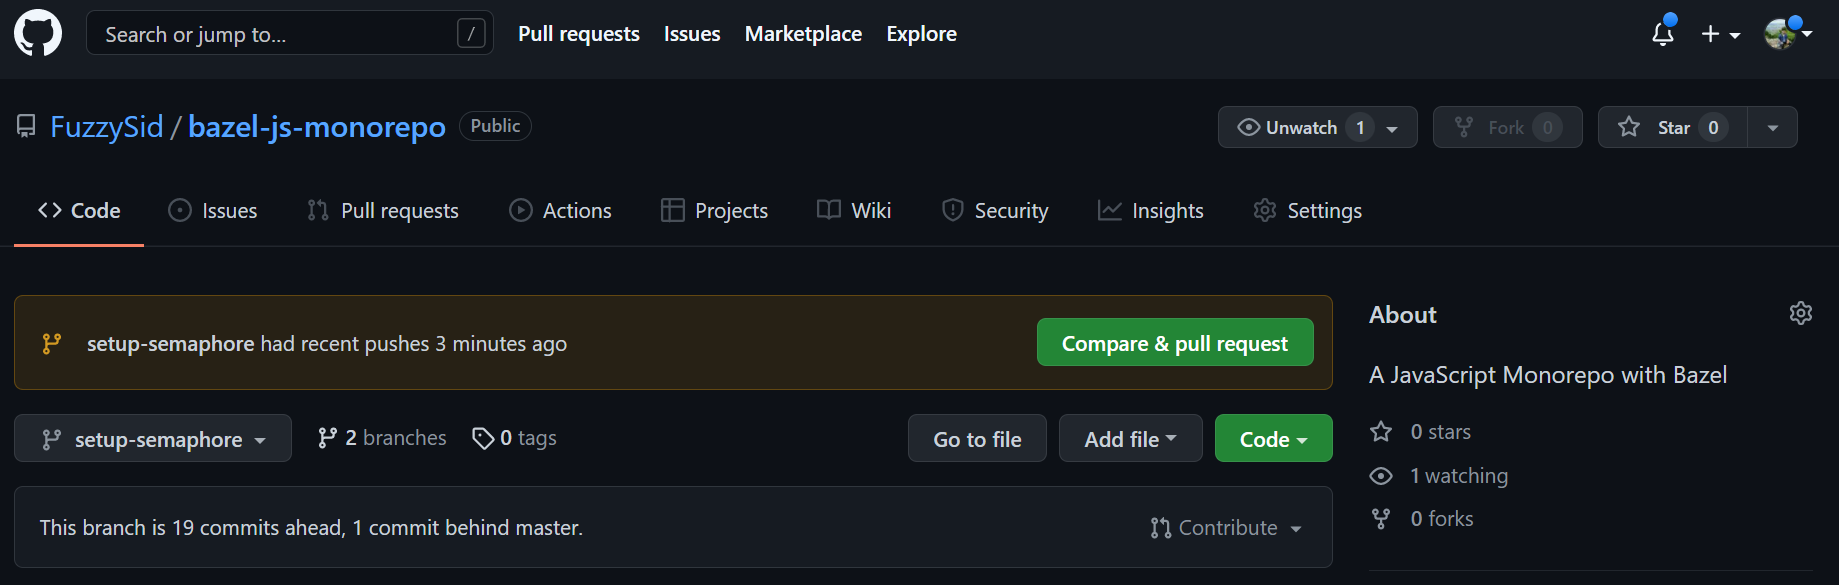
Essentially, the setup-semaphore branch offers continuous integration for your project. This means that any new changes pushed to this branch will automatically run our pipeline and run a new Bazel build on Semaphore.
Note: To successfully execute our workflow, I made sure that our Bazel project doesn’t have a
.Bazelversionfile. This file may lead to a version conflict with the Bazel you install globally leading to an error when you run your Bazel build. If you need a.Bazelversionfile locally, a smart solution would be to create a block in your workflow that deletes this file before setting up our Bazel build.
Conclusion
There’s a lot more you can explore on Semaphore from this point onwards. You can learn how to cache result of our Install Dependencies block here. Semaphore has a dedicated section in their docs towards building a generic Monorepo workflow. So if you’re using something other than Bazel for your Monorepos, it would bring some great insights to get you started.